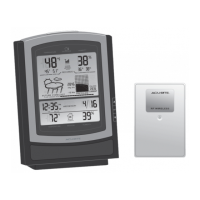
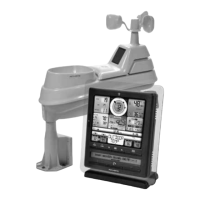
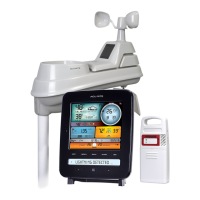
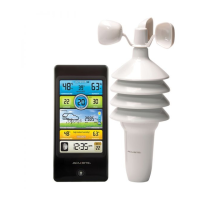
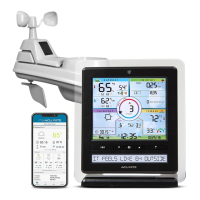
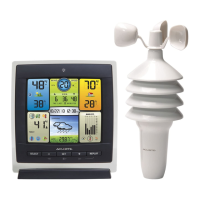
This document describes the AcuRite Professional Weather Center, model 01010, a comprehensive system designed to provide personalized weather forecasts and detailed environmental data. The system consists of a 5-in-1 outdoor sensor and an indoor display unit, working together to offer accurate and reliable weather information.
Function Description
The AcuRite Professional Weather Center serves as a personal weather station, collecting and displaying various weather parameters to help users plan their day with confidence. Its core function is to provide a 12 to 24-hour weather forecast, which is self-calibrating and personalized based on data collected from the 5-in-1 outdoor sensor in the user's backyard. This self-calibration process, known as "Learning Mode," analyzes changes in barometric pressure over time to determine the user's altitude, becoming more accurate after 14 days and fully calibrated after 33 days.
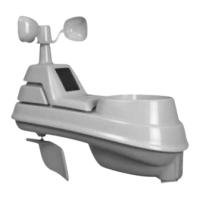
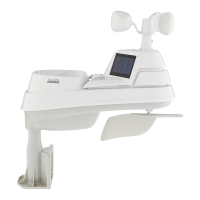
The 5-in-1 outdoor sensor is a multi-functional device that measures wind speed, wind direction, outdoor temperature, outdoor humidity, and rainfall. These measurements are wirelessly transmitted to the indoor display unit. The display unit then processes and presents this data in an easy-to-read format, along with additional indoor environmental readings.
Key weather data displayed includes:
- Wind Speed: Current, peak (highest in the last 60 minutes), and average (over the last 2 minutes) wind speeds.
- Wind Direction: Current and previous two wind directions.
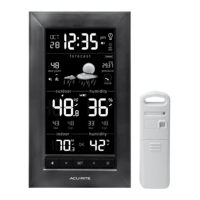
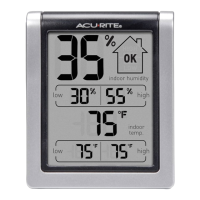
- Temperature: Current outdoor and indoor temperatures, with trend indicators.
- Humidity: Current outdoor and indoor humidity, with trend indicators.
- Barometric Pressure: Current pressure, a pressure history graph showing trends (rising, steady, or falling), and historical pressure from 12 hours ago.
- Rainfall: Current rainfall accumulation during an event, current month's total rainfall, and all-time rainfall.
- Weather Select: This feature allows users to toggle through additional calculated data such as heat index, dew point, wind chill, indoor temperature/humidity, and rainfall rate (inches per hour).
The system also includes programmable weather alarms for various categories like outdoor humidity, outdoor temperature, storm alert, indoor humidity, indoor temperature, wind chill, dew point, heat index, rain, and wind speed. These alarms provide audible beeps and flash the affected category on the display when programmed values are reached or specific weather events occur (e.g., rain starts, significant pressure drop for storm alert).
Usage Features
Setting up the AcuRite Professional Weather Center involves a few straightforward steps to ensure optimal performance. Both the 5-in-1 sensor and the display unit have an A-B-C switch in their battery compartments. It is crucial to set both switches to the same letter (A, B, or C) for the units to synchronize properly.
For the 5-in-1 sensor, four AA batteries are required. Lithium batteries are recommended for temperatures below -4°F (-20°C) as alkaline batteries may not function correctly in extreme cold. Before use, a rain gauge stabilizer (a plastic tab) taped into the bottom of the sensor must be removed to allow the rain gauge to function. The sensor should be mounted at least 5 feet (1.5 meters) off the ground in an open area, free from obstructions, and with its solar cell facing SOUTH to ensure maximum sun exposure and proper wind direction orientation. A built-in bubble level assists in level installation for accurate wind measurements.
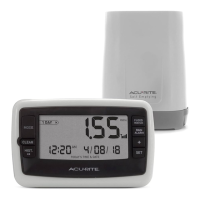
The display unit requires three AA alkaline batteries. Once batteries are installed in both units and the A-B-C switches match, the units will synchronize. This process may take a few minutes. After installation, any erroneous data collected during setup can be cleared by pressing the "CLEAR TODAY" button on the back of the display unit.
Setting the time and date is important for accurate time-stamping of history records. This is done through the display unit's "SET" button and arrow buttons, allowing adjustment of hour, minute, month, day, and year. Users can also select measurement units (standard or metric) for wind speed, temperature, and other parameters.
The display unit features a tabletop stand and is wall-mountable, offering flexibility in placement. It should be placed in a dry area, free of dirt and dust, and away from direct sunlight, heat sources, or vents to ensure accurate indoor temperature measurements.
For optimal wireless communication, the display unit and sensor should be within 330 feet (100 meters) of each other and at least 3 feet (0.9 meters) away from electronic devices that could cause interference.
Programmable alarms enhance the user experience by providing timely alerts. To set an alarm, users select the desired weather category, press and hold the alarm button to enter programming mode, adjust the alarm value using the arrow buttons, confirm with the "SET" button, and then activate the alarm. When an alarm sounds, it will beep and flash the relevant category. Alarms can be snoozed or turned off.
Maintenance Features
Proper care and maintenance are essential for the longevity and accuracy of the AcuRite Professional Weather Center.
Display Unit Care:
- Clean with a soft, damp cloth. Avoid caustic cleaners or abrasives.
- Keep the unit free from dust, dirt, and moisture.
- Regularly clean ventilation ports with a gentle puff of air.
5-in-1 Sensor Care:
- Cleaning the Sensor: Use a soft, damp cloth. Do not use caustic cleaners or abrasives that could mar the polished surfaces of the rain collection funnel or the solar cell, as scratches can decrease performance.
- Insect Prevention: Insects can obstruct the sensor and interrupt data. Spraying the outside of the sensor with a household insect repellent can help mitigate this issue. Always consult the repellent's instructions before use.
- Snow & Freezing Weather: The sensor is designed to withstand freezing conditions. However, if the rain collector cup fills with snow and then melts, it will register as rain on the display unit.
- Cleaning the Rain Collector Cup: Periodically remove and empty the debris filter located in the rain collector funnel. This filter helps prevent twigs and leaves from entering the rain gauge. It can be removed by gently squeezing and pulling it out from the top.
- Cleaning the Wind Vane & Anemometer: Remove any foreign matter from the outside of the sensor to ensure free movement of the wind vane and anemometer. If needed, a small amount of spray lubricant, clear silicone, or graphite powder can be applied to the anemometer for improved movement.
Calibration:
The system allows for calibration of temperature, humidity, and rainfall readings to improve accuracy, especially if sensor placement or environmental factors impact data.
Troubleshooting:
The manual provides a troubleshooting section for common issues such as no outdoor sensor reception, flashing or dashed outdoor temperature, inaccurate forecasts, no rainfall readings, inaccurate wind readings, and a non-working display screen. Solutions often involve relocating units, checking battery types and installation, synchronizing units, clearing debris, or resetting the display unit.