ADJ Products, LLC - www.adj.com - Inno Spot ProInstruction Manual Page 10
ADJ Products, LLC - www.adj.com - Inno Spot ProInstruction Manual Page 11
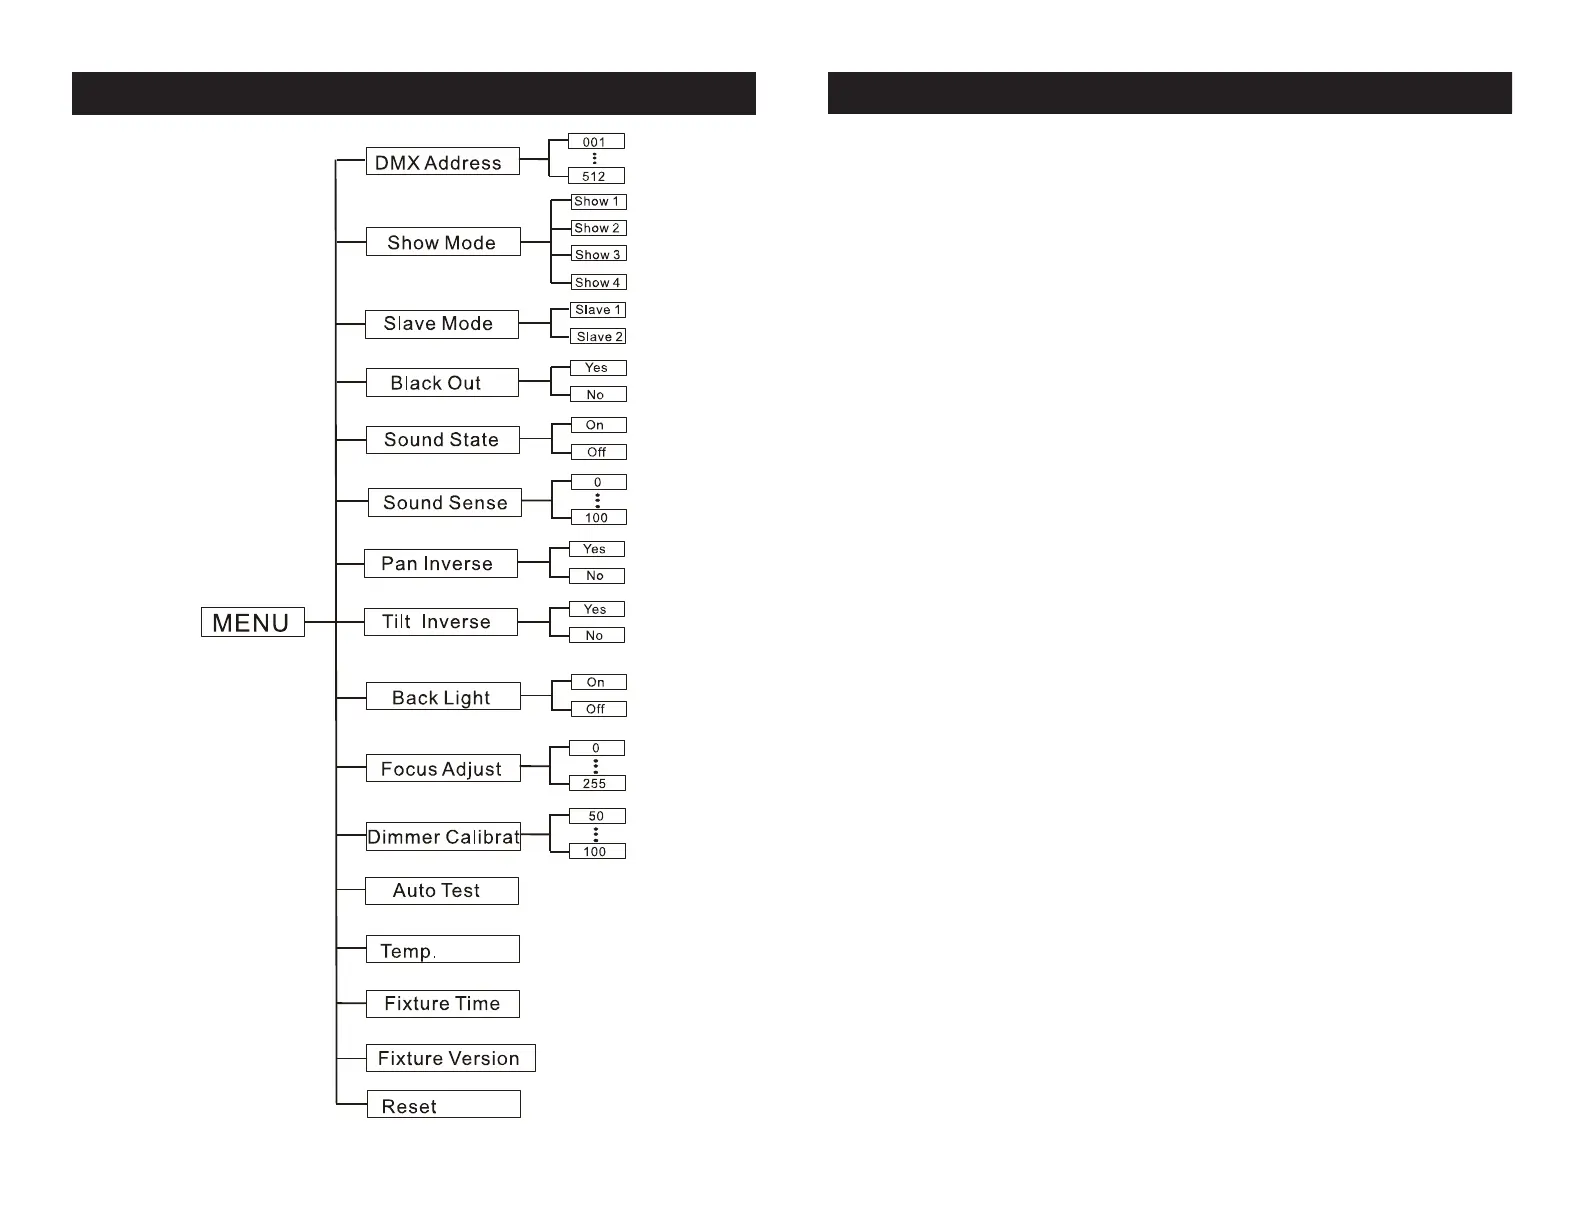
Inno Spot Pro System Menu
DMX Address - Set the DMX Address -
1. Press the MENU button until “DMX Addresss” is displayed,
press ENTER.
2. “X” will now be displayed, “X” represents the displayed
address. Press the UP or DOWN buttons to nd your desired
address.
3. Press ENTER to conrm, and then press and hold the MENU
button for at least three seconds to assign.
Show Mode - Show modes 1 - 4 (Factory Shows).
1. Press the MENU button until “Show Mode” is displayed, press
ENTER.
2. “Show X” will now be displayed, “X” representing a number
between 1-4. Press the UP or DOWN buttons to nd your desired
show and press ENTER to conrm. After pressing ENTER, press
and hold the MENU button for at least 3 seconds to activate.
SHOWS:
Show 1 - For xtures placed on the oor, the tilt movement angle is
210°
Show 2 - For fixtures fixed to the ceiling or truss, the tilt movement
angle is 90°.
Show 3 - For fixtures placed on a table or stage. The beam is pro-
jected at the audience’s direction; i.e. in front of the stage. Pan move-
ment angle (left to right to left) is 160°. Tilt movement angle is 90°.
Show 4 - For fixtures fixed to the ceiling or truss. The beam is pro-
jected at the audience’s direction; i.e. in front of the stage. Pan move-
ment angle (left to right to left) is 160°. Tilt movement angle is 90°.
Slave Mode - This will let you set unit as a slave in a
master/slave conguration.
1. Press the MENU button until “Slave Mode” is displayed,
Inno Spot Pro System Menu