Inno Spot Pro Cleaning
Inno Spot Pro Trouble Shooting
Trouble Shooting: Listed below are a few common problems that
you may encounter, with solutions.
No light output from the unit;
1. Be sure the external fuse has not blown. The fuse is located on
the rear panel of the unit.
2. Be sure the fuse holder is completely and properly seated.
Unit does not respond to sound;
1. Low frequencies (bass) should cause the unit to react to sound.
Tapping on the microphone, quiet or high pitched sounds may
not activate the unit.
Due to fog residue, smoke, and dust cleaning the internal and exter-
nal optical lenses and mirror should be carried out periodically to
optimize light output. Cleaning frequency depends on the environ-
ment in which the fixture operates (I.e. smoke, fog residue, dust,
dew). In heavy club use we recommend cleaning on a monthly basis.
Periodic cleaning will ensure longevity, and crisp output.
1. Use normal glass cleaner and a soft cloth to wipe down the out-
side casing.
2. Use a brush to wipe down the cooling vents and fan grill.
3. Clean the external optics with glass cleaner and a soft cloth every
20 days.
4. Clean the internal optics with glass cleaner and a soft cloth every
30-60 days.
5. Always be sure to dry all parts completely before plugging the unit
back in.
Inno Spot Pro Fuse Replacement
Locate and remove the unit’s power cord. Once the cord has been
removed located the fuse holder located inside the power socket.
Insert a flat-head screw driver into the power socket and gently pry
out the fuse holder. Remove the bad fuse and replace with a new one.
The fuse holder has a built-in socket for a spare fuse be sure not to
confuse the spare fuse with active fuse.
Inno Spot Pro Gobo Replacement
This unit comes with interchangable gobos. When changing the
gobos please be very careful.
Caution! Never open the unit when in use. Always disconnect
the main power before attempting to change the gobos.
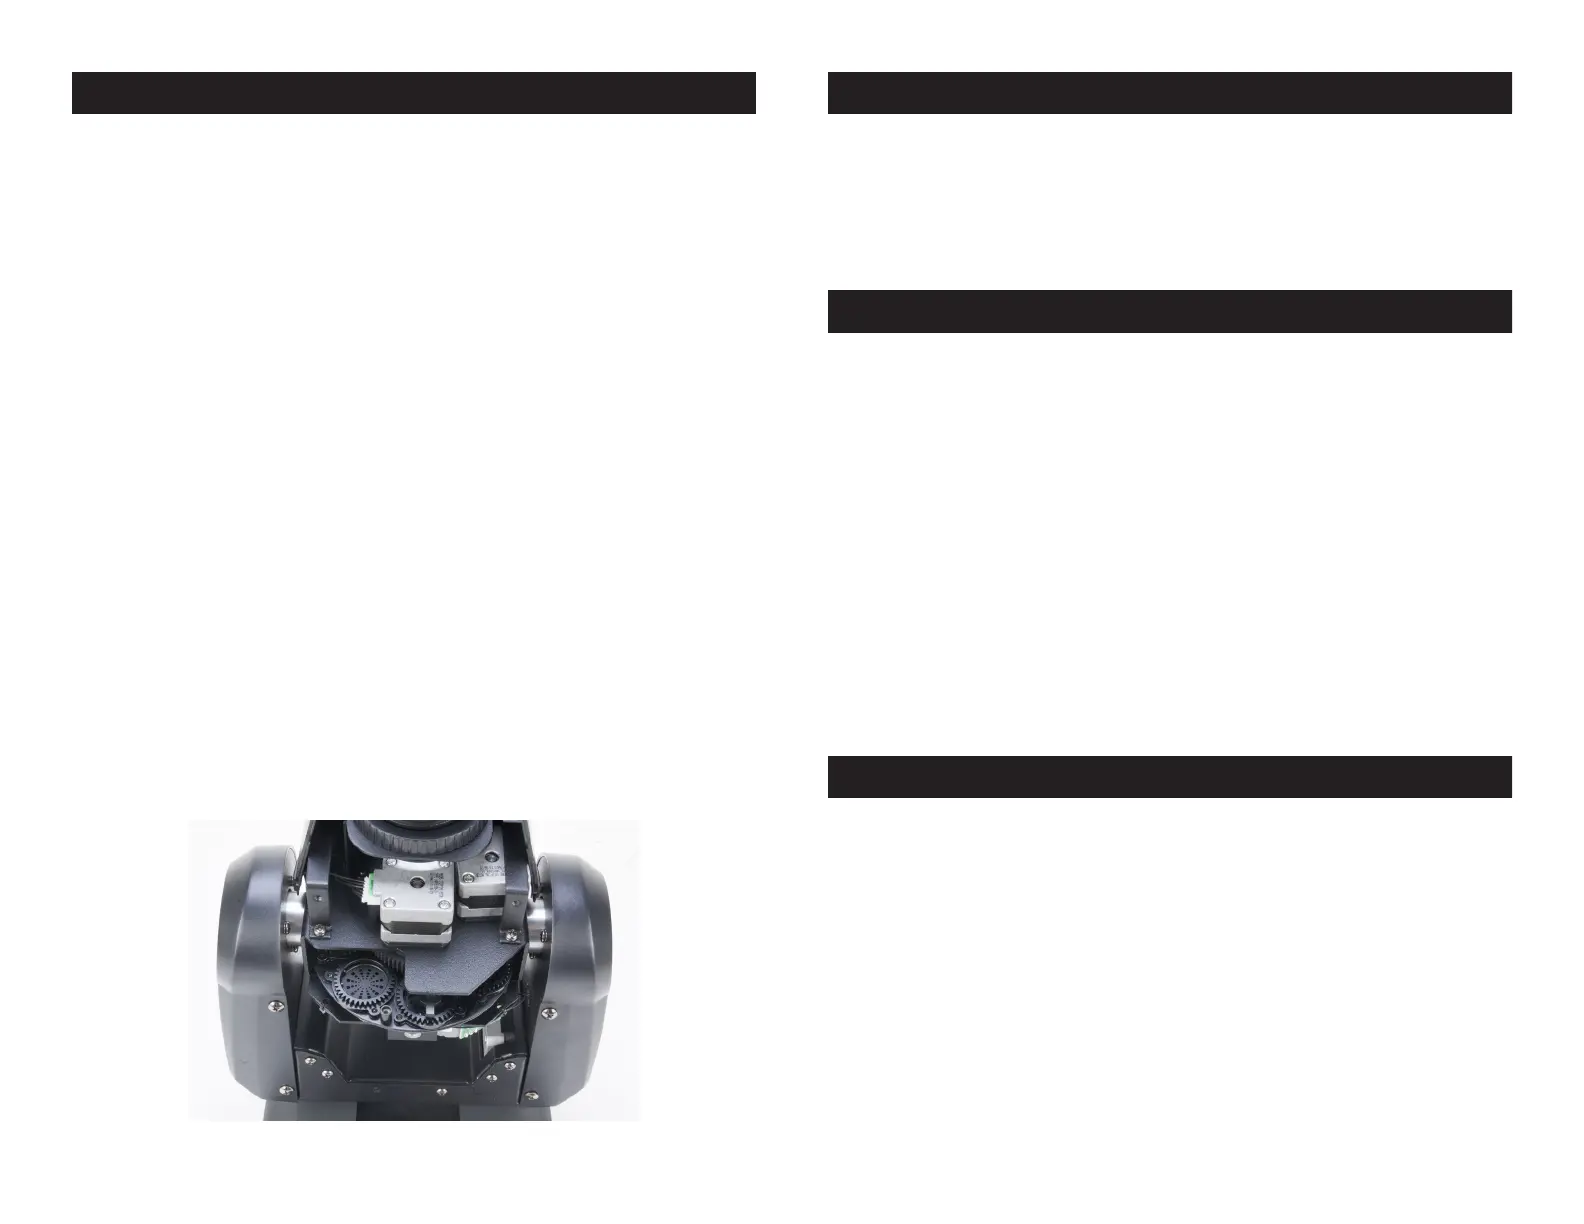
1. To change the gobo, you must remove the top half of the
moving head. The top half of the moving head does not
have the lens attached to it.
2. Unscrew the 4 phillips screws that secure the top half of the
head. Remove the top half of the head.
3. When you remove the shell you will be able to access the
gobo wheel (see picture below). Rotate the head so that the
lens is aimed up. Turn the gobo wheel with your hand until
you find the gobo you would like to change.
4. Using a pair of needle nose pliers, grab the fixture ring that
holds the gobo in place and remove the ring.
5. Once the ring is removed, rotate the head upside down so
that the gobo falls into your hand.
6. Carefully insert your new gobo and insert the fixture ring.
7. Reassemble the unit.
ADJ Products, LLC - www.adj.com - Inno Spot ProInstruction Manual Page 25ADJ Products, LLC - www.adj.com - Inno Spot ProInstruction Manual Page 24

 Loading...