ADJ Products, LLC - www.adj.com - Stinger Instruction Manual Page 16 ADJ Products, LLC - www.adj.com - Stinger Instruction Manual Page 17
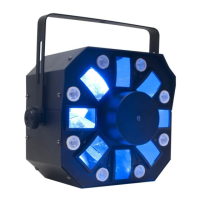
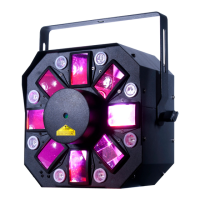
Stinger DMX Traits
Channel Value Function
7 LASERS
130 - 169 RED & GREEN LASERS FLICKER
170 - 209 GREEN & RED LASERS FLICKER
210 - 249 RED & GREEN LASERS FLICKER
SYNC
250 - 255 RED & GREEN LASERS ALTERNATE
FLICKER
8 LASER STROBE CONTROL
0 - 9 NO STROBE
10 - 244 STROBING SLOW - FAST
245 - 255 SOUND ACTIVE STROBING
9 LED ROTATION
0 - 8 NO ROTATION
9 - 127 CLOCKWISE ROTATION
SLOW - FAST
128 - 255 COUNTER-CLOCKWISE ROTATION
SLOW - FAST
10 LASER ROTATION
0 - 127 LASER PATTERNS
128 - 255 PATTERN CHASE SLOW - FAST
Stinger Fuse Replacement
Stinger Cleaning
Stinger Trouble Shooting
Trouble Shooting: Listed below are a few common problems that
you may encounter, with solutions.
No light output from the unit;
1. Be sure the external fuse has not blown. The fuse is located on
the rear panel of the unit.
2. Be sure the fuse holder is completely and properly seated.
Unit does not respond to sound;
1. Low frequencies (bass) should cause the unit to react to sound.
Tapping on the microphone, quiet or high pitched sounds may
not activate the unit.
2. Check the sound sensitivity level.
Fixture Cleaning: Due to fog residue, smoke, and dust cleaning the
internal and external optical lenses and mirror should be carried out
periodically to optimize light output. Cleaning frequency depends on
the environment in which the fixture operates (I.e. smoke, fog residue,
dust, dew). In heavy club use we recommend cleaning on a monthly
basis. Periodic cleaning will ensure longevity, and crisp output.
1. Use normal glass cleaner and a soft cloth to wipe down the out-
side casing.
2. Use a brush to wipe down the cooling vents and fan grill.
3. Clean the external optics and mirror with glass cleaner and a soft
cloth every 20 days.
4. Clean the internal optics with glass cleaner and a soft cloth every
30-60 days.
5. Always be sure to dry all parts completely before plugging the unit
back in.
Disconnect the unit from its power source. Remove the power cord
from the unit. Once the cord has been removed, you will find that
the fuse holder is located inside the power socket. Insert a flat-head
screw driver into the power socket and gently pry out the fuse holder.
Remove the bad fuse and replace with a new one. The fuse holder also
has a holder for a spare fuse.