ADOBE AUDITION 3.0
User Guide
82
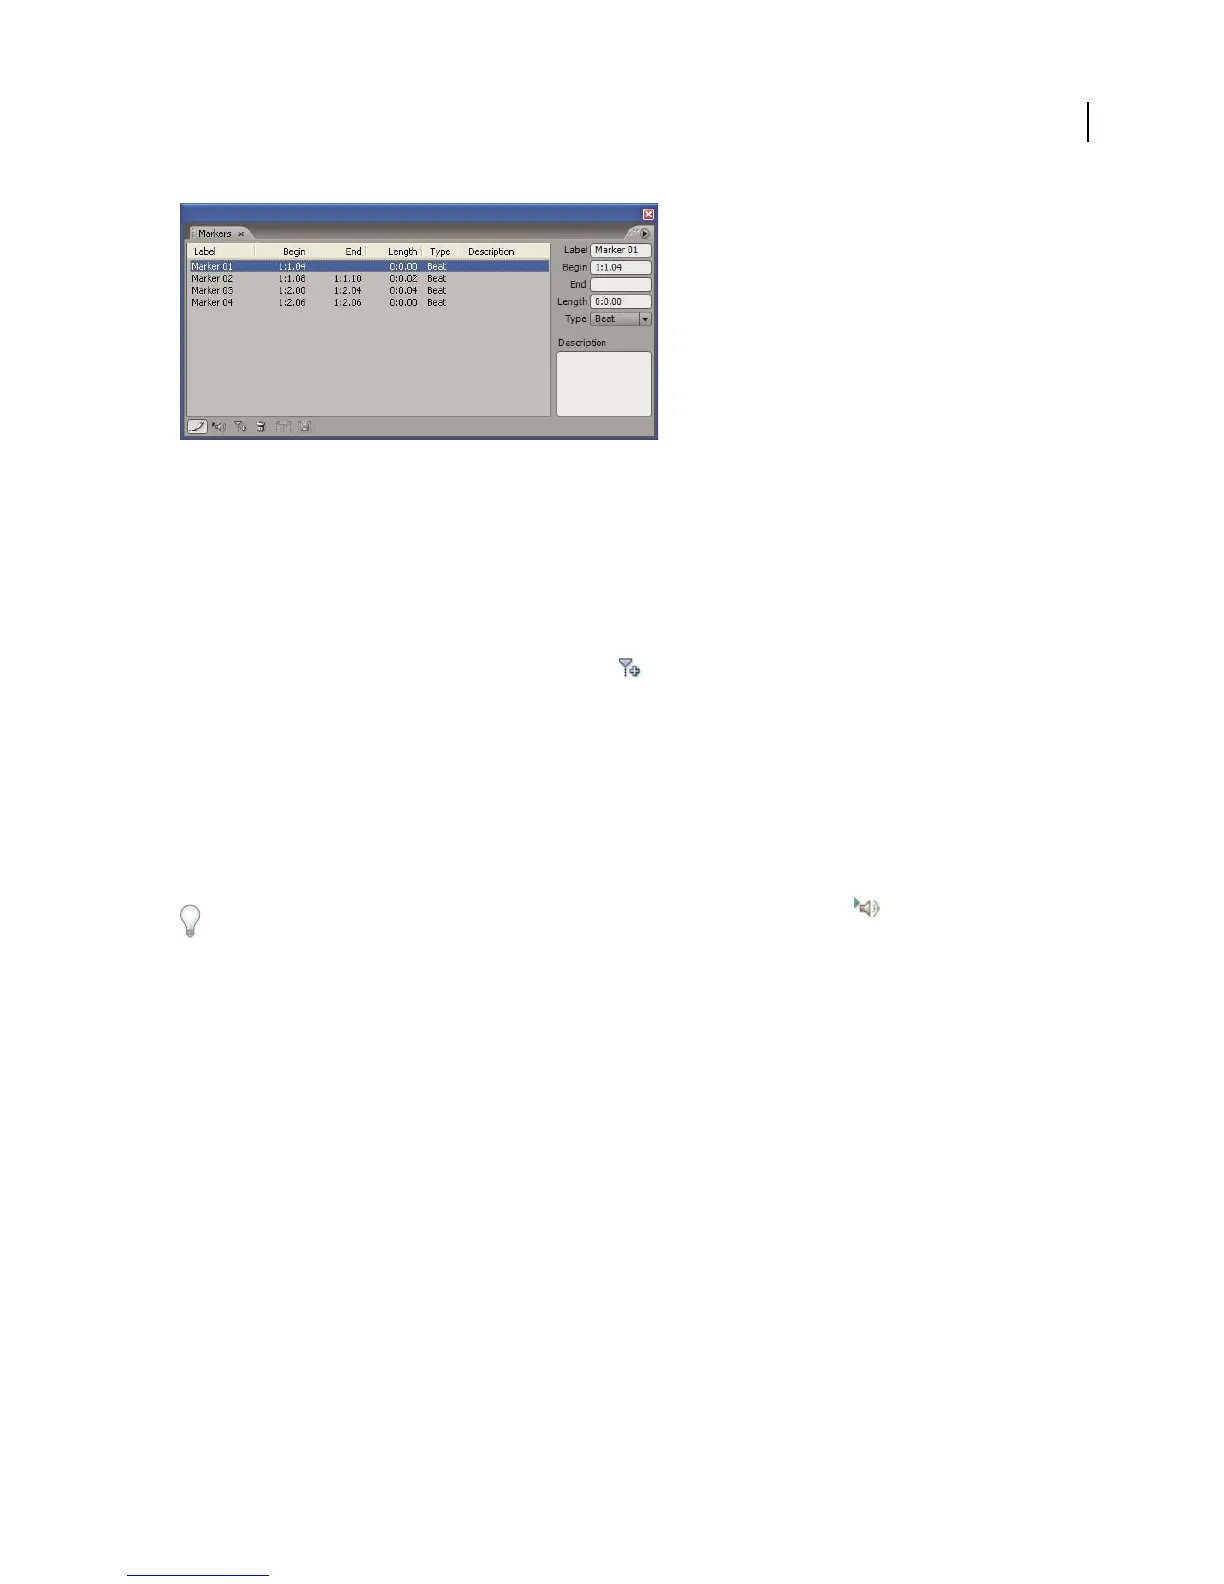
Markers panel
Add a marker
1
Do one of the following:
• Play audio.
• Place the cursor exactly where you want the marker point to be.
• Select the audio data you want to define as a marker range.
2 Either press the F8 key, or click the Add Marker button in the Markers panel.
Select a marker
• Double-click a marker handle in the Main panel.
• Double-click a marker in the Markers panel.
• To select adjacent markers, click the first marker you want to select in the Markers panel, and then Shift-click the
last.
• To select nonadjacent markers, Ctrl-click them in the Markers panel.
To automatically play markers when you select them in the list, click the Auto Play button . This option helps you
quickly identify marker locations.
Rename a marker and add a description
After you create a marker, you can rename it and add descriptive information.
1 Select a marker.
2 Click Edit Marker Info in the Markers panel.
3 Do any of the following:
• Enter a new name in the Label text box.
• Enter a description in the Description text box.
Adjust, merge, convert, or delete markers
After creating markers, you can fine-tune them to best address the needs of an audio project.
Reposition point or range markers
• In the Main panel, drag the marker handle (for point markers) or the red start handle (for range markers) to a
new location.