9
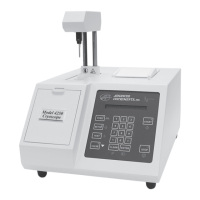
Installation & Setup
If the instrument has just been turned on, it takes a few minutes to cool
the freezing chamber. If the heat transfer fluid pump has not been
primed as described in step 7, the time will be longer.
When the freezing chamber has been cooled and the internal diagnostic
checks have been completed, the operating head rises, “Osmometer
Ready” is displayed, and an audible tone is sounded.
Step 9 — Set date and time
If you wish, you may now change your date and time settings by using
the instructions found in Chapter 2 of this user’s guide.
Step 10 — Set language preference
The 4250 can be operated in multiple languages. Your instrument will
initially be set for English. If you would prefer to operate the instrument
on one of the other languages, you should change the language setting
as described in Chapter 2.
Step 11 — Check initial factory calibration
Your instrument has been carefully calibrated by the manufacturer, but
to verify that this calibration is accurate within your operating environ-
ment, run tests using low and/or high range calibration standards before
testing samples. The number and type of tests that you run should be
determined by your own laboratory’s standard protocol. Use the operat-
ing technique described in Chapter 2 when running these materials.
If you determine that the initial calibration is incorrect, recalibrate as
described in Chapter 4.
NOTE If the 4250 has just been moved from a different location, it
should be allowed to warm up for 20 to 30 minutes before
running calibration verification tests.