Advanced
®
Cryoscope Model 4250 User’s Guide
If aligning a non-metallic probe, DO NOT ATTEMPT TO BEND
THE PROBE. Instead, loosen the probe setscrew and then rotate the
probe so that any curvature in the probe is in the back-to-front direc-
tion (parallel to the stir wire action).
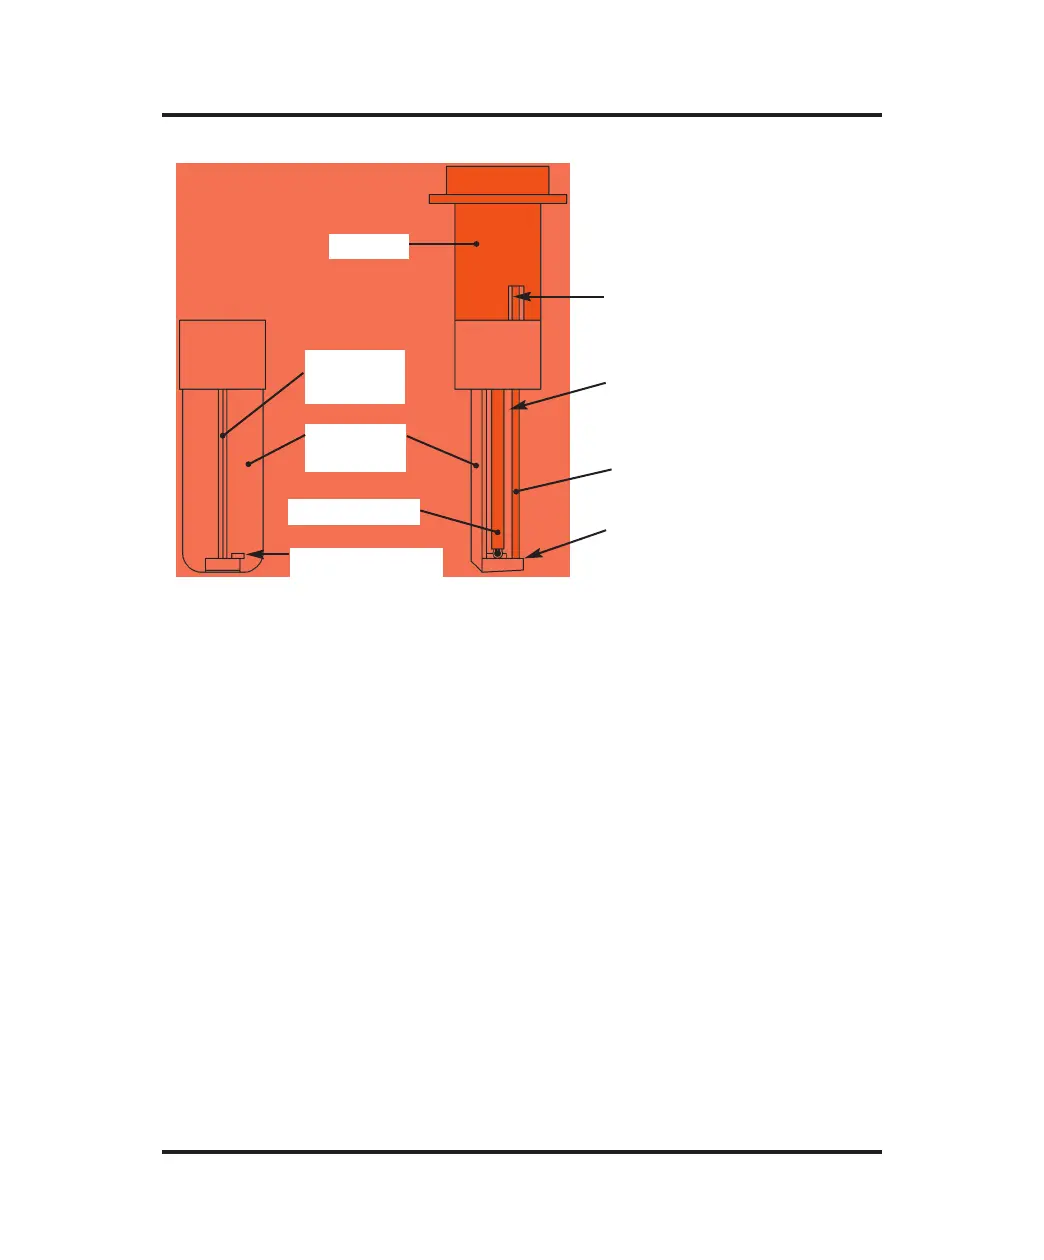
3. With the alignment tool squarely up on the mandrel, the bottom of
the probe should rest on the main level, as shown in Figure 9. If
vertical adjustment is necessary, first loosen the probe setscrew and
then raise or lower the probe within its mandrel, as necessary, then
retighten the probe setscrew gently (overtightening will crack or dis-
tort the thin plastic wall of the mandrel). Recheck the probe position.
4. The bottom of the stir/freeze wire should be even with the same
level as the end of the probe. As necessary, remove the head cover,
loosen the stir/freeze wire setscrew(s) and reset the stir/freeze wire.
Retighten the stir/freeze wire setscrew(s). Then bend the wire, if nec-
essary, so that the stir wire is parallel to the sample probe and spaced
60
Figure 9: Probe and Stir/Freeze Wire Alignment
M
ake sure the stir wire
does not rub on the sides
of the slot in the mandrel.
Stir wire should be parallel
to sample probe, and the
space should be about .06
inches (1.5 mm).
Bottom of sample probe
and end of stir wire
should rest on this level.
This level is not used
with cryoscopes.
Mandrel
Raised V
Centerline
Alignment
Tool
Sample Probe
Stir Wire
 Loading...