2.4 Charge the battery: The UPS charges its battery whenever it is connected to utility
power. For best results, charge the battery for 8 hours in the initial use.
2.5 Connect to Utility: See figure a. Please check the following items to connect the AC
input power to terminal block and power up the UPS.
2.6 Connect the loads: Connect the loads with the terminal block at the rear of the UPS.
To use the UPS as a master on/off switch, make sure all of the loads are switched on.
CAUTION: Never connect a laser printer or plotter to the UPS with other
computer equipment. A laser printer or plotter periodically draws
significantly more power than when its idle status, and may overload the
UPS.
2.7 Check the Site Wiring Fault Indicator: After plugging in the loads and the UPS,
check the site wiring fault indicator on the rear panel. See section 3.17 for location of the
indicator on the back panel. It lights if the UPS is plugged into an improperly wired AC
power outlet. Wiring faults detected include ground, hot-neutral polarity reversal, and
overloaded neutral circuit.
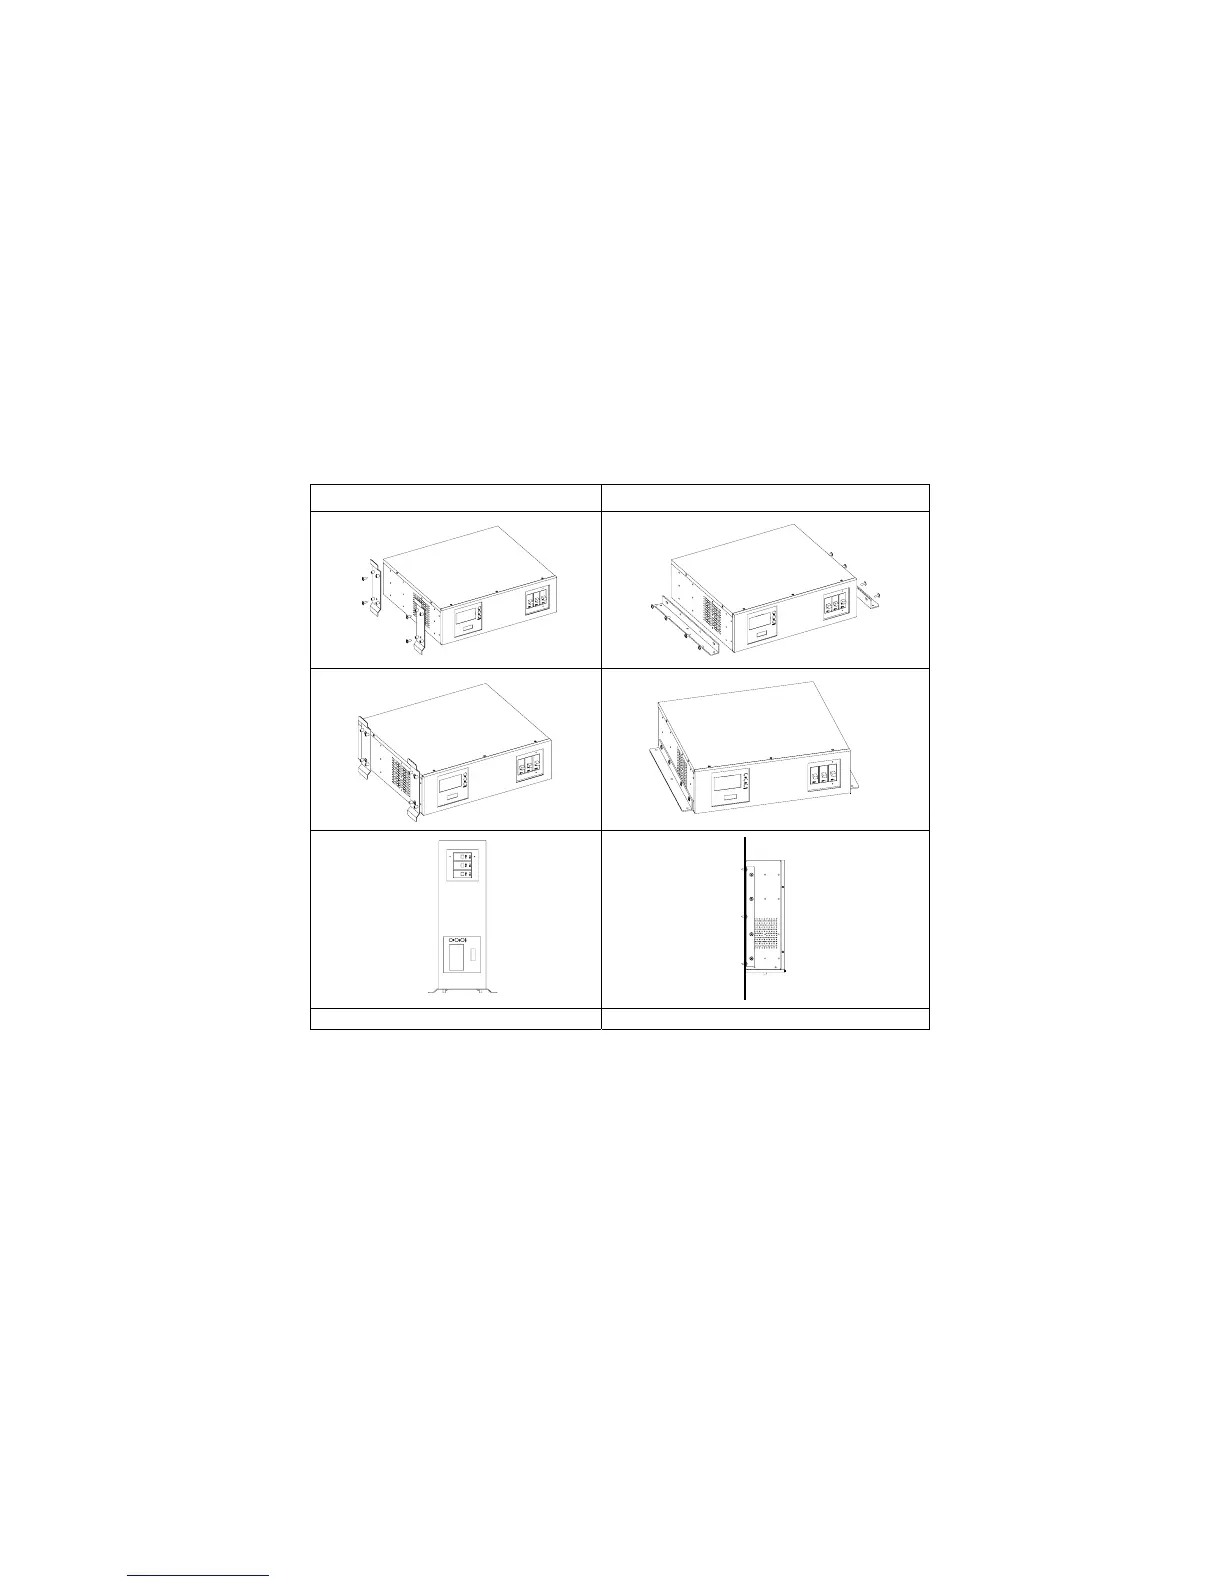
2.8 Installations with accessories of “Vertical” and “Wall-mounted” types:
Please install the vertical and wall-mounted types of units according to the following
illustration.
Vertical Installation Wall-mounted installation.