English 25
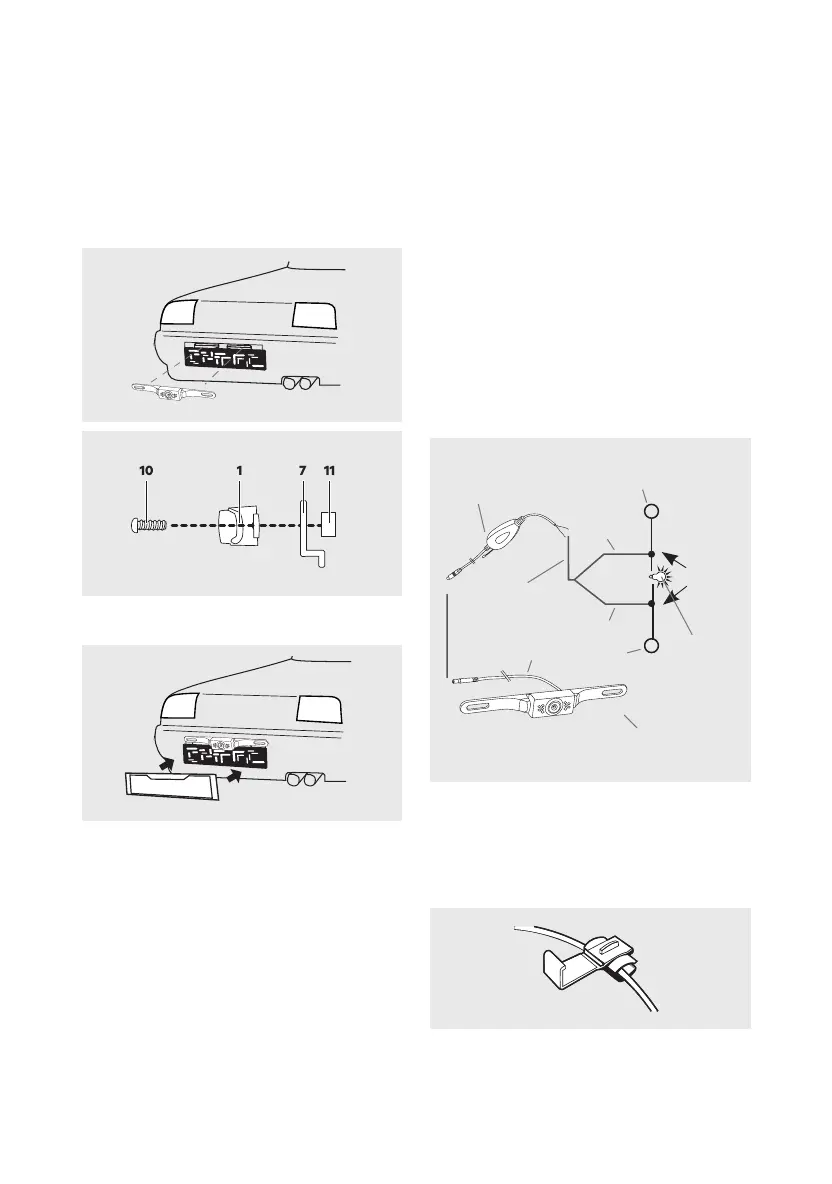
Step 7: Connecting the transmitter supply cable
Remove the cover of the reversing light. Remove
the bulb holder from the reversing light housing.
Please refer to the automaker‘s manual.
Caution!
Disconnect the negative cable from the vehicle‘s
circuit! Stored information, codes and programming
Now connect the red transmitter input lead to the
12V + (positive) cable lead of the reversing light.
Then connect the transmitter’s black cable lead to
the 12V - (negative) cable lead of the reversing light
(see image 7).
Using the two cable clamps (9) connect the cables
to the reversing light and follow the following steps
for connecting the respective cables.
Place the 12 V + (positive) reversing light cable side-
Transmitter
Red
Earth
Black
Reversing
light
Camera
Camera cable
cable
+ 12 V DC
Reversing light
Cable
clamp
Image 7
Image 8
(6) (see image 5). Stop turning the clamping nuts
connected to the bracket. Be sure the cable outlet
maintain the maximum swivel range.
(8) from both sides to prevent water from entering.
Step 5: Mounting the license number
Now mount the plate (see image 6).
Step 6: Running the camera cable
Now run the camera cable (1) to establish a con-
nection with the cable of the radio transmitter (4)
aren‘t pinched or knotted. Now connect the plug
from the camera cable (1) to the socket of the radio
transmitter (4).
Image 4
Image 5
10 1 7 11
Image 6
 Loading...