16
Please note: The tone controls have an eect
on the signal level. If the clip indicator ashes
more frequently, reduce the level a bit using
the gain control (see also 4.2)
5.2 Eects
Internal Eects
The Compact 60/4 has a built-in (internal) digital
eect processor. With the select switch you can
choose between 4 dierent eects.
1 = reverb 1 (short)
2 = reverb 2 (long)
3 = delay (320 ms)
4 = chorus
In the Tommy Emmanuel signature model,
eect #3 is a delay with 213.5 beats-per-minu-
te (this corresponds to 281 ms delay time).
The eects-level control determines the intensi-
ty of the eect (fully anticlockwise = no eect).
In addition, the eect is assigned to one or both
channels by the eects pan control (see below).
External Eects
Furthermore an additional eect unit (external
eect) may be connected to the amplier. For
this purpose use the send and return sockets
on the rear side of the amplier (send goes to
the input, return comes from the output of the
external device).
The intensity of the eect is determined by the
external eects unit.
The external eect loop works in parallel mode.
A parallel loop is intended to add the eect
component (for example, reverb) to the original
signal.
pan
Using the eects pan control you can blend
both eects continuously into the amplier‘s
channels:
Left stop:
internal eect on channel 1
external eect on channel 2
Center pos.:
internal eect on channel 1 + 2
external eects on channel 1 + 2
Right stop:
internal eect on channel 2
external eect on channel 1
Avoid distorted eects
Clipping in the internal or external eect unit
may not be indicated by the clip light. If distor-
tion is audible in in the eect, reduce the gain
controls until the distortion disappears. Subse-
quently you can restore the previous volume
with the master control.
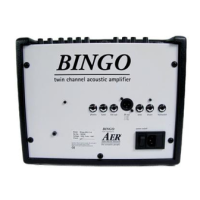
5.3 Footswitch
A standard double-footswitch (on-/o-switch)
can be plugged into the footswitch-socket on
the rear side of the amplier via stereo cable. By
this footswitch the internal and external eects
can be switched on and o.
Suitable footswitches are on-o toggle switches,
which are turned on by stepping once, and
turned o by stepping once again.
5. Phantom power
48 V phantom power at microphone input
Microphones that require 48 V phantom power
(P 48) can be connected directly to mic in by
an XLR plug. The amplier is supplied with 48 V
phantom power enabled, but it can be disabled
by an internal jumper (see note).
When connected by a jack plug, the 48 V
phantom power is not applied. Use the jack
connection for microphones that must not be
connected to phantom power.
Please also read the general notes on
phantom power.
Please note: For the alteration mentioned
above, the device must be opened, therefore
only qualied personnel may carry out the de-/
activation of the phantom power.