PR1: 04/01/11 Page| 9
Modulex Fireside (24-month) Maintenance
AERCO International, Inc. • 100 Oritani Dr. • Blauvelt, New York 10913 • Phone: 800-526-0288
Technical Instruction Document
1.4.2 - Removing The Burner Modules
To remove the burner modules and gaskets, refer to Instruction 1.4.2, below.
Removing Burner Module(s)
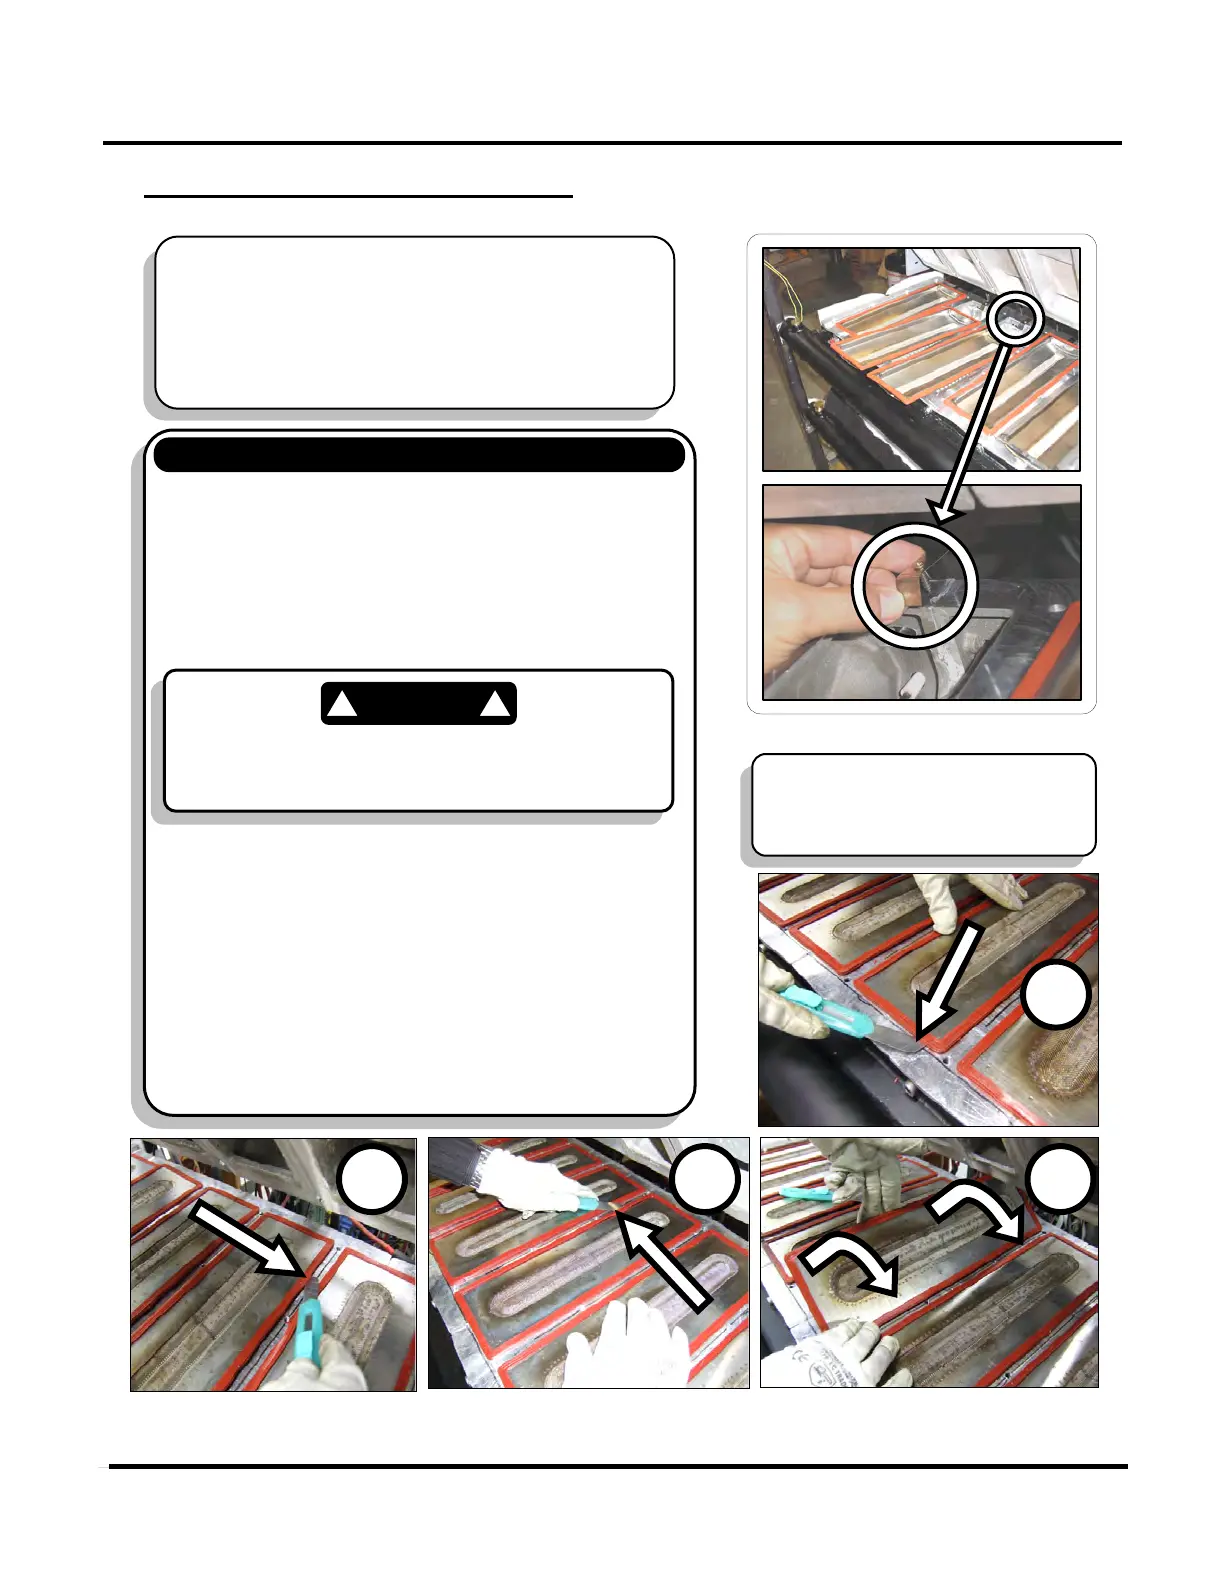
1. If present, remove all the grounding tabs (Figure 13)
at the rear of the burner modules (one per burner
and screwed onto the boiler body) and discard.
These are no longer needed as the new
replacement gaskets are self-grounding. Use only
the newer style gaskets as replacements.
2. Remove each burner module from its seat by
inserting a cutter between the gasket and the
aluminum body on which it rests, and then carefully
running the cutter down three sides of the burner.
The photos in Figure 14 show the (1) cutter being
run along the shorter front edge, (2) along right long
edge, and (3) along left long edge.
3. Next, remove the burner by carefully rotating it
upward ONLY along the left or right long edge axis
(#4 in Figure 14). Take care to avoid deforming the
burner module as it is removed.
NOTE
Before removing the burners and gaskets, verify if
the gaskets have been glued to the aluminum
surface. If they have, apply an appropriate solvent
and let set for the recommended time before
attempting to remove the gaskets.
Figure 13: Remove Ground Tabs
Figure 14: Cutting the Gasket (1-3) and Removing a Burner Module (4)
Ensure that the small plaited copper grounding
used on OLD gaskets is completely removed along
with old gaskets from the burner mounting surfaces.
NOTE
Old style gaskets are orange.
Newer style gaskets are grey.

 Loading...