Cell Assembly. 49919
ACTIVECLEAN
PORT
FOR LAUNDRY PRO
INSTALLATION INSTRUCTIONS
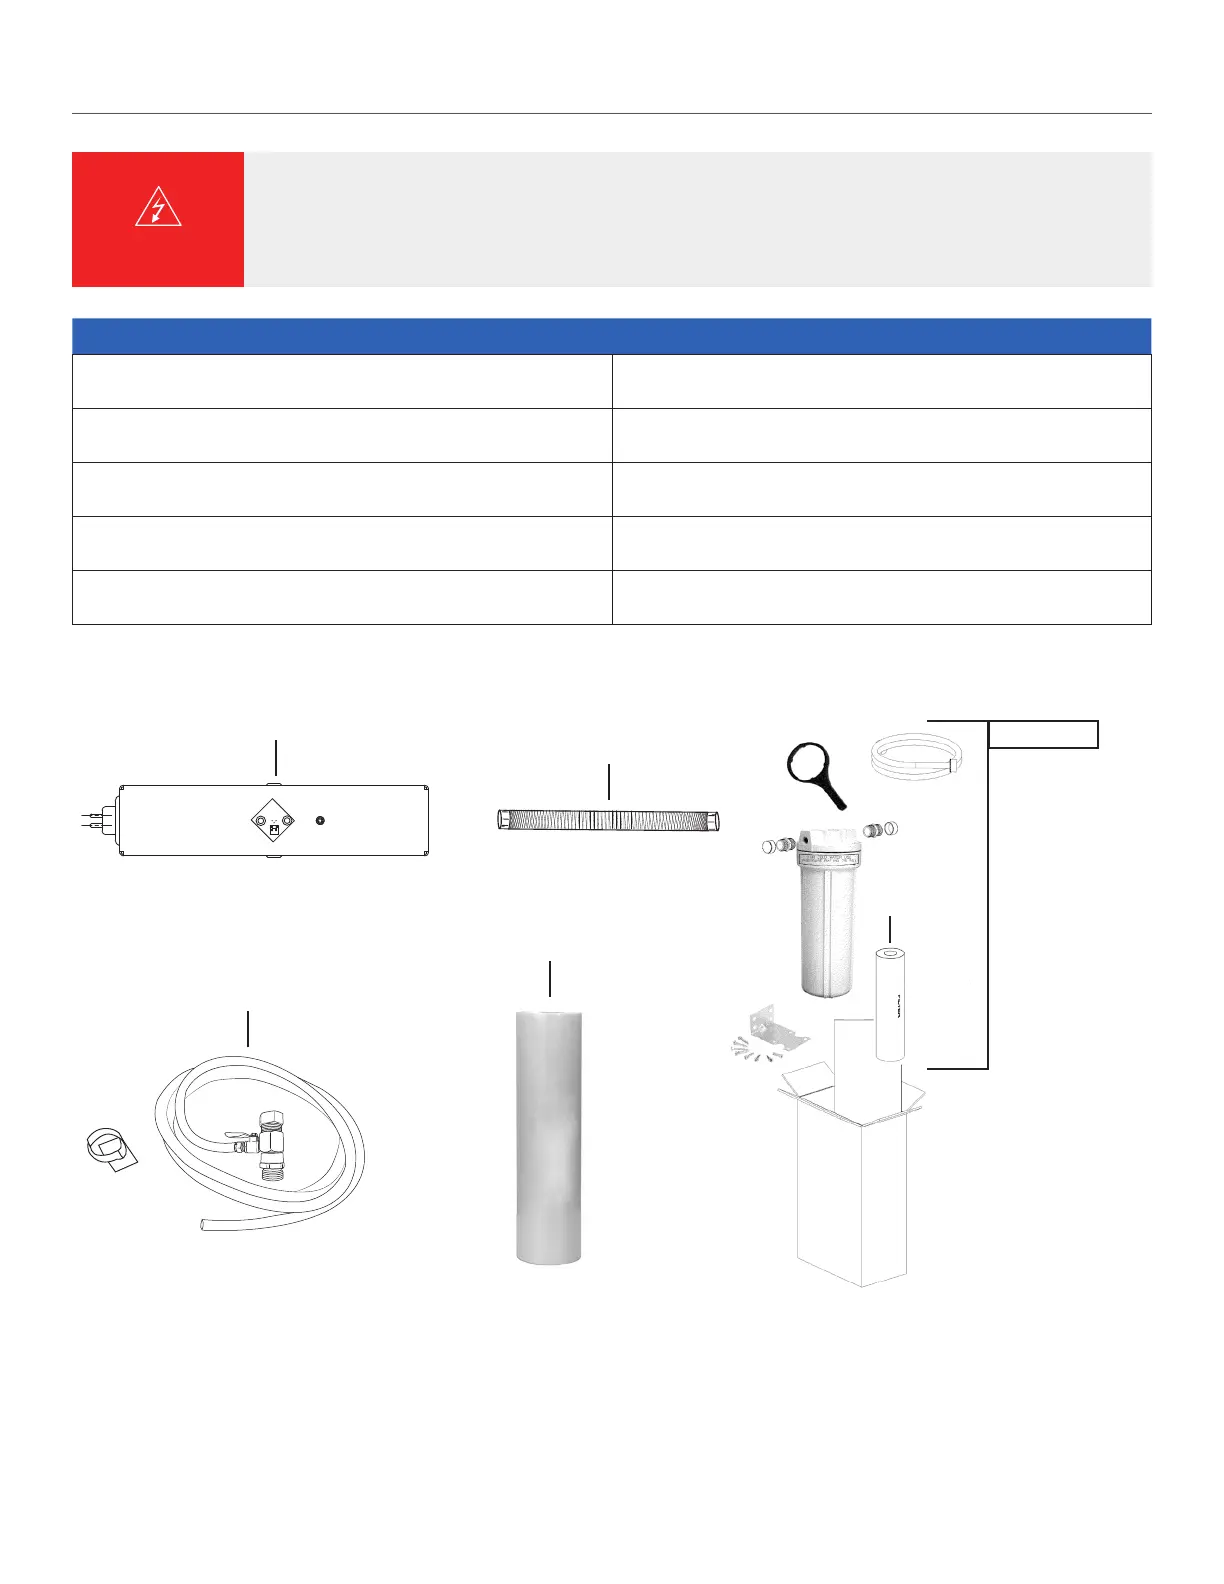
The ActiveClean Port for Laundry Pro includes the adapter hardware with attached tubing and
a Velcro
®
strap to conveniently store the tubing. (A) Installation is quick and easy. To use the
ActiveClean Port, hold a container under the tube and simply turn the valve clockwise. To turn
off the ActiveClean Port, turn the valve handle counterclockwise until it stops. Use the water
from the ActiveClean Port for cleaning surfaces such as countertops, bathrooms and hard
oors. Great for using with carpet cleaning equipment such as shampooers or extractors.
1. Shut off water at cold water faucet going to the Laundry Pro unit.
2. Turn the washing machine on to relieve pressure from the hoses.
3. Remove power adapter from wall outlet and set aside.
4. Remove the outlet hose from Laundry Pro.
5. Hand thread the ActiveClean Port couple to OUTLET connector on Laundry Pro.
Continue until it is as tight as possible by hand. (C)
6. Finish tightening by using adjustable pliers (only tighten top tting when attaching to
OUTLET connector). Take care not to over tighten as over tightening may damage
the plastic threads of outlet tting. (C) The valve stem should point to the left of the
Laundry Pro. The valve handle should be in the closed position
(pointing toward you). (B)
7. Remove adhesive backing from the included Velcro
®
strap and place on bottom
of Laundry Pro from a convenient location. (D)
8. Coil the tubing and secure it using the Velcro
®
strap. (E)
9. Connect washing machine hose to ActiveClean Port connection. Hand tighten until
snug. While holding the ActiveClean Port bottom tting with adjustable pliers, nish
tightening the hose with adjustable pliers. (E)
NOTE: If your washing machine requires water to ow through both the HOT and COLD valves
for proper operation, install a “Y” adapter to the ActiveClean Port. Please see page 11 of your
Laundry Pro owner’s manual.
10. Ensure the ActiveClean Port is in the closed position. (B)
11. Plug power cord into electrical outlet.
12. Turn on cold water valve and check for leaks. Tighten ttings as necessary
to stop leaks if found.
Water treated by your Laundry Pro unit is NOT approved for any internal
consumption such as drinking, bathing, brushing teeth, etc. DO NOT drink, ingest,
or internally consume the water from your Laundry Pro unit or washing machine.
DO NOT provide water from your Laundry Pro to your pets or other animals.
CAUTION:
A.
B.
C.
D.
E.
NOTE:
Hold with pliers
while installing port
in order to prevent
tting from rotating.
Aerus LLC | 5420 LBJ Freeway, Suite 1010 | Dallas, TX 75240 65-00523 VA-00551