SECTION A-A
SCALE 1 : 1
LOCK
NUT
BRASS EXTENSION
CAM
PHILLIPS SCREW
13/16 COUNTER
BORE 7/16 DEEP
15/32 HOLE
3/4 INCH
WOOD PANEL
SPRING WASHER
INNER
DOOR
1.234" (31.3mm)
.991" (25.2mm)
Step 7: Mark and drill lock hole.
Locate and mark with a pencil the location of the lock hole
on the overlay panel, this is the hole in the top corner of
the handle side of the door. Remove the clamp and re-
move the overlay panel from the door. On the backside of
the panel where you marked the lock location drill a
13
⁄16"
(20.5mm) diameter counter bore
7
⁄16" (11.0mm) deep into
the overlay panel. Drill a
15
⁄32" (12.0mm) diameter hole
through the overlay panel centered on the counter bore be-
ing careful not to splinter the wood on the face side of the
panel. (See Figure 9).
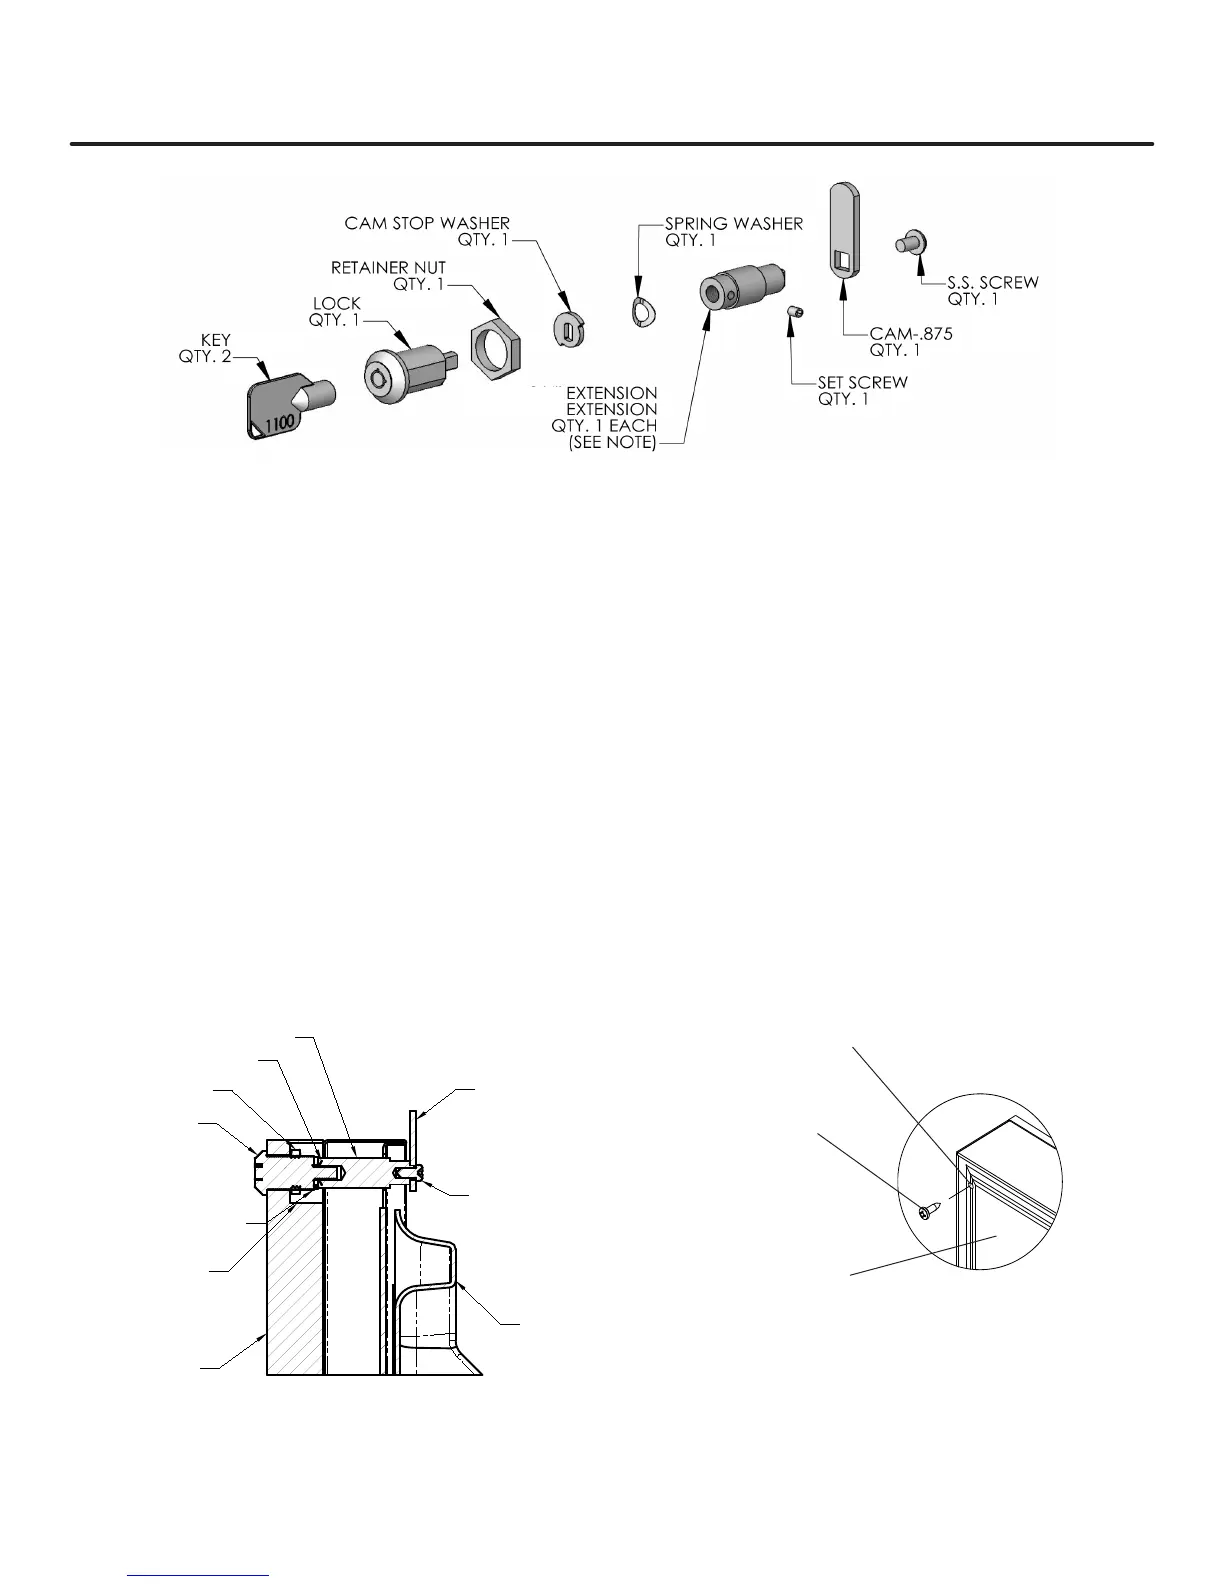
Step 8: Assemble the lock parts
Two (2) lock extensions are supplied with the lock. Use
the longer extension for a
3
⁄4" thick overlay panel and the
shorter one for a
5
⁄8" thick panel. Assemble the lock exten-
sion, cam stop washer, spring washer, and set screw to the
lock as shown in Figure 9 and 10. Install this assembly into
the overlay panel and secure with the retaining nut using a
15mm socket. Make sure the key slot in the lock is vertical.
Figure 9
Step 9: Secure overlay panel to the door.
With the #10 wood screws provided, fasten the overlay
panel to the door. (See Figure 11).
Clearance hole through
door gasket channel
#10 Wood Screw
Figure 11
Back of door
13
FULL OVERLAY PANEL INSTALLATION INSTRUCTIONS
Figure 10