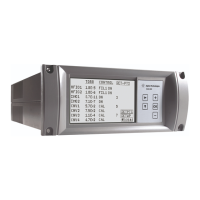
XGS-600 Gauge Controller
44
DRAFT 4/
15/14
c. Locate the rear panel portion of the board into its slot, press down the tab and
exert gentle pressure until it clicks into place.
CAUTION Do not force the board down. If too much pressure is required
the connector pins are not aligned.
d. Insert the yellow HFIG plug into the connector (HFIG boards only). See
Figure 4-3. This connector is keyed.
e. Inspect the installation to ensure the board is seated properly and not touching
any adjacent boards.
6. Replace the covers:
a. Push the cover straight in under the lip at the XGS front bezel.
b. Replace the two Philips head screws.
c. The cover must be flat and fully seated. It may be necessary to adjust the boards
and filler plates slightly for the cover to fully engage. The cover should drop on
front of the filler plate.
7. Plug the unit back in and turn on the power switch.
NOTE Any board-specific settings must be reprogrammed.
Most Sensor setup and Set point user settings stay with the
board. This means if the removed board is used elsewhere,
most settings will be saved. However, if a new board is
installed, you will have to reprogram the settings.

 Loading...