AGM Global Vision14
2.2.1 POWER-OFF BY UPTURNING THE SUPPORT
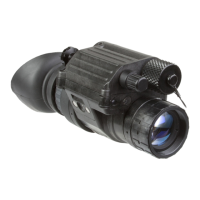
When using F14 by mounting it on a helmet support, you can power off the
equipment by upturning the support. This reduces power consumption and
possible damage to I
2
components due to direct exposure to sunlight or other
light sources.
2.3 INFRARED NIGHT VISION
Turn on the main power of the battery compartment and turn the infrared knob
from OFF towards MAX until you hear clicking. Then infrared night vision is
enabled. You can see the start-up logo “F14” and observe infrared thermal
images after 3-5 seconds in the ocular lens. Continue turning the infrared
knob towards MAX to adjust the brightness of the infrared thermal image as
required.
In infrared night vision mode, you can short press the I2 knob to zoom in on the
infrared image.
NOTE:
When the external video is connected, “PIP of external video” and “Full screen
of external video” are available.
NOTE:
You cannot switch to enhanced mode if only infrared night vision is enabled.
2.4 SHUTTER CORRECTION
If infrared images experience noise, deterioration, or bright spots after you
enable infrared night vision, you need to correct the shutter manually. Long
press the I
2
knob for 2s to manually correct the shutter. You can hear the shutter
click during the correction. The correction time is less than 1s.
2.5 ENHANCED NIGHT VISION
When I2 night vision and infrared night vision are enabled at the same time, you
can observe enhanced night vision images from the ocular lens. You can switch
among a variety of enhanced display modes as needed.
2.5.1 SWITCHING ENHANCED NIGHT VISION MODES
In the enhanced night vision mode, short press the I
2
knob to switch the
enhanced modes. F14 has four enhanced display modes: Outline, Target
highlight, Thermal image, and Breathing alert. Short press the I
2
knob to switch
between the four display modes cyclically.
CAUTION:
When the external video is connected, “PIP of external video” and “Full screen
of external video” are available.