6.1 REMOVAL
Condition: place yourself in a sitting posi-
tion laying the helmet upside down on your
knees. Start the operation from the right
side.
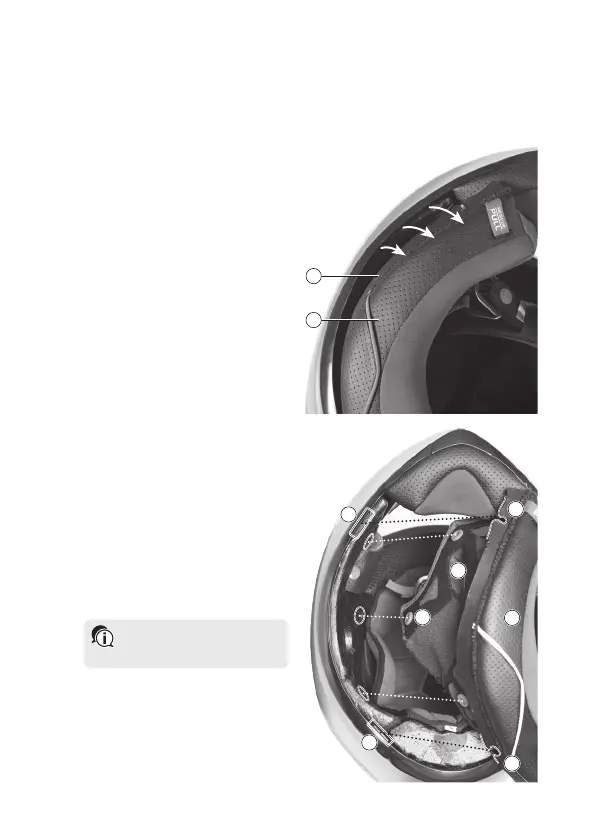
• Pull the cheek pad (1) and extract it
(arrows) until the plastic attachment
band is unfastened (2) from its cou-
pling place between the shell and the
inner polystyrene.
• Release the cheek pad from the shell
by unfastening the 3 automatic but-
tons (4, below image) that keep it se-
cured to the polystyrene.
• Repeat the previous operations on
the other side.
• Remove the chin strap from the
housing of the cheek pad.
→ The cheek pads are now released and
it’s possible to remove them.
6 THE CHEEK PADS
The inside part of K6 S helmet consists of: two lateral cheek pads connected by the
neck roll, the top crown pad, the wind protector and the chin strap cover. These com-
ponents are individually extractable.
6.2 INSTALLATION
Condition: place yourself in a sitting po-
sition laying the helmet upside down on
your knees. Start the operation from the
right side.
• Move the cheek pad (1) close to the
inside of the shell.
• Insert the chin strap into the designat-
ed housing (2) on the cheek pads.
• Insert the cheek pads attachment
band between the outer shell and the
inner polystyrene, securing the
shaped edge (3) to the two red clips (4).
• Secure the cheek pads to the shell
by fastening the 3 automatic buttons
(5) that fix it to the inner polystyrene.
• Repeat the previous operations on
the other side.
→ Check if the cheek pad is firmly
secured.
Notice! It’s advisable to secure
at first the cheek pads rear
part and then the front one.
2
1
3
4
3
4
5
1
2
12
 Loading...