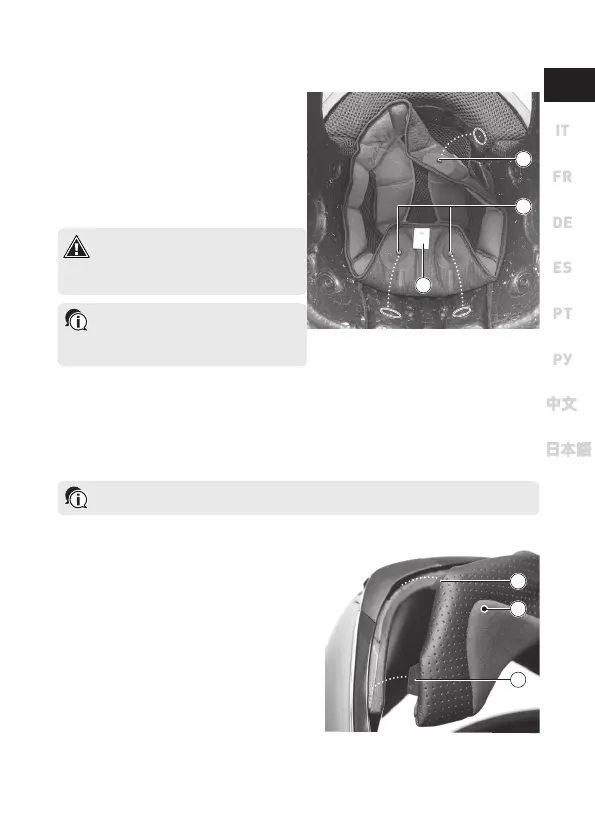
7.1 REMOVAL
Condition: place yourself in a sitting posi-
tion laying the helmet upside down on your
knees.
• Unhook the two front automatic but-
tons (1) and the two rear ones (2).
→ The crown pad is released from the
polystyrene and now it’s possible to
remove it.
Warning! Before removing the crown
pad, make sure that the automatic
buttons are unhooked in order to
avoid unstitching the textile parts.
Notice! The crown pad removal is
easier if the cheek pads and the
wind protector have already been
removed from the helmet.
7.2 INSTALLATION
Condition: place yourself in a sitting position laying the helmet upside down on your
knees.
• Insert the crown pad into the shell, orienting it correctly with the white label (3)
towards the rear part of the helmet.
• Secure the two front automatic buttons (1) and the two rear ones (2).
→ The crown pad is now fastened to the shell.
Notice! The crown pad installation is easier if the cheek pads and the wind pro-
tector have been previously removed from the helmet.
7 THE CROWN PAD
8 THE WIND PROTECTOR
8.1 REMOVAL
Condition: place yourself in a sitting position lay-
ing the helmet upside down on your knees.
• Pull the wind protector out by holding it in
its central area (1).
• Remove the central hooking tooth (2) and
the 2 lateral ones (3), placed one on the
right side and one on the left side.
8.2 INSTALLATION
Condition: place yourself in a sitting position lay-
ing the helmet upside down on your knees.
• Hold the wind protector in its central area
(1).
• Fasten it to the shell guiding the insertion
of the central hooking tooth (2), then the
two lateral ones.
2
1
3
1
2
3
13
EN
 Loading...