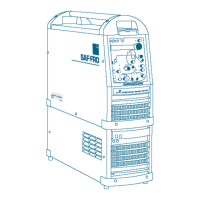
Do you have a question about the Air Liquide SAF-FRO PRESTOTIG 250 AC/DC and is the answer not in the manual?
| Input voltage | 230V |
|---|---|
| Input current | 16A |
| Welding current range (TIG DC) | 5-250A |
| Welding current range (TIG AC) | 10-250A |
| Welding current range (MMA) | 10-200A |
| Protection class | IP23 |
| Welding process | TIG, MMA |
Lists the components included with the generator.
Details the components and controls on the front and back panels.
Instructions for connecting the machine to the power supply.
Steps for connecting the gas supply.
How to connect welding accessories.
Instructions for performing MMA welding.
Adjusting the arc dynamism for better weld quality.
Using intermittent arc welding for thin materials.
Procedure for sharpening the TIG electrode tip.
Explanation of AC balance adjustment in TIG welding.
Selecting between HF and contact TIG striking modes.
Operation of the 2-stroke mode with HF striking.
Operation of the 2-stroke mode with contact striking.
Operation of the 4-stroke mode with HF striking.
Adjusting the time for current decrease after welding.
Setting the duration of gas flow after welding.
Adjusting the ramp-up time for welding current.
Setting the duration of gas flow before welding.
Adjusting the AC balance for electrode and current.
Adjusting the AC frequency for arc stability.
Step-by-step guide for saving current welding settings.
Procedure to start the machine using the security code.
How to remove the active security code.
Steps to change the existing security code.
Detailed descriptions of specific additional functions (J01-J09).
Description of the overheating protection system.
Protection against main supply overvoltage.
Handling incorrect voltage selection for the machine.
Safety feature for liquid-cooled torches.
Critical safety warning before performing maintenance.
Schedule for essential 6-month maintenance tasks.
Maintenance guidelines for the welding torch.
Instruction to replace damaged components promptly.
Guidelines for environmentally responsible machine disposal.
Lists the components included with the generator.
Description of front and back panels.
Instructions for connecting the machine to the power supply.
Steps for connecting the gas supply.
How to connect welding accessories.
Instructions for performing MMA welding.
Adjusting the arc dynamism for better weld quality.
Using intermittent arc welding for thin materials.
Procedure for sharpening the TIG electrode tip.
Explanation of AC balance adjustment in TIG welding.
Selecting between HF and contact TIG striking modes.
Operation of the 2-stroke mode with HF ignition.
Operation of the 2-stroke mode with contact ignition.
Operation of the 4-stroke mode with HF ignition.
Adjusting the time for current decrease after welding.
Setting the duration of gas flow after welding.
Adjusting the ramp-up time for welding current.
Setting the duration of gas flow before welding.
Adjusting the AC balance for electrode and current.
Adjusting the AC frequency for arc stability.
Step-by-step guide for saving current welding settings.
Procedure to start the machine using the security code.
How to remove the active security code.
Steps to change the existing security code.
Detailed descriptions of specific additional functions (J01-J09).
Description of the overheating protection system.
Protection against main supply overvoltage.
Handling incorrect voltage selection for the machine.
Safety feature for liquid-cooled torches.
Critical safety warning before performing maintenance.
Schedule for essential 6-month maintenance tasks.
Maintenance guidelines for the welding torch.
Instruction to replace damaged components promptly.
Guidelines for environmentally responsible machine disposal.
Lists the components included with the generator.
Description of front and back panels.
Connecting to the electricity mains.
Connecting gas to the pressure regulator.
How to connect welding accessories.
Instructions for performing MMA welding.
Adjusting the arc dynamism for better weld quality.
Using intermittent arc welding for thin materials.
Procedure for sharpening the TIG electrode tip.
Explanation of AC balance adjustment in TIG welding.
Selecting between HF and contact TIG striking modes.
Operation of the 2-stroke mode with HF ignition.
Operation of the 2-stroke mode with contact ignition.
Operation of the 4-stroke mode with HF ignition.
Adjusting the time for current decrease after welding.
Setting the duration of gas flow after welding.
Adjusting the ramp-up time for welding current.
Setting the duration of gas flow before welding.
Adjusting the AC balance for electrode and current.
Adjusting the AC frequency for arc stability.
Step-by-step guide for saving current welding settings.
Procedure to start the machine using the security code.
How to remove the active security code.
Steps to change the existing security code.
Detailed descriptions of specific additional functions (J01-J09).
Description of the overheating protection system.
Protection against main supply overvoltage.
Handling incorrect voltage selection for the machine.
Safety feature for liquid-cooled torches.
Critical safety warning before performing maintenance.
Schedule for essential 6-month maintenance tasks.
Maintenance guidelines for the welding torch.
Instruction to replace damaged components promptly.
Guidelines for environmentally responsible machine disposal.
Lists the components included with the device.
Description of front and back panels.
Connecting to the electrical network.
Connecting gas to the pressure regulator.
How to connect welding accessories.
Instructions for performing MMA welding.
Adjusting the arc dynamism for better weld quality.
Using intermittent arc welding for thin materials.
Procedure for sharpening the TIG electrode tip.
Explanation of AC balance adjustment in TIG welding.
Selecting between HF and contact TIG striking modes.
Operation of the 2-stroke mode with HF ignition.
Operation of the 2-stroke mode with contact ignition.
Operation of the 4-stroke mode with HF ignition.
Adjusting the time for current decrease after welding.
Setting the duration of gas flow after welding.
Adjusting the ramp-up time for welding current.
Setting the duration of gas flow before welding.
Adjusting the AC balance for electrode and current.
Adjusting the AC frequency for arc stability.
Step-by-step guide for saving current welding settings.
Procedure to start the machine using the security code.
How to remove the active security code.
Steps to change the existing security code.
Detailed descriptions of specific additional functions (J01-J09).
Description of the overheating protection system.
Protection against main supply overvoltage.
Handling incorrect voltage selection for the machine.
Safety feature for liquid-cooled torches.
Critical safety warning before performing maintenance.
Schedule for essential 6-month maintenance tasks.
Maintenance guidelines for the welding torch.
Instruction to replace damaged components promptly.
Guidelines for environmentally responsible machine disposal.
Manual remote control accessory.
Foot pedal remote control accessory.
Cylinder sack-truck accessory.
 Loading...