Air Techniques, Inc.
Page
14
AS10, AS12, AS21, AS22, AS30,
AS40, AS50, AS70, & AS100
POST INSTALLATION CHECK
Make Sure Everything Is Running Properly
After your AIRSTAR has been installed and before it is put into operation, be sure to follow
the check-out procedure detailed below:
Check that Intake Filter(s) are fully seated into the compressor head(s) and that the Tank
Outlet Valve is closed.
Turn on the electricity. Check the incoming line voltage. It should be at least 108 Volts
for the AS10 and AS21; and 198 Volts for the AS12, AS22, AS30, AS40, AS50, AS70
and AS100. This voltage should remain at or above these levels while the AIRSTAR
is running. If not, install the appropriate boost transformer and check that the correct
main circuit breaker and wire size are being used.
Check pump-up and recovery times as detailed below and compare to the times in
the table.
Turn on the AIRSTAR’s power and determine the pump-up time from 0-115 PSI.
See the table below.
Drain the storage tank to 80 PSI and determine the recovery time from 85 to 115 PSI.
See the table below.
INSTALLATION INFORMATION
If the recovery time differ as listed above, call authorized dealer for service.
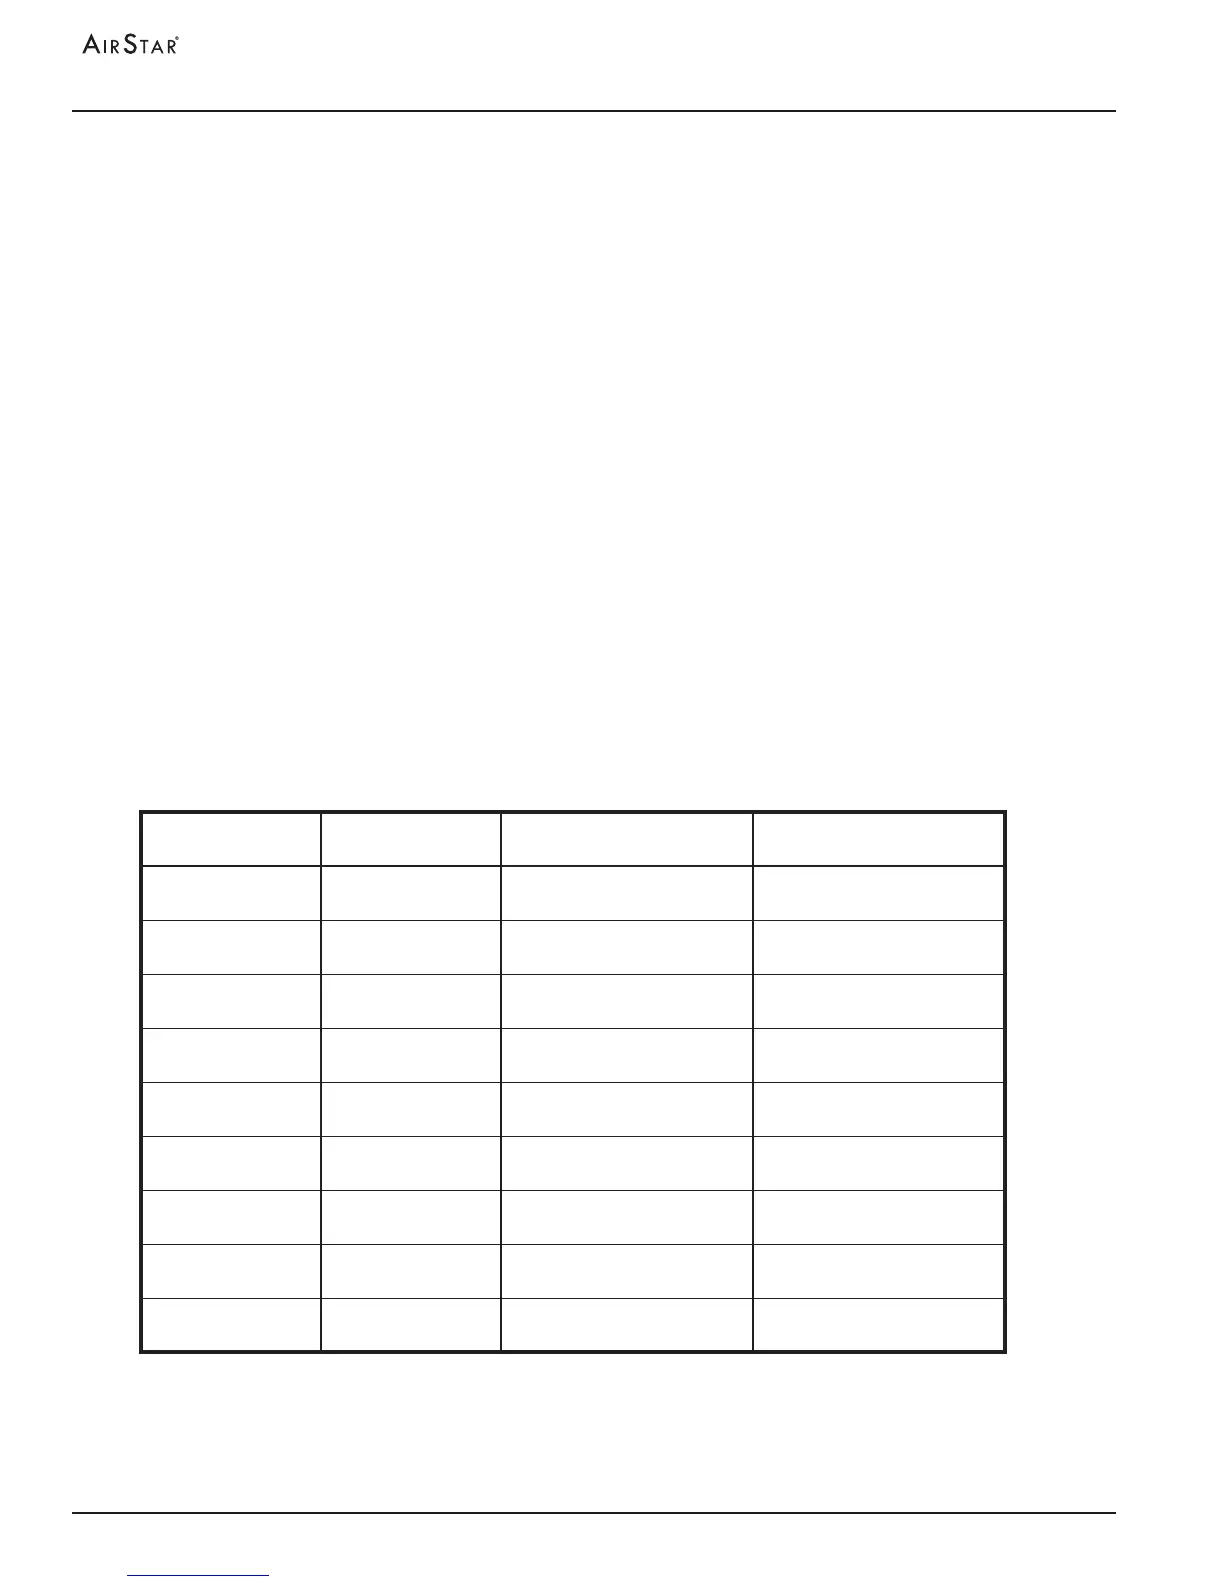
Model
Number of
Motors/Heads
Pump-up Time
0-115 PSI Maximum
Recovery Time
85-115 PSI Maximum
AS10 1/1 2 minutes, 55 seconds 48 seconds
AS12 1/1 2 minutes, 55 seconds 48 seconds
AS21 1/2 3 minutes, 10 seconds 47 seconds
AS22 1/2 3 minutes, 10 seconds 47 seconds
AS30 2/2 3 minutes, 10 seconds 47 seconds
AS40 2/3 1 minute, 40 seconds 34 seconds
AS50 2/4 2 minutes, 50 seconds 42 seconds
AS70 3/6 2 minutes, 40 seconds 40 seconds
AS100 2/8 2 minutes, 15 seconds 30 seconds