Do you have a question about the Airmar ST800 and is the answer not in the manual?
Always wear safety goggles and a dust mask during installation.
Ensure the valve is not a watertight seal and use inserts/plugs with safety wire.
O-rings must be intact and lubricated. Attach safety wire to prevent backing out.
Immediately check for leaks after placing the boat in water.
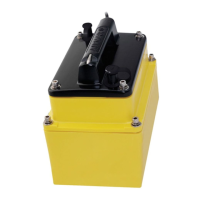
Precautions for metal and stainless steel housings to prevent corrosion.
Avoid fairings with plastic housings; do not install metal housing on positive ground systems.
Do not pull sensor by cable. Avoid solvents that attack plastics.
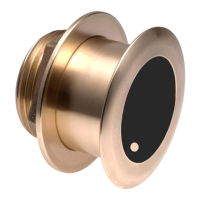
Recommendations for plastic, bronze, and stainless steel housings based on hull material.
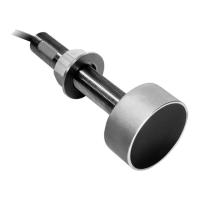
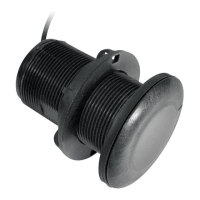
Ensure turbulence-free water flow over the paddlewheel at all boat speeds.
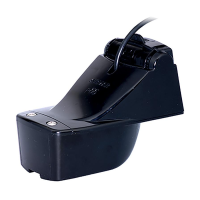
Allow minimum 280mm (11") headroom for installation and maintenance.
Avoid mounting ahead of depth transducers to prevent performance issues.
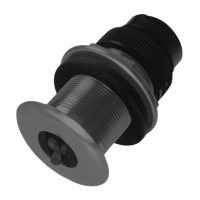
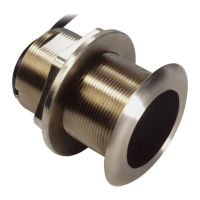
Steps for drilling pilot and main holes for various hull types.
Apply marine sealant around housing flange for a watertight seal.
Push housing into hole, align arrow, and secure with washer and hull nut.
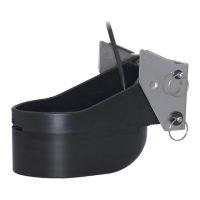
Use isolation bushing for stainless steel housing in metal hulls to prevent corrosion.
Apply water-based anti-fouling paint to specific surfaces before installation.
Ensure washer contacts hull; do not tighten hull nut against isolation bushing.
Do not clamp plastic housing tightly on wrenching flats to prevent fracture.
Route cable carefully, use grommets, and separate from electrical wiring.
Do not remove the waterproof connector; use Airmar junction box if splicing.
Check for leaks immediately after launching and periodically for 3 hours.
Protect core from water seepage and reinforce hull to prevent crushing.
Steps for cutting outer and inner skins, and sealing the core.
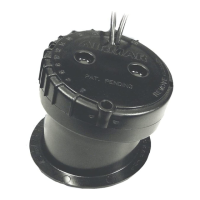
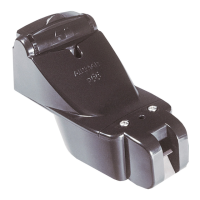
Sensor has a self-closing valve; always use insert/plug for a watertight seal.
Use for boats in salt water >1 week, removed from water, or with suspected growth.
Lubricate O-rings, remove paddlewheel insert, install plug, and secure with cap nut.
Remove aquatic growth with a scour pad and detergent; lightly wet sand if needed.
Bearings last up to 5 years on low-speed, 1 year on high-speed vessels.
Procedure for replacing the paddlewheel shaft and O-rings.
Remove snap ring and slide valve assembly out of housing.
Clean, repair, or replace valve parts; reinstall assembly and snap ring.
| Brand | Airmar |
|---|---|
| Model | ST800 |
| Category | Transducer |
| Language | English |