Do you have a question about the Airmar SS502 and is the answer not in the manual?
Always wear safety glasses, a dust mask, and ear protection during installation.
Immediately check for leaks after launching and monitor for three hours.
Always operate the transducer in water to prevent overheating and failure.
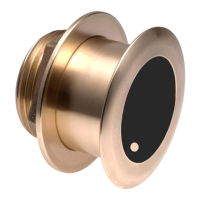
Isolate stainless steel housing from metal hulls to prevent electrolytic corrosion.
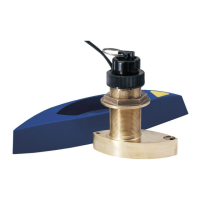
Orient the SS422 transducer with the mark forward and parallel to the boat's centerline.
Never install a metal transducer in a vessel with a positive ground system.
Do not pull, carry, or hold the transducer by its cable to avoid severing internal connections.
Never strike the transducer to prevent damage.
Never use solvents, as they can damage plastic parts and the transducer face.
Read instructions completely; they supersede instrument manual if conflicting.
Stainless steel transducer is compatible with all hull materials.
Recommended for aluminum hulls with proper isolation to prevent electrolytic corrosion.
Safety glasses, dust mask, and ear protection are required for installation.
Permanent marker, electric drill, and appropriate drill bits/hole saws.
Mild household detergent or weak solvent (like alcohol) for surface cleaning.
File and knife/scissors for preparing metal hulls.
Marine sealant, slip-joint pliers for hull nut tightening.
Grommets for cable routing and cable ties for securing excess cable.
Water-based anti-fouling paint is mandatory for salt water installations.
Hole saws, cylinder, wax, tape, and casting epoxy for cored fiberglass hulls.
Do not mount near water intakes, discharges, or hull irregularities that disturb water flow.
Do not mount where boat support during trailering/hauling could damage the transducer face.
Ensure water flow under the hull is smooth with minimal bubbles and turbulence.
The transducer must be continuously immersed in water.
The transducer beam must be unobstructed by the keel or propeller shaft.
Choose a location away from power/radiation sources like propellers and machinery.
Select a mounting location with a minimal deadrise angle.
Choose an accessible spot inside the vessel with adequate space for tightening the nut.
Ensure all surfaces to be bedded are clean and dry before applying sealant.
Apply marine sealant to the transducer surface and stem, extending higher than the hull nut.
Slide a washer onto the transducer cable and stem, resting against the transducer.
Thread cable through the hole, then push transducer stem through, twisting to seal.
From inside, slide second washer and hull nut, screw on, and tighten with pliers.
Ensure SS422 housing is not rotated during tightening; avoid damaging threads.
Ensure isolation sleeve is between stem and hull; trim if it interferes with nut tightening.
Do not overtighten on cored fiberglass; allow wood hulls to swell.
Remove excess sealant from the outside of the hull for smooth water flow.
Do not remove the sensor's connector. Use Airmar's junction box if splicing.
Route cable carefully, use grommets, separate from electrical wiring, and secure with ties.
Refer to the instrument owner's manual for connecting the transducer.
Check for leaks immediately after placing the boat in water.
Do not leave the boat in water for more than 3 hours without re-checking for leaks.
If a leak is observed, repeat 'Bedding' and 'Installing' procedures immediately.
Core must be cut and sealed carefully to prevent water seepage and crushing.
Drill a 3mm or 1/8" pilot hole perpendicular to the waterline from inside the hull.
Cut a hole through the outer skin only from outside, keeping drill plumb.
Optimal interior hole diameter depends on hull thickness and deadrise for core sealing.
Remove core material, sand, and clean inner skin, core, and outer skin around the hole.
Fill the gap between a cylinder and hull with casting epoxy to seal the core.
Clean area around the hole and ensure sealant adheres properly.
After epoxy sets, proceed with the 'Bedding' procedure.
Exposed surfaces in salt water must be coated with water-based anti-fouling paint.
Never use ketone-based paint, as it can damage plastics.
Reapply anti-fouling paint every 6 months or at the start of each boating season.
Clean the transducer surface regularly with a scour pad and mild detergent.
For severe fouling, lightly wet sand with fine grade wet/dry paper.
Part information for ordering replacements is on the cable tag; do not remove it.
Order lost, broken, or worn parts from your instrument manufacturer or marine dealer.
| Brand | Airmar |
|---|---|
| Model | SS502 |
| Category | Transducer |
| Language | English |