AS-D+—AS-P Series Instruction Manual 27
AirSep Corporation
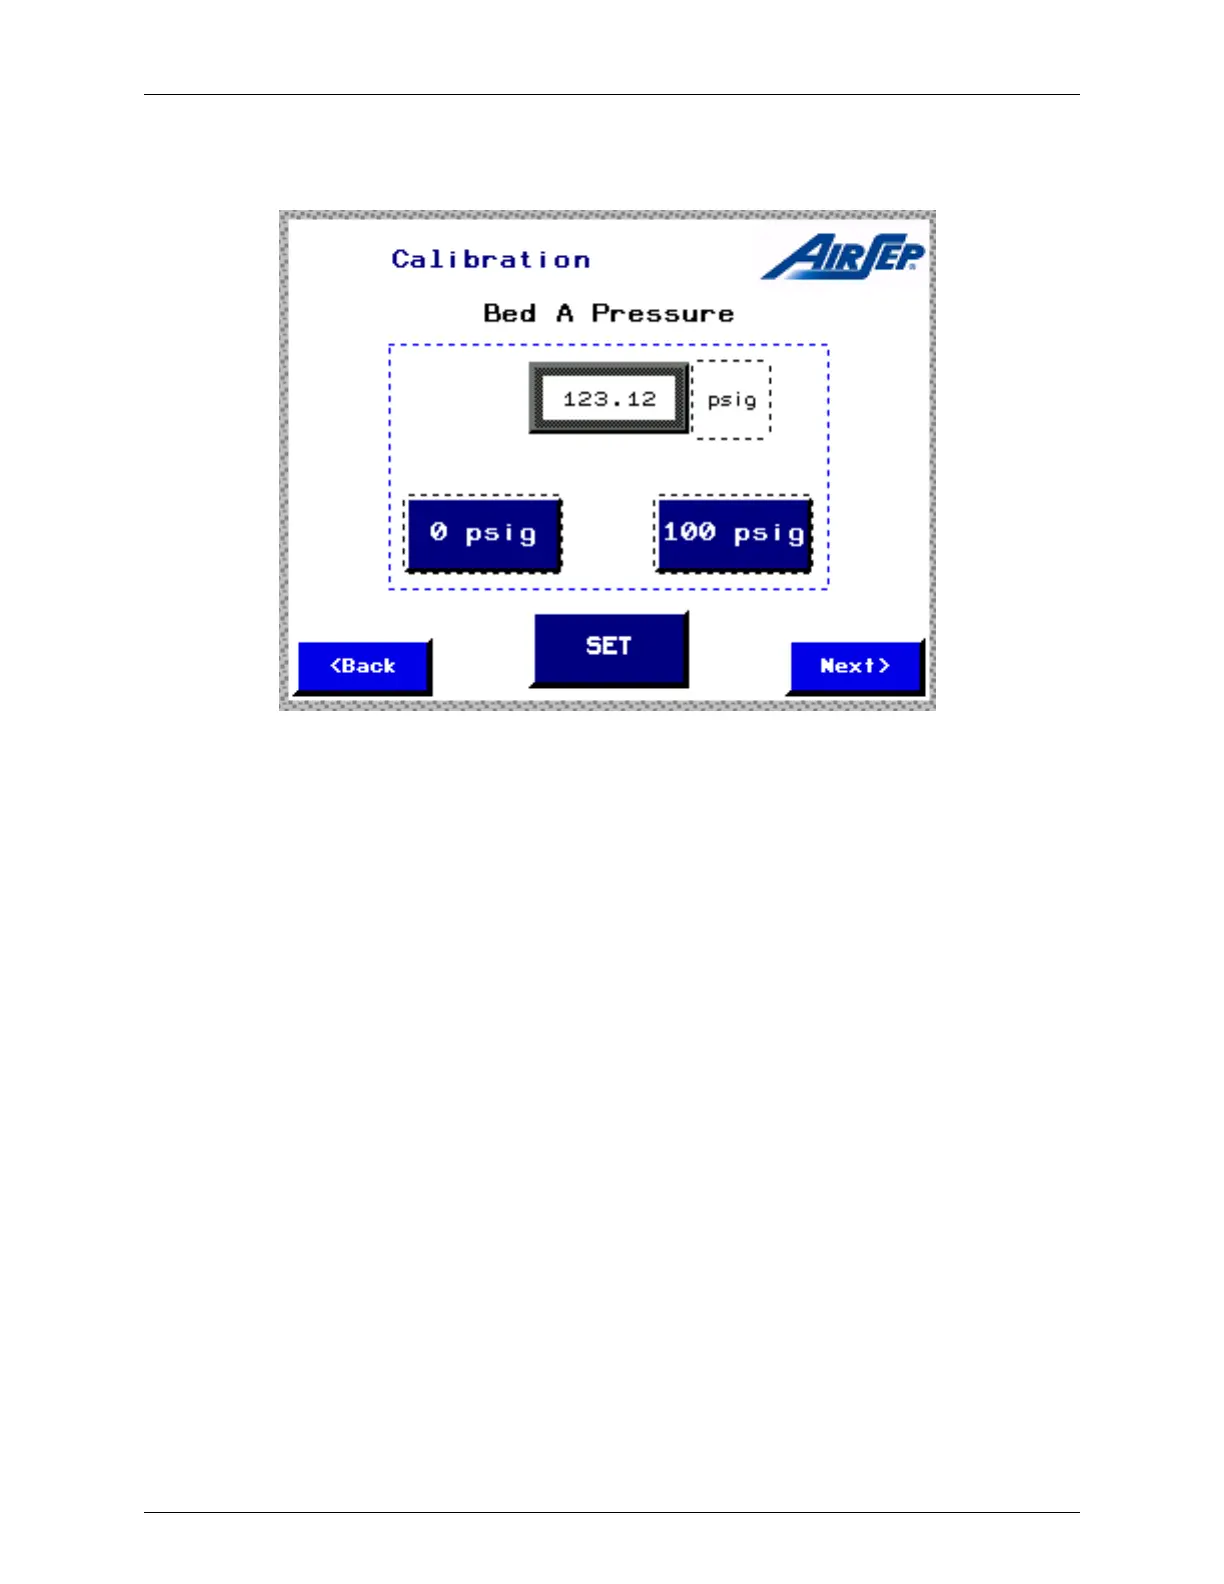
The ‘Calibrate Pressure Transducers’ icon displays a screen dedicated to the
pressure transducers calibration and settings as shown below.
Figure 4.8: Typical Bed Pressure Calibration Screen
The pressure transducers for the beds and the product oxygen pressure are factory
calibrated and should not require any calibration for a long period. However, if the
need arises, follow the procedure below for calibration.
1. The three-way valve (V-A) (Figure 4.9) handle shows the direction of
flow path. In Figure 4.9, direction of flow path is from oxygen generator
to pressure transducer. Close this manual three-way valve (V-A), so
that the flow path is from the atmosphere to the pressure transducer.
2. Take out the plug, if any, from port A (Figure 4.9) and attach a manual
air pump having an accurate pressure gauge.
3. Press the ‘Calibrate 0 psig’ icon when the gauge on the manual air
pump reads 0 psig.
4. Manually pump the air so that the pressure reading on the gauge is
100 psig.
5. At this point, press the ‘Calibrate 100 psig’ icon on the calibration
screen to finish the calibration procedure.
6. Press and hold the “SET” button until it pops back out. This will save
the calibration.