HDP3 Mini-Converter v1.0 www.aja.com
16
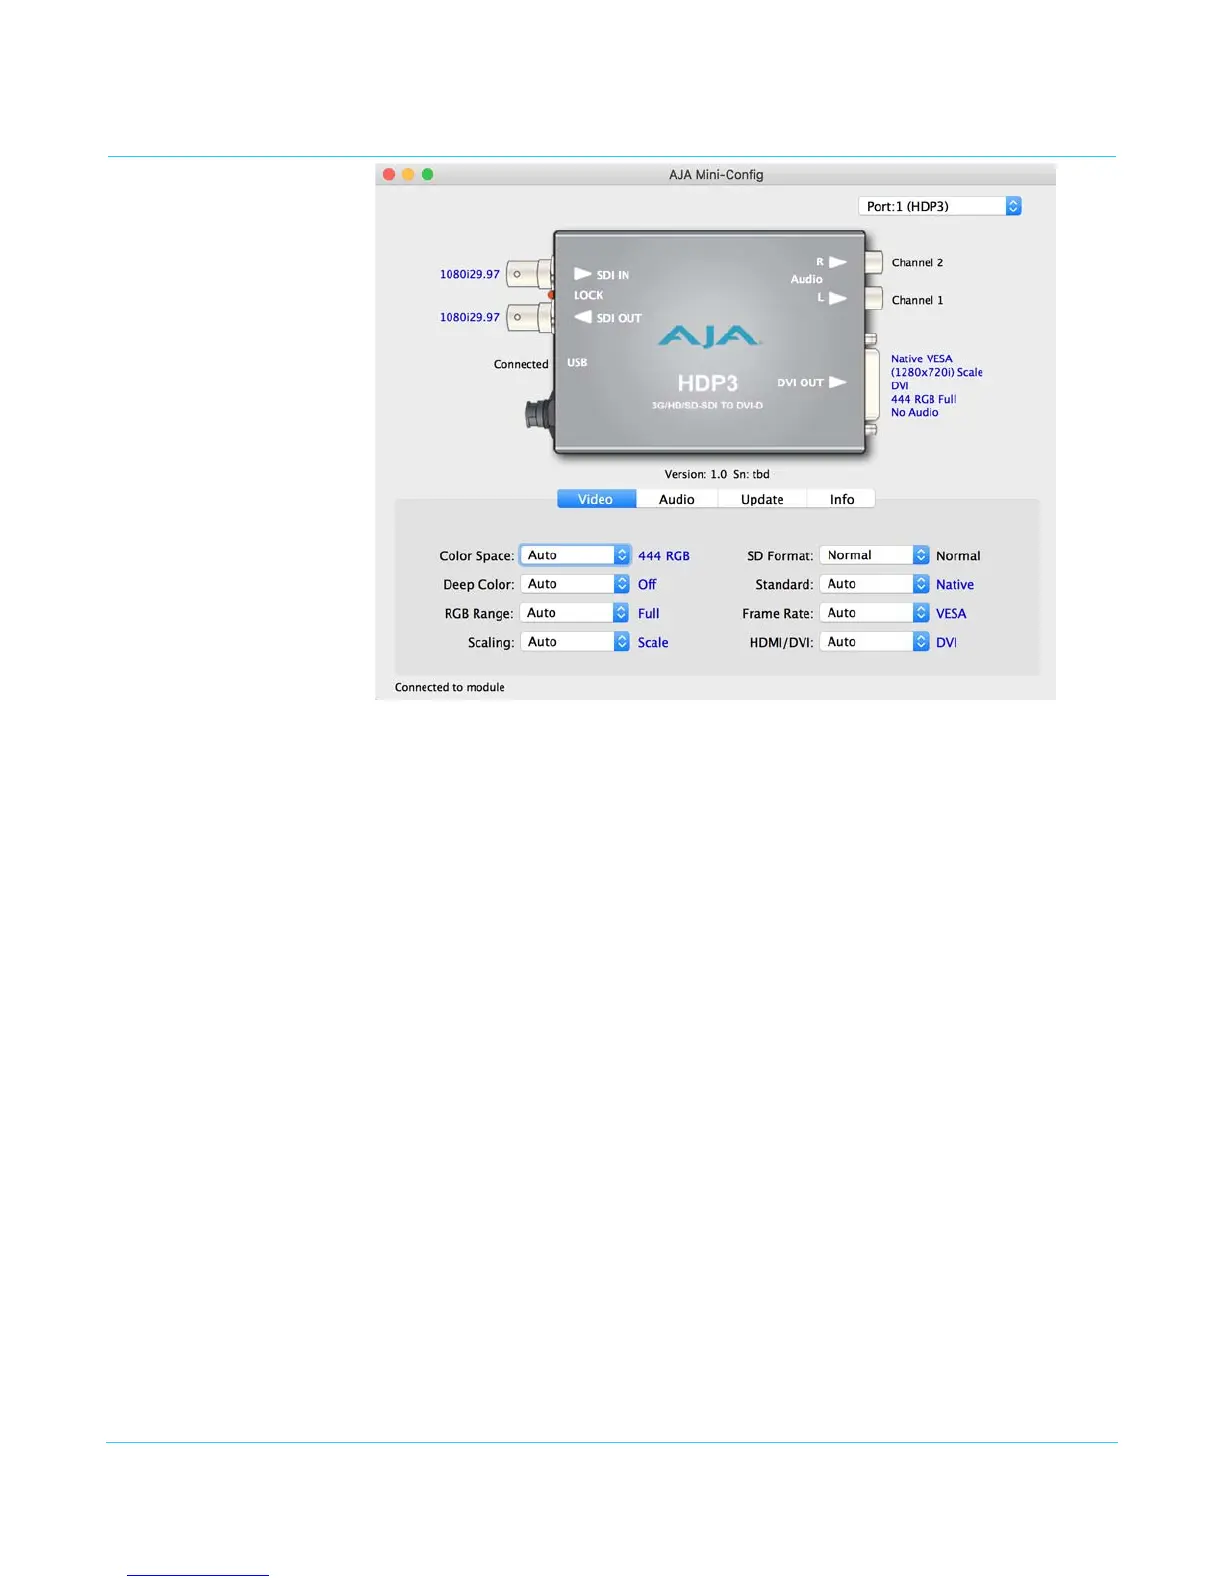
Video Screen
The selections on this screen configure the output video.Selecting “Auto” allows the
HDP3 to conform the output to best serve the attached monitor. This is handled
automatically when the HDP3 reads the capabilities indicated by the attached monitor.
Color Space Selects the Video Format. Choose from Auto, 4:2:2 YCbCr, 4:4:4 RGB or 4:4:4 YCbCr.
Choosing “Auto” lets the HDP3 automatically select the format based on the capabilities
indicated by the attached monitor.
Deep Color Selects how Deep Color is supported. Choose from Auto, On or Off. Choosing “Auto” lets
the HDP3 decide based on input. Choosing On turns on support for Deep Color 30-bit
video (24-bit also supported).
RGB Range Selects the Input Video Color Range. Choose Auto to let the HDP3 decide, or choose
SMPTE or Full color range.
Scaling Choose Auto to let the HDP3 choose based on the attached output device’s capabilities,
1:1 for no scaling, or Scale, to let the HDP3 scale for the attached monitor. Displaying 1:1
only works properly when it is possible to display the entire unscaled raster. For example,
it is not possible to display a 1920 x 1080 input on a 1600 x 1200 monitor. For optimal
performance with 1:1 scaling, use a 1920 x 1200 (WUXGA) monitor.
SD Format Choose Normal (standard picture aspect ratio) or Anamorphic; these control how an SD
picture appears on an HD monitor.
Standard Raster choices available are: Auto (let the HDP3 decide based on input), Native, WUXGA,
UXGA, WSXGA+, SXGA, XGA, 1080p, 1080i, 720p, 576p, or 480p.
Frame Rate Choices are: Auto (let HDP3 decide), VESA, 24/23.98, 25, 30/29.97, 48/47.95, 50, or 60/
59.94.
HDMI/DVI Choose Auto, HDMI, or DVI. Choosing “Auto” lets the HDP3 automatically select the
output mode based on the input video and the attached device's capabilities.