14
Installation (Cont.)
After Sales Support
1300 886 649 | info@tempo.org
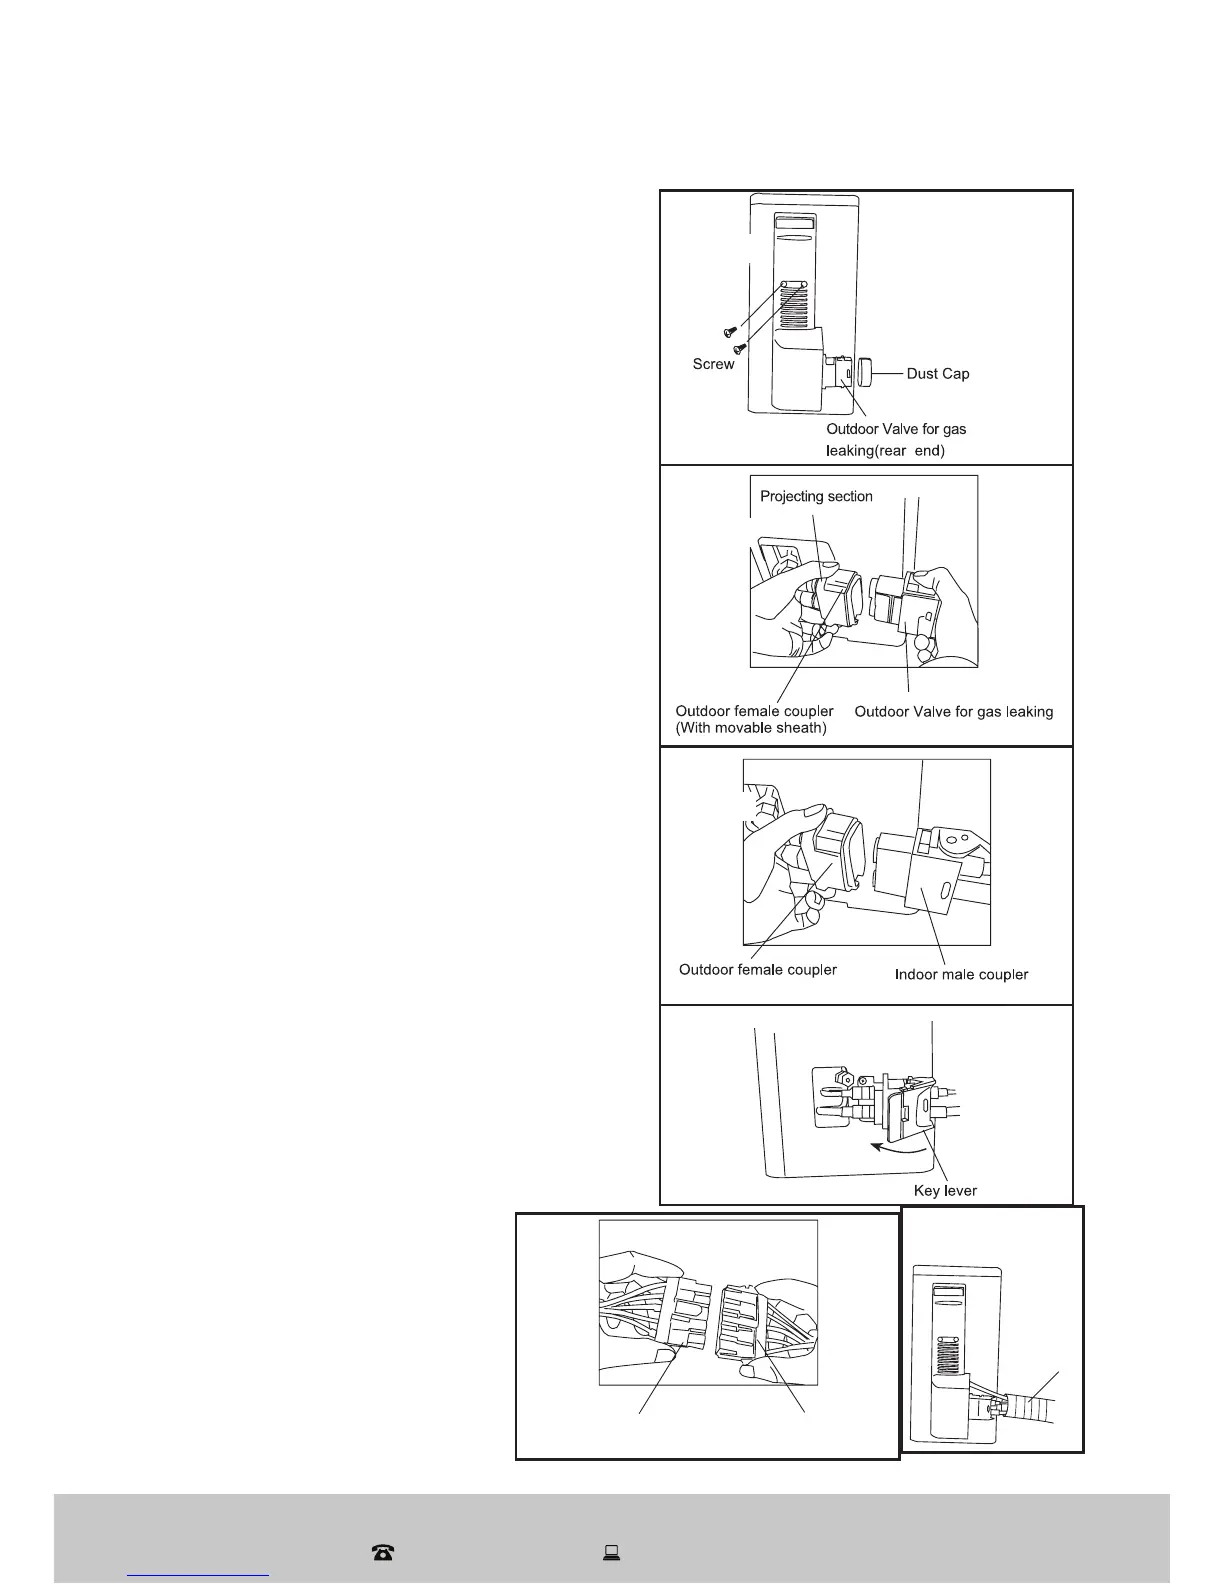
Pipelines connection for whole unit
type quick coupler models
(This section does not apply to the AK-
9000-RC Air Conditioner.)
1. Remove the two screws on the
maintenance plate with a screwdriver
and take off the plate, then remove
the dust caps on both the indoor
male coupler and outdoor female
coupler (Fig.18).
2. To open the inner hooks, apply a little
force with your thumb and press the
projecting section of the outdoor
female coupler backwards, then you
can easily take out the outdoor valve
with the other hand (Fig.19).
3. In the same way, press the projecting
section backwards, then connect the
indoor male coupler to the outdoor
female coupler (Fig.20).
4. Close the key lever of the indoor male
coupler, push it into the horizontal
position (Fig.21). The refrigerant will
start circulating through the indoor
and outdoor units; you should be able
to hear sounds of air flowing through
the system.
5. Connect the outdoor quick cable
coupler with the indoor quick cable
coupler (Fig.22).
6. Finally, re-install the maintenance
plate back into its place
(Fig.23). As for the
outdoor valve for gas
leaking and the dust
caps, you can preserve
them for future possible
use on the removal of
your air conditioner.
Fig.18
Fig.19
Fig.20
Fig.21
Fig.22
Indoor quick cable coupler
Outdoor quick cable coupler
Wrap with ethylene tapes
Fig.23
 Loading...