EasyManua.ls Logo

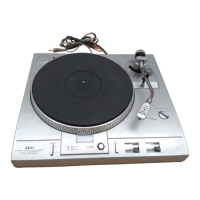
Akai AP-D40

Akai AP-D40
59 pages
To Next Page IconTo Next Page
To Previous Page IconTo Previous Page
Loading...
1.
Disconnect
the
Power
Cord.
6.
Turn
Main
Weight
counter-clockwise
(as
viewed
2.
Set the
Tone
Am
Lifter
switch
to
W..
from
the
front)
with
the
Stylus
Pressure
Scale
3.
Bring
the
Tone
Arm
to
a
position
between
the
Ring
until
the
marker
on
the
weight
shaft
corre-
tumtable
and
the
Tone
Arm
Rest
without
touch-
sponds
to
the
desired
stylus
pressure
on
the
scale.
ing
either.
NOTE
1.
AP-D40,
AP-Q60
Black
and
Silver
Panel
4.
Rotate
Main
Weight
backwards
and
forwards
until
Models
do
not
come
equipped
with
the
Tone
Arm
is
in
perfect
horizontal
balance.
Cartridges.
(Zero
balance
is
attained.)
2.
The
recommended
stylus
pressure
for
CAUTION
1.
Be
sure
that
Anti-skating
Adjuster
is
the
supplid
stylus
(AP-D40C,
AP-Q60C
set
to
zero.
only),
RS-90
is
2
grams.
However,
in
the
2.
Remove
the
stylus
guard
and
be
care-
case
of
outside
interference,
more
pres-
ful
not
to
damage
the
stylus.
sure
may
be
needed
for
stability.
5.
Without
moving
the
Main
Weight,
turn
only
the
The
range
of
adjustment
is
from
0
to
3
Stylus
Pressure
Scale
Ring
to
match
the
“0”
mark
Sans:
:
with
the
marker
on
the
weight
shaft.
(Refer
to
7.
Set
the
Anti-skating
adjuster
to
correspond
with
Fig.
13)
the
stylus
pressure.
(Fine
adjust
if
necessary.)
2.
OVERHANG
ADJUSTMENT
iY
©
SPINDLE
@
GROOVE
Fig.
14
Overhang
Adjustment
The
distance
from
the
turntable
shaft
to
the
stylus
when
the
Tone
Arm
is
at
the
center
of
the
turntable
is
called
overhang.
Although
overhang
is
preset
at
the
factory
for
this
model,
when
the
cartridge
is
replaced,
adjustment
may
be
necessary.
For
your
convenience,
the
rubber
tumtable
mat
has
an
indicator
groove
at
the
center
for
easy
overhang
adjustment.
Bring
the
Tone
Arm
to
the
center
of
the
turntable.
Adjust
the
cartridge
position
in
the
cartridge
shell
so
that
the
stylus
position
is
even
with
the
middle
groove
ring
at
overhang
adjustment
position.
The
cartridge
position
is
adjustable
by
resetting
the
screws
of
the
cartridge
shell.
19

Related product manuals