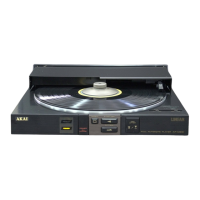
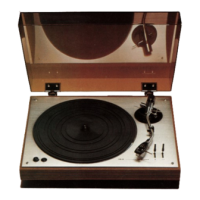
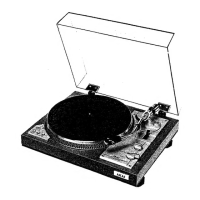
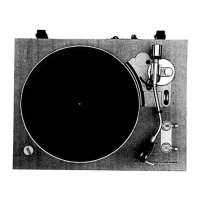
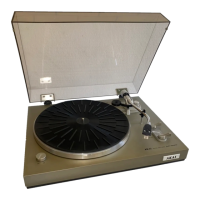
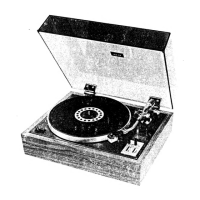
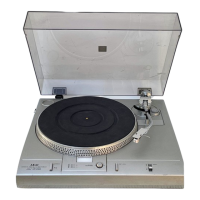
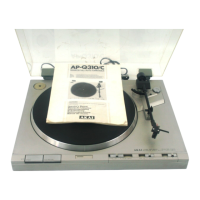
This document is a service manual for the AKAI AP-M50 Full Automatic Player, a turntable designed for playing vinyl records.
Function Description:
The AKAI AP-M50 is a full automatic player, meaning it automates several aspects of record playback, such as cueing the tonearm to the lead-in groove and returning it at the end of a record. It features a static balance linear tracking type tonearm, which is designed to minimize tracking error by moving linearly across the record, maintaining a consistent tangency to the groove. The player utilizes an EG-Servo DC Motor for belt drive, ensuring stable platter rotation. It supports two standard playback speeds: 33-1/3 rpm and 45 rpm. The automatic functionality is managed by a system control PCB, which integrates various sensors and motors to execute the programmed play sequence. These include arm position sensors (both TR and LED types), a tracking sensor, and a music interval sensor for advanced playback features like random program play. The device also incorporates a power on/off switch, speed selector, sensitivity selector, start/cut button, arm forward/backward buttons, and a cue button for manual control.
Important Technical Specifications:
- Turntable (Platter): Aluminum Alloy Diecast
- Drive System: Belt Drive
- Motor: EG-Servo DC Motor
- Speed: 33-1/3 & 45 rpm
- Wow & Flutter: 0.04% (W RMS)
- Rumble: 70dB (DIN-B)
- Tone Arm: Static Balance Linear Tracking Type
- Effective Arm Length: 90mm
- Arm Lifter: Oil Damped
- Over Hang: 0mm
- Cartridge Output Voltage: 2.5mV ±3dB (at 1kHz)
- Channel Separation: More than 18dB
- Optical Stylus Pressure: 2g (pre-adjusted at factory)
- Power Requirements:
- 120V, 60Hz for USA & Canada
- 220V, 50Hz for Europe except UK
- 240V, 50Hz for UK & Australia
- 110V/120V-220V/240V, 50/60Hz Convertible for other countries (Note: Models for USA, Canada, Europe, UK, and Australia are not equipped with this facility).
- Dimensions: 350(W) x 90(H) x 320(D) mm (13.8 x 3.5 x 12.6 inches)
- Weight: 3.8kg (8.4 lbs)
Usage Features:
The AKAI AP-M50 is designed for ease of use with its full automatic operation. Users can select playback speeds (33-1/3 or 45 rpm) and adjust sensitivity. The "START/CUT" button initiates playback and automatically cues the tonearm. For more precise control, "ARM FORWARD" and "BACKWARD" buttons allow manual positioning of the tonearm, while the "CUE" button lifts and lowers the tonearm. A "RANDOM PROGRAM PLAY SYSTEM" button suggests advanced playback capabilities, likely allowing users to program specific tracks or sequences. The "PROGRAM DISPLAY" provides visual feedback on the player's status or programmed sequence. The turntable is equipped with a dust cover to protect the platter and tonearm when not in use.
Maintenance Features:
The service manual provides detailed instructions for maintenance and adjustment, crucial for ensuring optimal performance and longevity.
- Dismantling: Instructions are provided for disassembling the unit, starting with the dust cover, rubber sheet, platter, and bottom cover, to access internal components. Reassembly is done in reverse order.
- Safety Checks: Before and after servicing, insulation resistance checks are required between power cord prongs and exposed parts to ensure safety. Specific resistance values are provided (e.g., >10 Mohms, or >2.2 Mohms for units with external antenna terminals).
- Critical Parts: Parts identified with a special symbol are critical for safety and performance, and must only be replaced with specified part numbers. This includes RF converters, tuner units, antenna selector switches, RF cables, noise blocking capacitors, and noise blocking filters.
- Wiring and Insulation: Specific instructions are given for internal wiring, including the use of PVC tubing, double insulated wires, high voltage leads, and various insulating materials (tape, spacers, sheets, plastic screws) to prevent hazards.
- Component Replacement: When replacing AC primary side components (transformers, power cords, noise blocking capacitors), wires must be securely wrapped about terminals before soldering.
- Wire Routing: Wires must not contact heat-producing parts (heatsinks, oxide metal film resistors, fusible resistors) or sharp-edged/pointed parts.
- Foreign Objects: Care must be taken to ensure no foreign objects (screws, solder droplets) remain inside the set after servicing.
- Voltage Conversion: The manual describes how to convert the machine's voltage (110V/120V or 220V/240V) using a Voltage Selector, though this feature is not available on all models.
- Adjustments:
- Ordinary Mechanical Adjustment: Stylus pressure, overhang, and tonearm height are pre-adjusted at the factory and typically do not require re-adjustment. Stylus pressure is set to 2.0 grams.
- Elevation and Position Adjustment: This adjustment is necessary if the elevation prop is replaced or mis-adjusted. It involves aligning the elevation prop with the tonearm using a flat-type screwdriver.
- Arm Offset Voltage Adjustment: Involves disconnecting connector P5 on the system control PCB, connecting an oscilloscope or digital voltmeter to TP3, and adjusting VR6 to achieve 0V ±50mV.
- Tracking Sensor Sensitivity Adjustment: Requires placing a 30cm record, powering on, connecting a meter to TP5, shifting the tonearm with the ARM-FF key, lowering it with the CUE key, fixing the arm, and adjusting VR1 to achieve 0V ±0.1V.
- Music Interval Sensor Sensitivity Adjustment: Involves placing a 30cm record, powering on, connecting a meter to TP2, shifting the tonearm to the lead-out area, and adjusting VR4 and VR5 for specific DC voltages (0.95V ±0.05V) in the "UP" position, and VR2 and VR3 for specific DC voltages (2.2V ±0.1V) in the "DOWN" position.
- Speed Adjustment: Requires a test record (33-1/3rpm at 1000Hz), setting the speed selector, playing the record, and adjusting VR1 (for 45rpm) and VR2 (for 33rpm) on the Main Motor PCB to achieve the correct playback output frequencies (995Hz ±5Hz for 33-1/3rpm and 1343Hz ±5Hz for 45rpm).
- Lead-In Position Adjustment: Involves setting a 17cm record, powering on, setting speed to "AUTO", pressing "START/CUT", and adjusting the lead-in position adjuster if the stylus descent point is incorrect. Clockwise adjustment moves the landing point away from the spindle, counter-clockwise moves it closer.
- PC Board Identification: A comprehensive list of PC board titles and their corresponding identification numbers (e.g., SYSTEM CONTROL PCB P1041A501A, MAIN MOTOR PCB P1041A501E) is provided for easy reference during servicing.
- Parts List: Detailed parts lists are included, categorized by PC board block and assembly block, with reference numbers, part numbers, and descriptions. Recommended spare parts are highlighted.
- Schematic Diagrams: The manual includes schematic diagrams and PC board layouts to aid in troubleshooting and repair.