Do you have a question about the Akai AP-D2 and is the answer not in the manual?
Prevents fire/shock by avoiding rain/moisture exposure.
Ensures machine meets local power requirements. Consult electrician if unsure.
Do not attempt conversion yourself. Models for specific regions are not equipped.
Caution to reduce electric shock risk; do not remove cover.
Essential knowledge for user and AP-D2 protection.
Safety guidelines for US users including reading instructions, heeding warnings, and proper use.
Details on electrical safety, grounding, cord protection, cleaning, and servicing requirements.
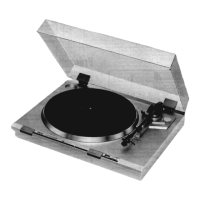
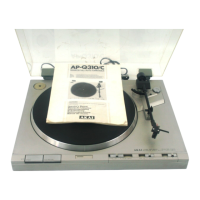
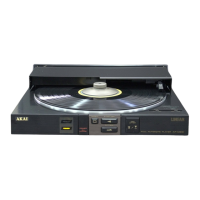
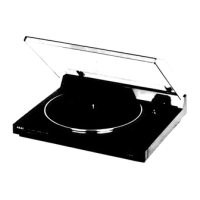
Describes the AP-D2 as a Direct Drive Turntable with FG servo motor for stable playback.
Lists four main features: auto-return, tone arm, cabinet, and front panel operations.
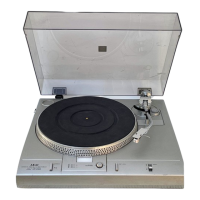
Components related to the platter and dust protection.
Controls and indicators for selecting playback speed and confirming platter rotation.
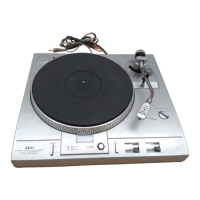
Controls for tone arm movement, stylus pressure, anti-skating, and playback control.
Steps to install the platter and rubber mat.
Instructions for attaching and adjusting the tone arm's main weight.
Important step before making any connections to the unit.
Connects the AP-D2's audio output to the amplifier's PHONO input.
Connects the AP-D2's ground wire to the amplifier for noise reduction.
Final step to connect the power to the turntable.
Correct stylus pressure is crucial for proper tracking and prevents record damage.
Set the ANTI SKATING adjustor to "0" before setting stylus pressure.
Remove the stylus guard from the cartridge before making adjustments.
Set the ANTI SKATING Adjuster to "2" after balancing the tone arm.
Balance the tone arm horizontally by adjusting the main weight.
Unlock the tone arm from its rest before moving it.
Move the tone arm midway between the rest and platter rim for placement.
Protect stylus by holding cartridge and using CUE lever to lower arm.
Rotate main weight until tone arm achieves perfect horizontal balance.
Adjust Stylus Pressure Scale Ring to "0" without moving the main weight.
Place a record on the platter and unlock the tone arm.
Replace stylus (RS-85) after approx. 400 hours for optimal playback.
Avoid touching arm/platter or turning off power during playback; set volume to zero when moving arm.
Press CUT/RETURN button to stop playback before the record ends.
Use the CUE lever to temporarily lift or lower the tone arm.
Remove the stylus guard before starting playback.
Set the CUE lever to raise or lower the tone arm.
Use the SPEED selector to choose the desired record speed.
Hold head shell and manually guide stylus to desired starting point.
Set CUE lever to begin playback; arm returns automatically at end of record.
Turn off all components before changing the cartridge.
Steps for installing a new cartridge, including wire connection.
Defines overhang and outlines adjustment steps.
Adjust tone arm height so stylus is 3-6mm above record surface.
Keep records and stylus clean to prevent distortion and stylus jump.
Avoid bumping AP-D2 to prevent stylus jump and damage.
Protect speakers by setting amplifier volume to zero during arm movement.
Steps for safely moving the turntable, including unplugging and securing.
Place away from electronics to avoid signal interference.
Handle records by edges, avoid touching grooves, store vertically.
Check output cord connection to PHONO jacks for no sound.
Ensure output cord and ground wire are securely connected for humming noise.
Clean stylus or record if dirty or worn for distorted sound.
Clean or replace stylus if it is dirty or worn.
Adjust stylus pressure and anti-skating per cartridge specs for scratching.
Move AP-D2 away from speaker system if it is too close.
Details platter material and drive system type.
Specifies motor type and available playback speeds.
Technical metrics for speed stability and noise levels.
Describes tone arm type and its effective length.
Specifies stylus pressure range, cartridge weight, and type.
Electrical output and channel separation metrics.
Power input requirements and physical dimensions of the unit.
Unit weight and included accessories.