CD
/'
1
/
,
,
1
,
,
1
®
v
1
~1
@
L7"
1
//
1
~
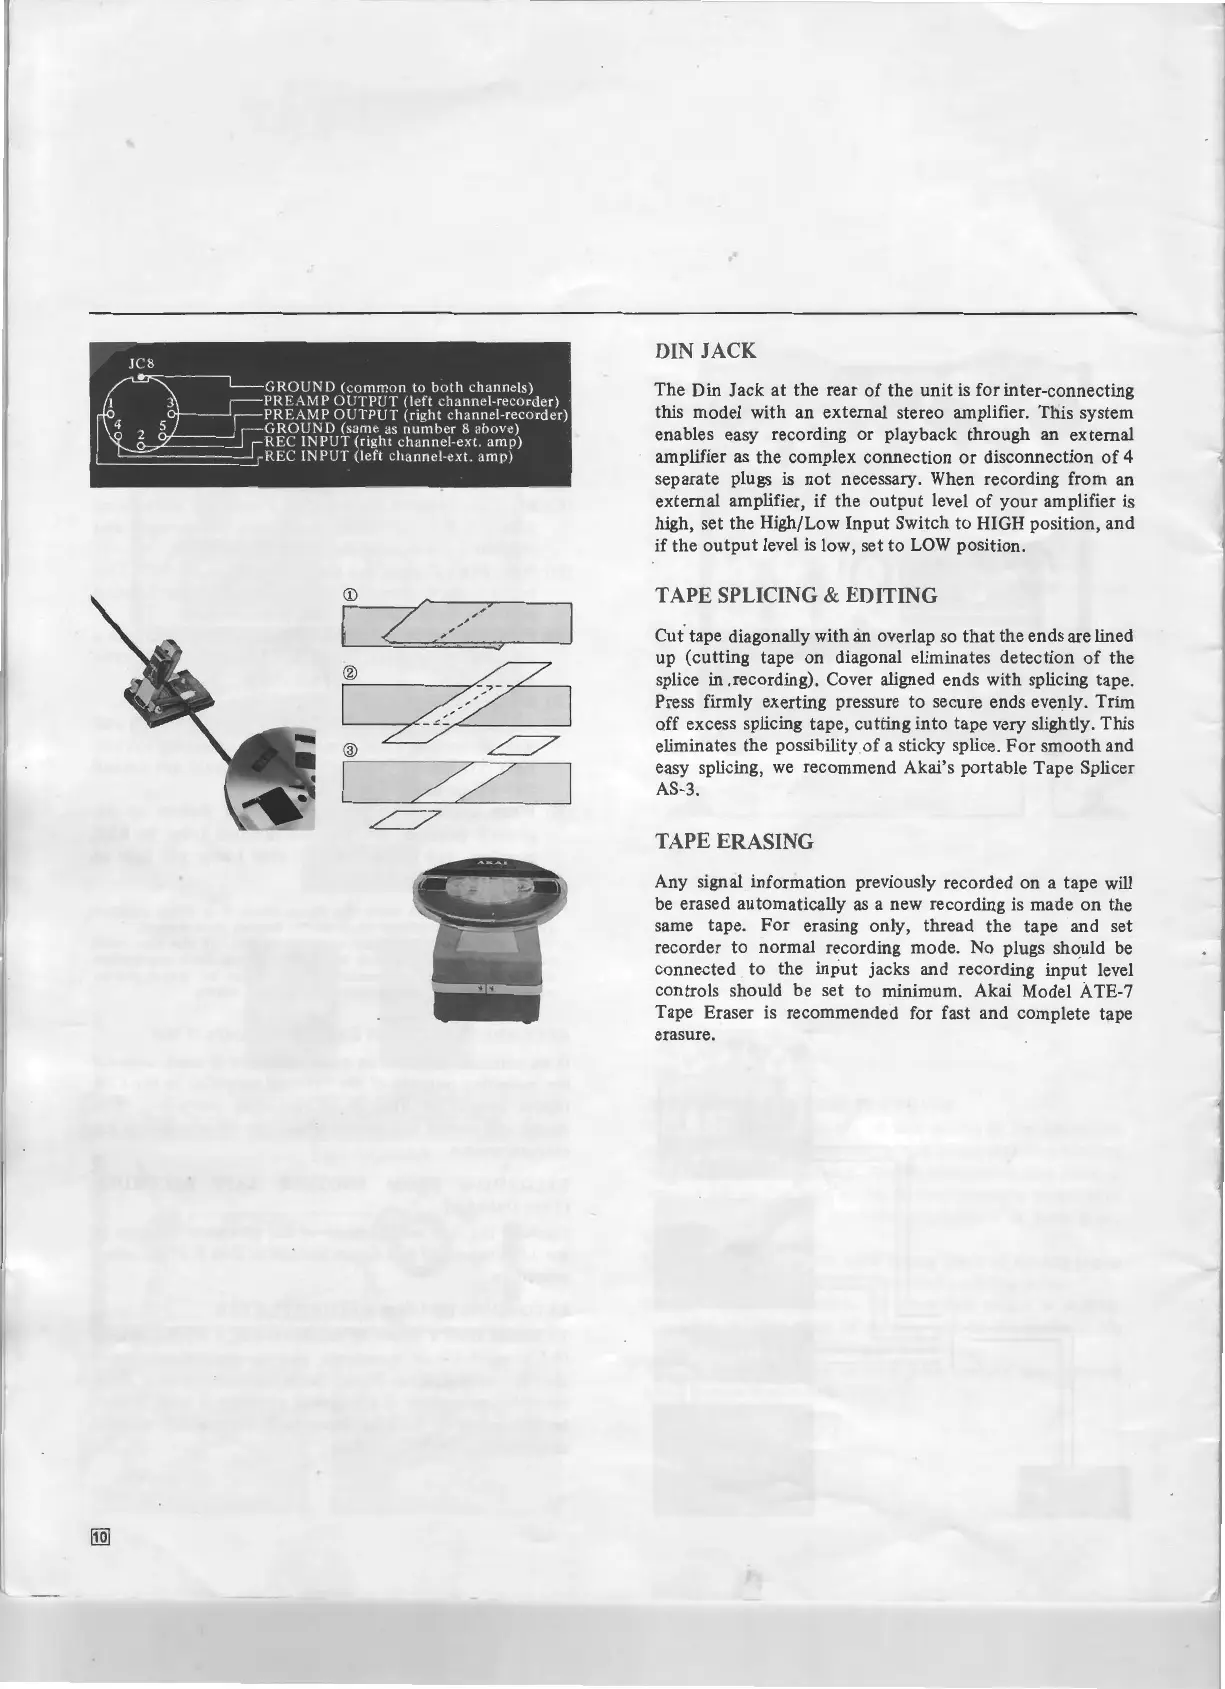
DIN
JACK
The Din Jack
at
the rear
of
the unit
is
for inter-connecting
this mode! with an external stereo amplifier. This system
enables easy recording or playback through an external
amplifier
as
the complex connection
or
disconnection
of
4
separate plugs
is
not
necessary. When recording from an
external amplifier,
if
the
output
leve!
of
your
amplifier is
high, set the High/Low
Input
Switch
to
HIGH position, and
if
the
output
leve!
is
low, set
to
LOW
position.
TAPE
SPLICI
NG & EDITING
Cut· tape diagonally with lin overlap so
that
the ends are lined
up (cutting tape on diagonal eliminates detection
of
the
splice
in
.recording). Cover aligned ends with splicing tape.
Press firmly exerting pressure
to
secure ends evel)ly. Trim
off excess splicing tape, cutting into tape very slightly. This
eliminates the possibility
of
a sticky splice.
For
smooth and
easy splicing,
we
recommend Akai's portable Tape Splicer
AS-3.
TAPE ERASING
Any signal information previously recorded
on
a tape will
be erased automatically
as
a new recording is made
on
the
same tape.
For
erasing only, thread the tape and set
recorder
to
normal recording mode. No plugs should be
connected to the
input
jacks and recording
inp~t
leve!
con trois should be set to minimum. Akai Mode!
A TE-7
Tape Eraser
is recommended for fast and complete tape
erasure.
 Loading...