..
SOUND-ON-SOUND RECORDING
For transfer of previously recorded material from one track
to another accumulating as many individual recordings on a
single track as is desired. Use für language training or
various interesting musical compilations.
First Recording
1. Connect power cord and turn on Power Switch.
2. Confirm that there are no connections to the input
jacks and turn all input level controls to minimum.
0
3. Plug in microphone to left Mic-I Microphone Jack.
.4. Depress left Track Selector Switch für recording on
track 1.
5. Depress SOURCE Monitor Switch.
6. Adjust left MIC-I/DIN Input Level Control while
observing the left VU Meter.
7. With Reset Button, set Index Counter to "0000".
8. While holding Recording Safety Button at depressed
position, depress Forward Button to begin first record-
ing; Le., Do-Re-Mi-.
9. When the first recording is completed, rewind tape to
starting point.
Second Recording
10. Confirm that the Monitor Switch is at SOURCE
position and set S.O.S./Echo Selector Switch at rear of
unit to S.O.S. position.
11. Depress fight Track Selector Switch für recording on
track 3 while monitoring track 1 through headphones.
The left Track Selector Switch must be set to
OUT position.
12. Set Line Output Level Controls to "0" VU (position 5)
~
and plug in microphone to fight Mic-l Microphone Jack.
13. Set fight MIC-I/DIN and MIC-2/UNE Input Level
Controls to about position 7 or 8.
14. Connect stereo headphones für monitoring the first
recording on track 1.
15. While holding Recording Safety Button at depressed
position, depress Forward Button to be gin recording;
i.e., Do-Do'-Re-Re'-Mi-Mi'oo.
.
The second recording (Do'-Re'-Mi' . . .) is made on track 3 as the
first recording (Do-Re-Mi. . .) is heard through headphones. The
two recordingswill merge on track 3 (Do-Do'-Re-Re'-Mi-Mi' . . .).
.
The third (Left MIC-2jLINE Input Level Control must be set to
same level as fight MIC-2jLINE Input Level Control) and sub-
sequent recordings are made in the same way as the second by
switching Track Selector Switches to and from 1-4, 3-2 and
reinserting microphone to corresponding channel. For playback,
set Track Selector Switch to track on which the last recording was
made, depress the TAPE Monitor Switch, and set the S.O.SjEcho
Selector Switch to NOR position.
t
.
,
SOUND MIXING
One of the features of this model is its varied sound mixing
ability. MIC-I + UNE, MIC-2 + DlN, UNE + DlN, or
MIC-I + MIC-2 can easily be accomplished. For sound
mixing, choose any of the above combinations and follow
recording procedure, connecting source to appropriate
inputs, and adjusting input level controls accordingly in
step 8.
TAPE ERASING
Any signals previously recorded on the tape will be
automatically erased as a new recording is made. For
erasing only, thread tape and set machine to recording
mode. No plugs should be connected to the input jacks and
the input level controls should be kept at minimum. For
quick and complete erasure, a bulk tape eraser is recom-
mended.
.
Be sure that the proper Track Selector Switches are depressed. If
both switches are depressed, both the left and fight channels will
be erased.
TAPE SPLICING AND EDITING
Q)
/
,/
J
.
/,-'
r-
Tl
~L7
/ /__J
~
@
[
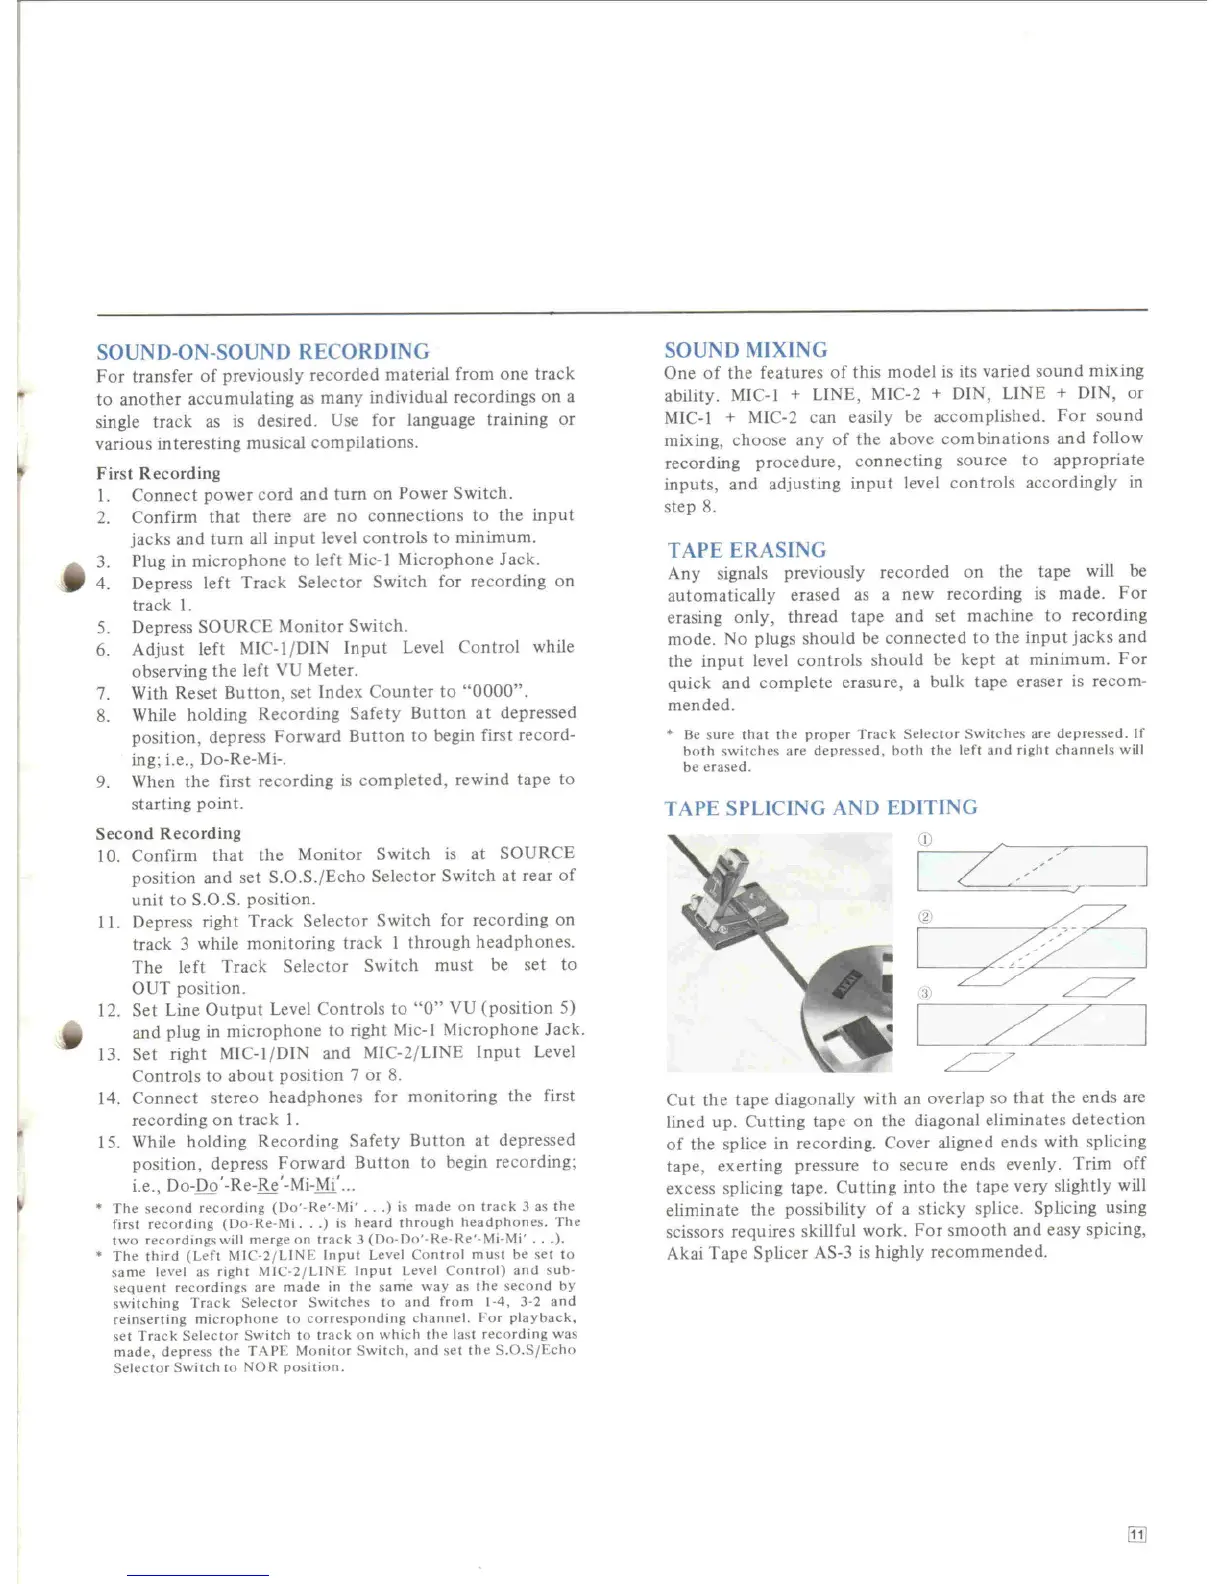
Cut the tape diagonally with an overlap so that the ends are
lined up. Cutting tape on the diagonal eliminates detection
of the splice in recording. Cover aligned ends with splicing
tape, exerting pressure to secure ends evenly. Trim off
excess splicing tape. Cutting into the tape very slightly will
eliminate the possibility of a sticky splice. Splicing using
scissors requires skillful work. For smooth and easy spicing,
Akai Tape Splicer AS-3 is highly recommended.
[ß]
 Loading...