PLEASE READ TUE FOLLOWING PRECAUTIONS BEFORE OPERATION
* Your machine requires constan t voltage fOT optimum
*
Use good quality tape. New tape gives best results.
performance. Pie ase feier to voltage and cycle con- * Avoid using extremely thin tape whenever possible.
version procedure on page 13 if change of voltage or When the use of such tape is unavoidable, be sure to
cycles is necessary. depress the Stop Button before changing modes.
* As dirty heads and magnetized heads become the
*
As tapes which have not been used fOTaperiod of time
source of logs of sound, distortion, sound drop-out, may have become sticky, run tape once before using.
and other recording and playback failures, the heads
*
Always store tapes in a cool, dry place.
most be kept clean and demagnetized at all times.
* Place machine on a flat level surface. Operate in either
vertical or horizontal position.
*
Do not place anything on top of the unit which will
obstruct the ventilator.
*
If the sound sources are so rar away from the
microphones that the input level controls most be
tumed to maximum, some hum or noise will inevitably
be recorded.
A test recording is recommended before making a final
recording.
.
'i~-"'.
.
~ I
'~I
I
/
I" I
....
\
~
..
Should there be a problem with your machine, write down
the model and serial numbers and all pertinent data
regarding warranty coverage as weIl as a clear description of
the existing trouble and contact your nearest authorized
Akai Service Station or the Service Department of Akai
Company, Tokyo, Japan.
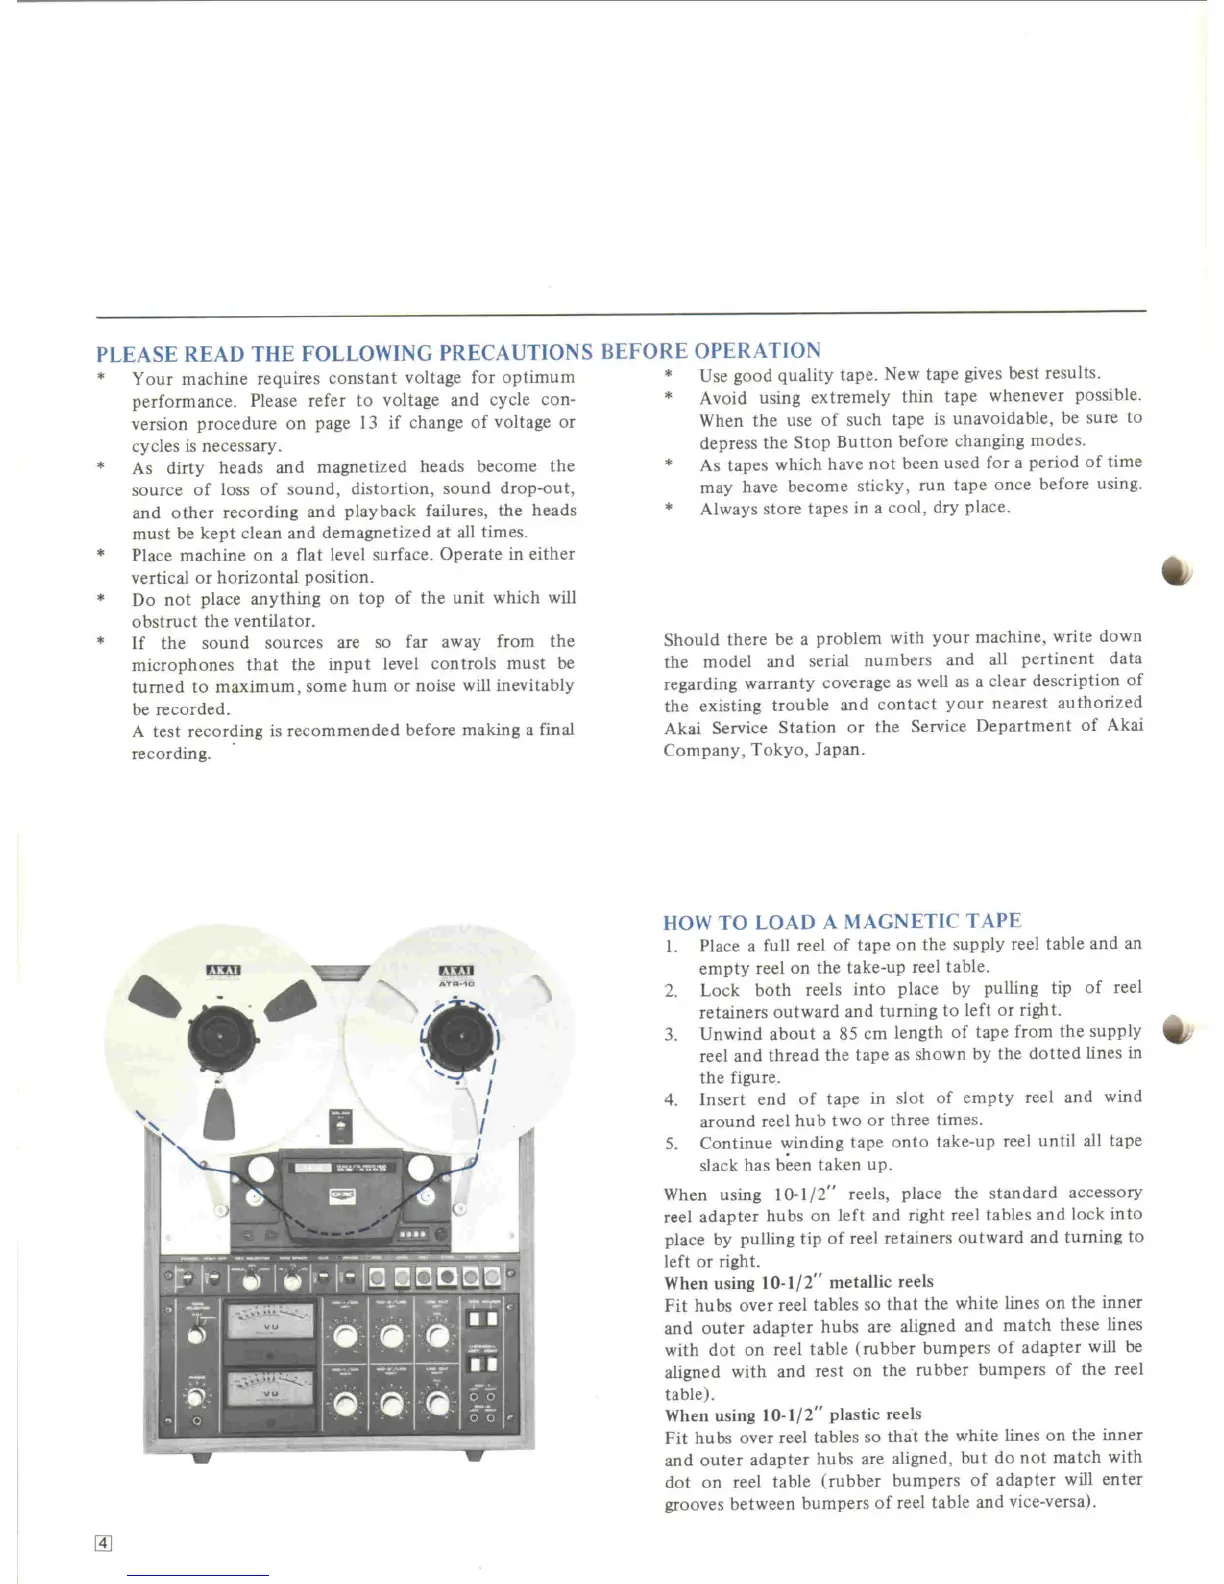
UOW TO LOAD A MAGNETIC TAPE
I. PIace a full reel of tape on the supply reel table and an
empty reel on the take-np reel table.
2. Lock both reels into place by pulling tip of re el
retainers out ward and tuming to left or fight.
3. Unwind about a 85 cm length of tape from the supply
reel and thread the tape as shown by the dotted lines in
the figure.
4. Insert end of tape in slot of empty reel and wind
around reel hu b two or three times.
5. Continue winding tape onto take-np reel until all tape
slack hag been taken up.
When using 10-1/2" reels, place the standard accessory
reel adapter hubs on left and fight reel tables and lock into
place by pulling tip of reel retainers outward and tuming to
left or fight.
When using 10-1/2" metallic reels
Fit hubs over reel tables so that the white lIDes on the inner
and outer adapter hubs are aligned and match these lines
with dot on reel table (rubber bumpers of adapter will be
aligned with and rest on the rubber bumpers of the re el
table).
When using 10-1/2" plastic reels
Fit hubs over reel tables so that the white lines on the inner
and outer adapter hubs are aligned, hut do not match with
dot on reel table (rubber bumpers of adapter will enter
grooves between bumpers of reel table and vice-versa).
-
 Loading...