2.Flush Moun
3
Waterproof Tips:
Please make sure that the gap between the wall and the
flush-mounting box is carefully filled to ensure that water
does not seep into the machine through the gap.
Cut out a square hole with the
dimension height*width*depth
= 264*122*61 mm.
Take off the box and drill the holes on the
marked positions with a depth of 25 mm
using 5 mm drill bit hand drill before
inserting the plastic anchors in to the
drilled holes.
Note:
The flush-mounting box can not over the edge of the square hole.
Break off the round knock-out wiring holes
and lead the wires through the corresponding
hole in to the flush-mounting box, then press
the flush-mounting box in to the square hole
until the edges of which align to the wall.Then
fix the box using the four ST4x20 screws.
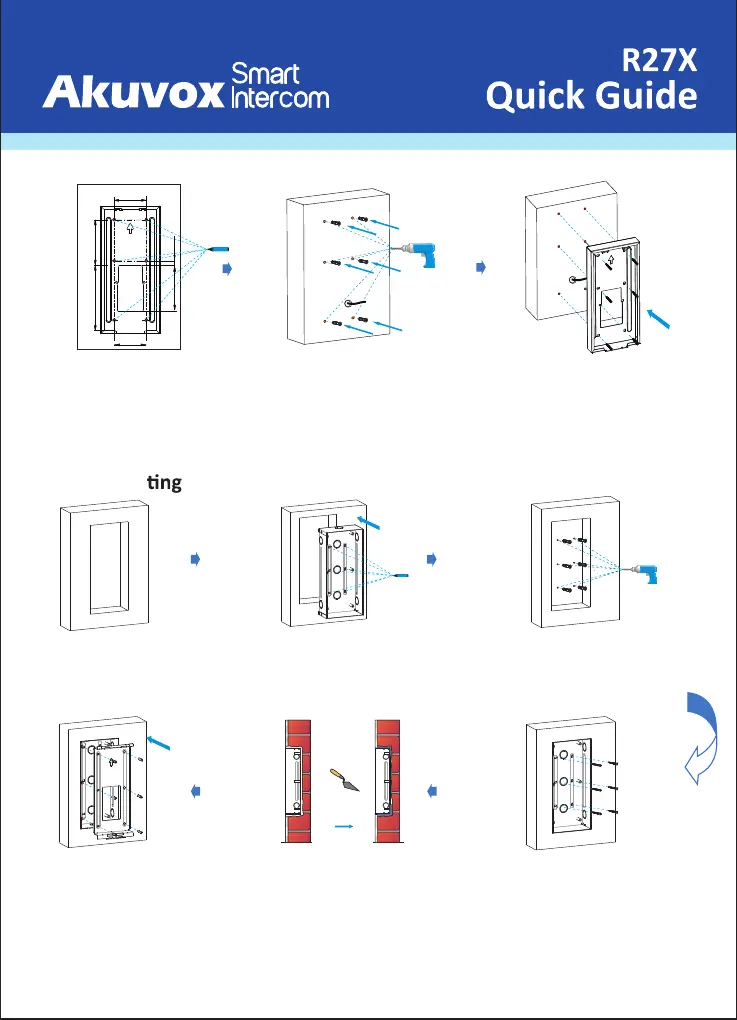
Insert the flush-mounting box in to the
hole and mark the the positions of the six
holes of the flush-mounting box on the
wall.
According to the position of the wire
on the wall, put the wall-mounting
box closely on to the wall and mark
the six positioning holes, while
making sure that relative positions
between wall-mounting box and
wiring hole are correct.
Fix the wall-mounting box with six ST4x20
screws.
Use a hand drill with 5 mm diameter bit to
make the holes in markded positions.And
then insert the plastic wall anchors into
the holes.
Waterproof Tips:
After the wall-mounted box is installed, it must be ensured that
the EVA foam on the back is close to the wall and there is no
gap between it and the wall.
12
80
60
70
90
130
Use six M4x10 screws to fix
the flush-mounnting bracket
on the embedded box.
Use cement or non-corrosive structural
adhesives to fill the gap between the wall
and flush-mounnting box. Wait the
adhesive material desiccation, go to the
next step.
 Loading...