Copyright © 2017 Alarm.com | www.alarm.com | May 2017
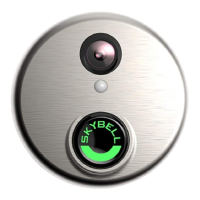
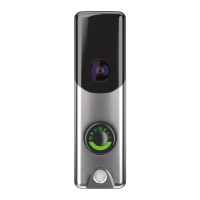
Wi-Fi Doorbell Camera - HD and Slim Line Editions | Installation Guide
POWER INFORMATION & TROUBLESHOOTING
Wired Power Supply
The Alarm.com Wi-Fi Doorbell Camera requires a wired
power supply.
Standard Doorbell Power
Standard doorbell power is 16VAC (Volts Alternating
Current) provided by a transformer that steps Mains
(120VAC) power down to low voltage. A common
transformer is 16VAC 10VA (Volt Amps) – this is
standard if the home has a single chime. If there are
multiple chimes, the transformer will normally have a
higher power (Volt Amps) rating. Other doorbell
transformers offer variable Voltage outputs from
8VAC to 24VAC.
Battery for Uninterrupted Supply
The Doorbell Camera has a battery supply to provide
power when the indoor doorbell chime is rung. To make
the existing doorbell chime ring, the Doorbell Camera
must short the doorbell circuit, diverting power from
the camera. During this time, the battery is used to
power the Doorbell Camera. The camera cannot run
solely on battery power – a wired power supply is
required. The built-in lithium battery has an expected
battery life of 3 to 5 years, depending on usage.
Battery Charging
When the LED is alternating Red and Blue (HD Edition)
or pulsing
Blue (Slim Line), the battery is charging. The
battery may need to charge prior to first-time use. The
duration of the pre-syncing charge process varies due
to differences in existing doorbell circuits but normally
takes less than 30 minutes.
Power Supply Issues
The protection circuitry in doorbell transformers
degrades over time and with use. This causes the
power output of the doorbell transformer to drop.
Eventually the power provided by the transformer
drops below the power required by the Alarm.com Wi-
Fi Doorbell Camera. At this point, the transformer
needs to be replaced.
If installation is attempted and the doorbell
transformer’s power output does not meet the
required power, the doorbell camera’s LED will flash
with a
Red (HD Edition) or Blue (Slim Line) rapid
double-flash pattern. If this pattern persists, the
doorbell transformer must be replaced to provide
sufficient power for doorbell camera operation.
Transformer Replacement
If you have confirmed there is a transformer failure,
there are two options for transformer replacement.
You can either use a plug-in wall-wart style
transformer or wire a new transformer into the home’s
Mains lines, physically replacing the existing
transformer (a professional electrician is
recommended for this installation).
If you choose the first option, you can use an AC-AC
Wall-Adapter transformer like those commonly used to
power security panels.
Next, identify a power outlet near the existing
transformer. Remove the low-voltage wires from the
existing transformer and connect those wires to the
new transformer. Plug the new transformer in to the
power outlet and secure it in place.
 Loading...