13
4:7:1 REPLACING THE 1 KW HEATING
CARTRIDGE
1. Switch off 230 V power supply
2. Drain the glycol mixture from the heating system.
3. Remove the cover and end plate.
4. Remove the fan in accordance with 4.2
5. Remove the cables from the heating cartridge.
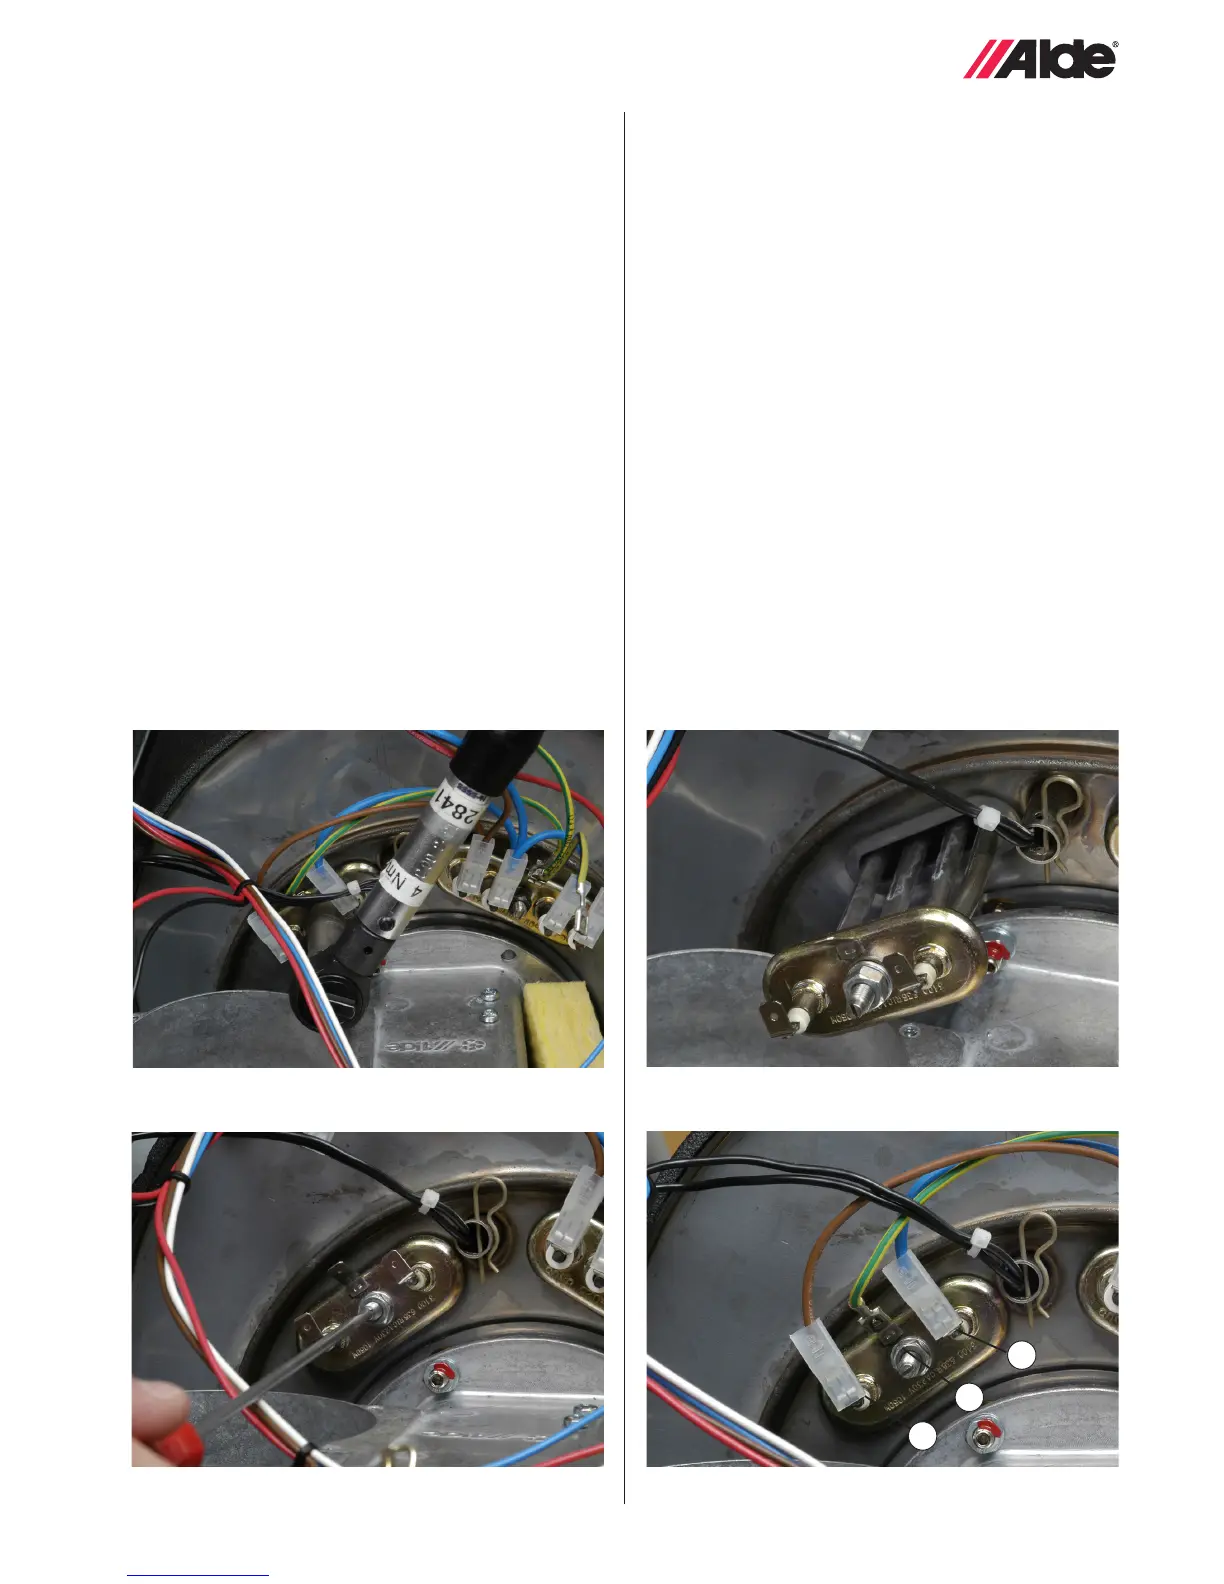
6. Slacken the nut in the centre of the electrical heating
cartridge electrode (g. 17).
7. Give the t-screw on the heating cartridge a one-quarter
turn (g. 18).
8. Extract the heating cartridge by pulling straight back-
wards (g. 19).
9. Clean around the edges where the old heating cartridge
has been located.
10. Then t the new heating cartridge, give the t-screw a
one-quarter turn and tighten the nut.
NB! Before tting the heating cartridge, check the direc-
tion in which to turn the t-screw.
Fig 17.
Fig 18.
Fig 19.
NB! Check that the rubber plug is fully inserted and
push the lower edge of the heating cartridge while tigh-
tening the nut. Tighten the nut to 4 Nm.
11. Connect the cables according to g. 20, (A=brown,
B=blue, C=yellow/green). Fit the cover and end plate.
Add glycol mixture.
Bleed and test-run the boiler.
A
B
C
Fig 20.
 Loading...