ELECTRICAL CONNECTION
12 VOLT DC
Connect the extension cable (E 34)
between the control panel and the LPG
boiler.
NB! If there is no liquid in the heating
system, wait before connecting 12V to
the boiler. This is so that the boiler shall
not be started by mistake without liquid.
The cable must not be extended. Only
use genuine cables from Alde, which are
available in various lengths.
Supply of 12 volts to the boiler must be
direct from the battery via the boat’s
main breaker (E 35) or a separate
breaker (the boiler consumes about
15-40 mA when it is in standby or is
switched off).
A fuse (E 36) of 3-5A must be mounted
close to the battery. The plus and minus
cable between the battery and the boiler
shall have an area of 1.5mm² up to 20
metres length (10m for plus cable and
10m for minus cable). With longer cable
lengths, the area must be increased to
2.5mm².
If a transformer is used instead of bat-
tery, it must be of good quality, giving
proper direct current and not pulsing
direct current.
230 VOLT ~
Connect the boiler (electrical heating
cartridge) securely to 230V ~ and secure
with a 10A fuse for 2kW electrical heat-
ing cartridge and 16A for 3kW electrical
heating cartridge. The boiler must be
protectively earthed. The installation
must be carried out by a qualied person
according to current national regulations.
Only genuine connection cable from
Alde may be used.
WARNING: 230V ~ must be well sepa-
rated from 12V.
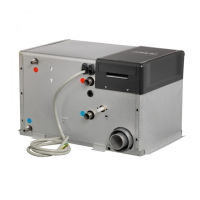
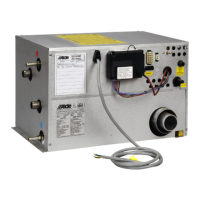
Fig E
34. Extension cable.
35. Switch.
36. Main fuse 3 - 5A.
37. Connection plinth for 12V in.
38. 2-pole connection plinth on boiler.
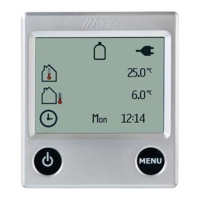
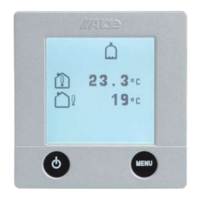
40. Control panel 3010 214.
41a. Circulation pump 12V.
41b. Circulation pump 230V (option).
42. Boiler.
43. 15-pole connection plinth.
44. Battery 12V.
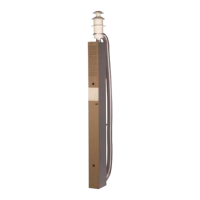
FILLING THE HEATING
SYSTEM
The heating system shall be lled with
a liquid mixture consisting of water and
glycol. Preferably use ready-mixed glycol
of high quality (with inhibitor) intended
for aluminium heating systems. When
using concentrated glycol, the mixture
shall be 60% water and 40% glycol.
If the heating installation is subjected
to lower temperatures than -25°C, the
glycol content should be increased, how-
ever, not more than 50%.
The tank for handling the liquid must be
absolutely clean, and the pipes in the
heating system must be free from con-
tamination. This is to prevent the growth
of bacteria in the system.
Filling the system is carried out in the
expansion tank, either manually or
using Alde’s lling pump (1900 811),
which both lls and bleeds the system.
When lling manually, the liquid must be
poured in slowly until the level is about
1cm above the MIN line on the tank.
Then bleed the system. Pour in some
more if the level has gone down from
bleeding. With a newly lled heating
system, bleed at regular intervals during
the rst days the heating is running.
For other care of the heating system,
see User Instructions.
INSTALLATION CONTROL
The LPG system:
Always check the LPG installation for •
leakage after installation or service. If
there is leakage, localise the leak with
leak spray or soapy water.
NB! A naked ame must not be used
when looking for leaks.
Check that the reduction valve is at the •
right pressure.
In order to increase safety further, it is •
recommended that an Alde leak tester
should be mounted. This should be
mounted close to the pressure reduc-
ing valve, and it is possible to check
quite easily whether the installation
has any leaks or not by pushing a but-
ton.
The heating system:
The heating system shall be checked •
for leaks when the entire system is vis-
ible, i.e., before the xtures have been
mounted. Checks can be made in
two ways. Either leakage control with
0.75 – 1.0 bar over 15 min – pressure
reduction max. 0.05 bar, or by lling
the system with liquid and checking
visually. No leakage of liquid is accept-
able.
Check that all hose clips are mounted •
and correctly located.
Miscellaneous:
Check that the bleeding and drain-•
ing hoses on the expansion tank and
the drain cock for warm water are not
blocked.
Check that ue and hoses are cor-•
rectly in position, and that hose clips
are mounted and fastened.
Check that the boiler’s service report •
has the manufacturing number and
installation date entered in it.
Check that the year on the boiler’s •
data plate has a cross against it (when
mounting or during rst start-up).