AUS
1300 886 649
MIN.
MAX.
max 1/2
When cooking food
that will expand
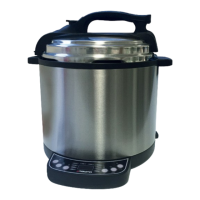
3. Close the lid
3
and rotate it anti-clockwise towards the lock icon (
) on the
handle
11
until the lid locks in place (see Fig. D).
The arrows on the lid and base unit
8
should align. And the pin
26
should not
be visible from the side of the lid when the lid is properly closed.
4. Turn the pressure regulator
2
to the “pressure” position.
The pressure symbol (
)
27
should align with the arrow (see Fig. F).
5. Press the MENU button
18
to select a cooking mode.
When a cooking mode is selected, the corresponding cooking mode indicator
light
21
will be turned on. You will see a number on the display
25
which
stands for the default cooking time in minutes.
Refer to the table below for the default cooking time in each cooking mode:
Cooking mode Default cooking time (min) Adjustable range (min)
Rice 12 5–16
Porridge 5 3–15
Meat 20 10–60
Chicken 15 10–30
Beans/Tenderise 40 20–60
Soup 18 5–45
Fish 10 5–15
Steam 15 1–45
Fast Cooking 8 3–15
Normal Pressure
Cooking
58 20–120
6. If a different cooking time is desired, press the TIMER +
22
or TIMER – button
20
to adjust the cooking time.
Press and hold the TIMER + or TIMER – button to adjust the values quickly.
You will see the new cooking time on the display.
You can only adjust the cooking time within the adjustable range for each
cooking mode (see the table in step 5).
7. Press the START/CANCEL button
24
to start cooking.
You must press the START/CANCEL button within 5 seconds after a cooking mode
has been selected; otherwise, your selection will be cancelled.
 Loading...