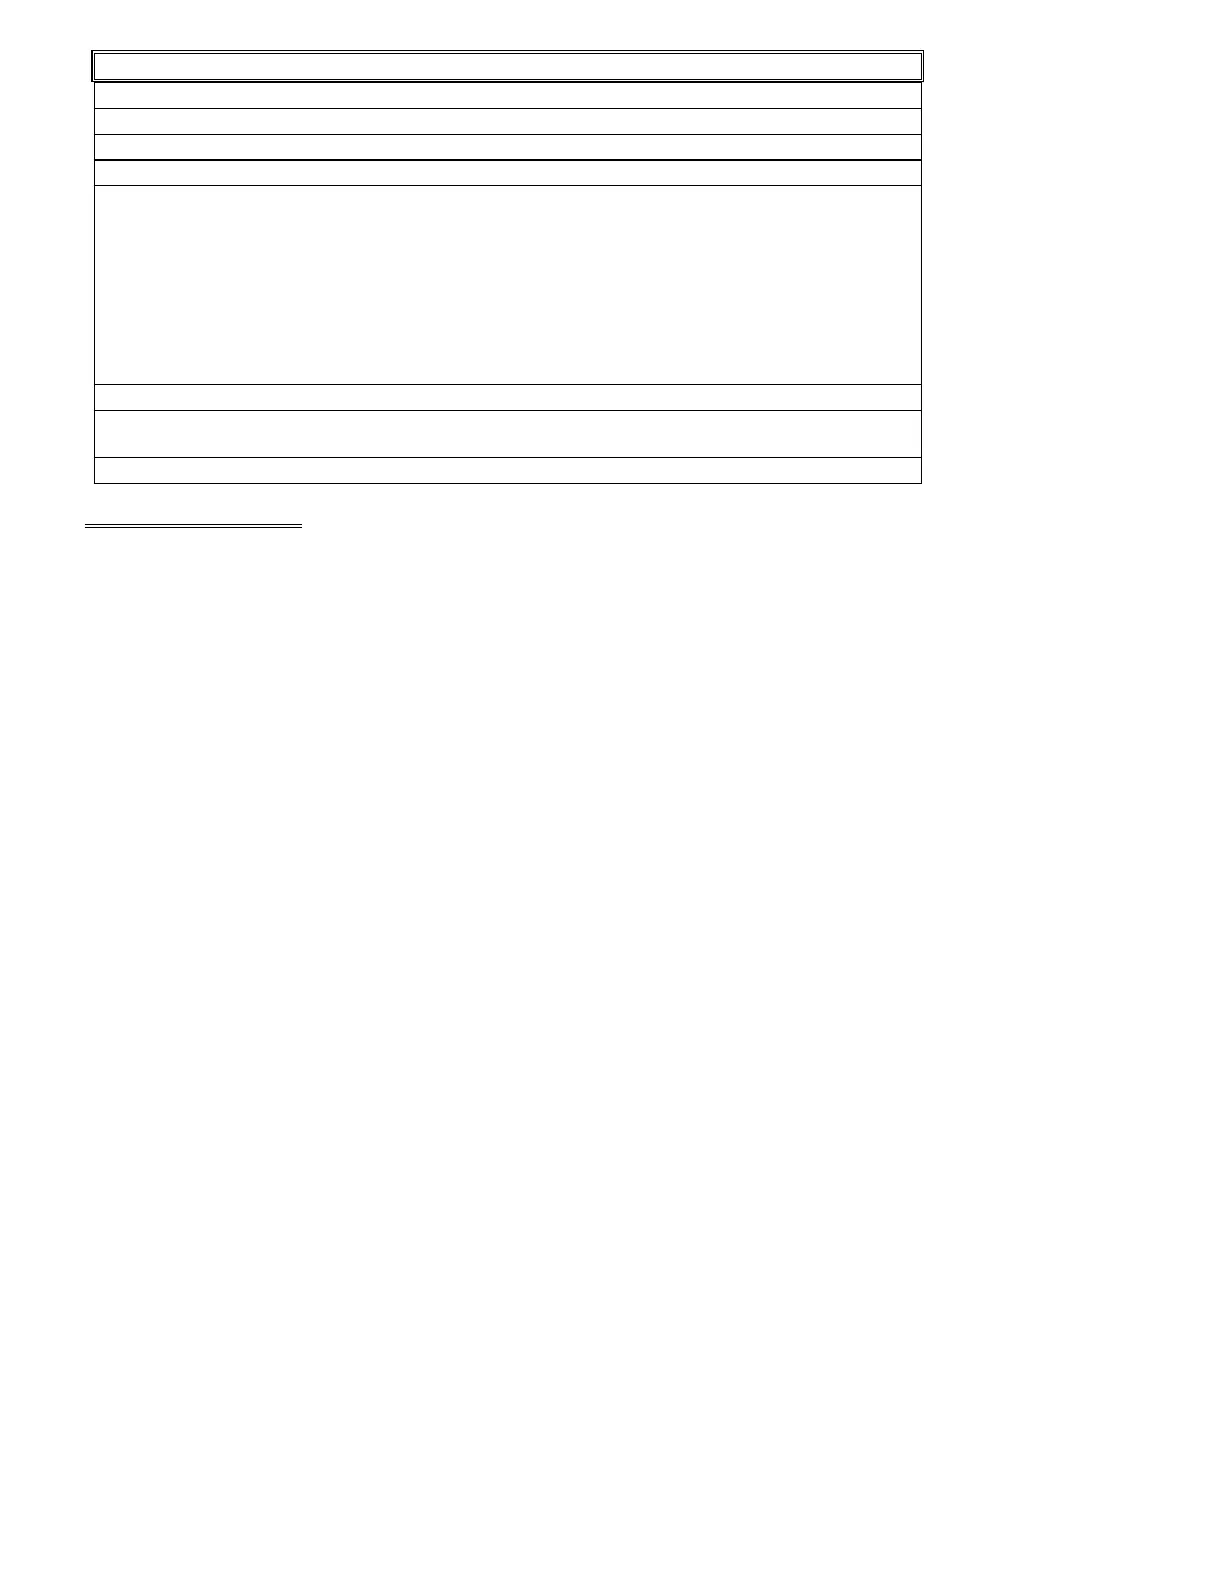
Signal Pin Function
OE 12 SRAM output enable.
CLK 51 - 6MHz clock
RST 50 - RESET
INH 46 - Controls sample and hold circuit timing.
LSTMSB 48 - This signal indicates the last state of the MSB (the sign bit in two's
complement math). Note at this point that there are two different ASICs. One is made by Fujitsu,
the other by AMI. The circuitry will vary depending on which manufacturers ASIC is used. This
signal, in conjunction with either R250, or R57-R59, and the 2N4401 transistor, +C39 is used to
bias the incoming analog signal slightly positive, or negative, depending on the result of the last
DAC cycle (i.e. if the last DAC cycle started off with a negative value, LSTMSB will be 1, causing
the input to the sample and hold circuit to pull slightly positive. On the next cycle, the reverse will
occur). This reduces any audio pop during the attack portion of the input signal, and allows for a
faster response to small signals.
ADC 49 - A/D comparison input.
OVFL 47 - This signal indicates a math overflow condition, and consequently turns on the
clip LED circuit.
WE 11 - DRAM write enable
5.0 TEST PROCEDURES
If possible, user data should be saved (a DataDisk is recommended) prior to any servicing.
This, of course, may not always be possible (i.e. dead power supply, bad reset signal, corrupt data,
etc.). Saving user data may also be accomplished after unit functionality is restored (i.e. power
supply, or reset line, is repaired), and prior to further servicing, and testing. The unit should always
be reinitialized (power unit up while holding "INT PROG" and "STORE" buttons down) after changing
the EPROM, or SRAM. To perform the M3's self diagnostics plug a MIDI cable between MIDI in, and
MIDI out. Power up the unit while holding the "INT PROG", and "CONFIG", buttons down. The unit
will then test ROM, RAM, Button LEDs, MIDI, and the clip LED. In the event of a #1 ROM, #2 RAM,
or #3 MIDI failure, the unit will stop, and the display will show "ERROR #".
 Loading...