4 www.Observint.com
© 2019 Observint Technologies. All rights reserved.
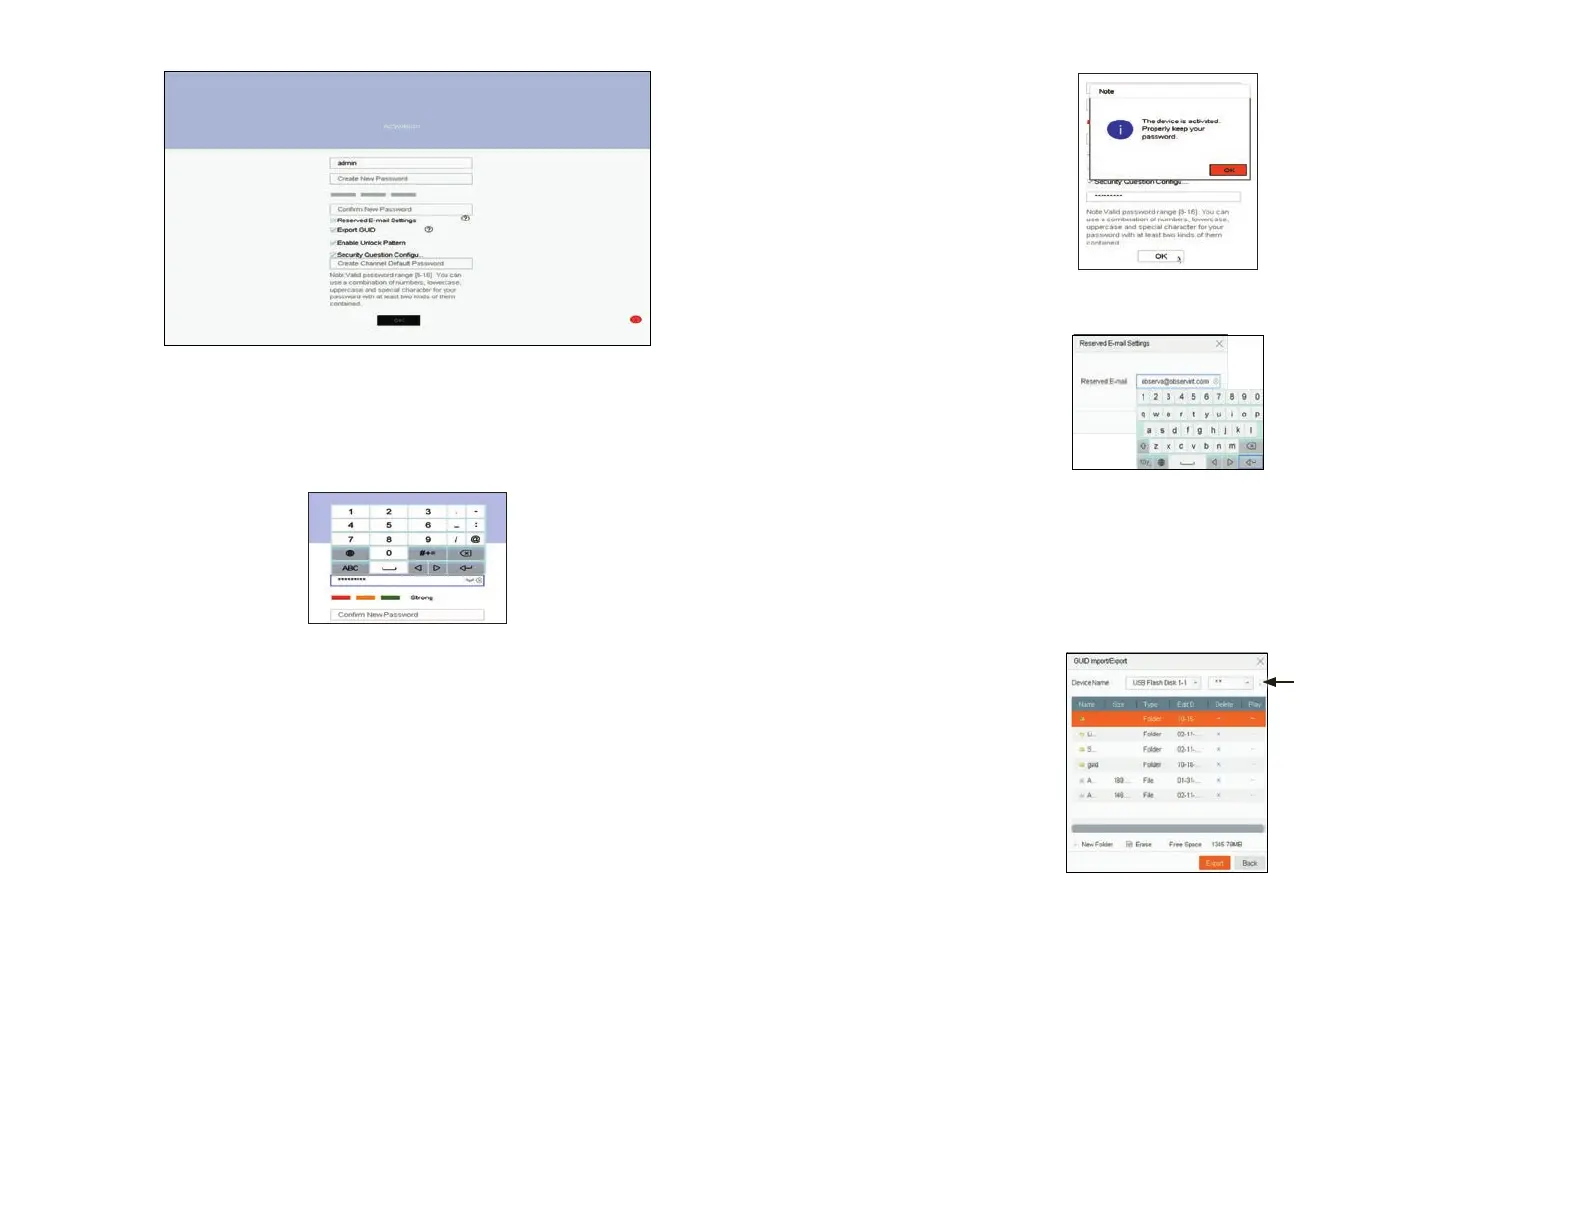
4. If you selected options for Reserve E-mail Setting, enter a valid email address in the pop-up window.
a. Click OK. Your email address will be veried.
b. In the Note window, click OK to continue.
5. If you selected the option in the Activation screen to Export GUID, use the instructions in this step to congure this feature.
a. Plug a ash drive into an unused USB port on the recorder, and then click the Refresh icon (see below).
Refresh
icon
b. In the GUID Import/Export window, open the Device Name drop down list and then select the device where you want to
save the GUID le. If a list of directories appear, click on the directory you prefer (in the window shown above, the rst directory
was selected). Some options will appear at the bottom of the screen to add a New Folder or Erase les.
c. Click Export, and then allow the export operation to complete.
d. After the export operation completes, remove the ash drive from the NVR and store it in a secure location.
6. Security Question Conguration: If you selected the Security Question Conguration option, the Security Question
Conguration menu will open. Do the following:
a. Open the drop down list in the Question 1 eld, and then select the question you want to use.
In the screen above:
a. Click on the Create New Password eld, and then enter a unique password using the pop-up virtual keyboard. Follow the
guidelines in the Note at the bottom of the screen. Always use a password that will produce a “Strong” rating (green indicator
in the status bar).
b. Enter the same New Password in the Conrm New Password eld.
c. Select or deselect the check boxes to:
Reserved E-mail Settings: This feature enables you to reset the admin password of NVR through scanning the QR code.
Export GUID: This feature enables you to create a GUID le and save it to a ash drive for logging back into the NVR if you loose
your admin password.
Enable Unlock Pattern: This option allows you to login by dragging the mouse across a 3 x 3 matrix to quickly login to your
admin account.
Security Question Conguration: If you loose your password, this option enables you to login by responding correctly to
security questions you setup.
d. Enter a password in the Create Channel Default Password eld. This will become the default password of the admin user
of cameras plugged into the internal switch on the backpanel of the NVR. Follow the guidelines in the Note below this eld.
3. Click the OK button to continue. If passwords were setup properly in the Activation menu, an Note window will appear showing the
NVR is now “activated.” Leave the Note window open.