5 www.Observint.com
In the screen above:
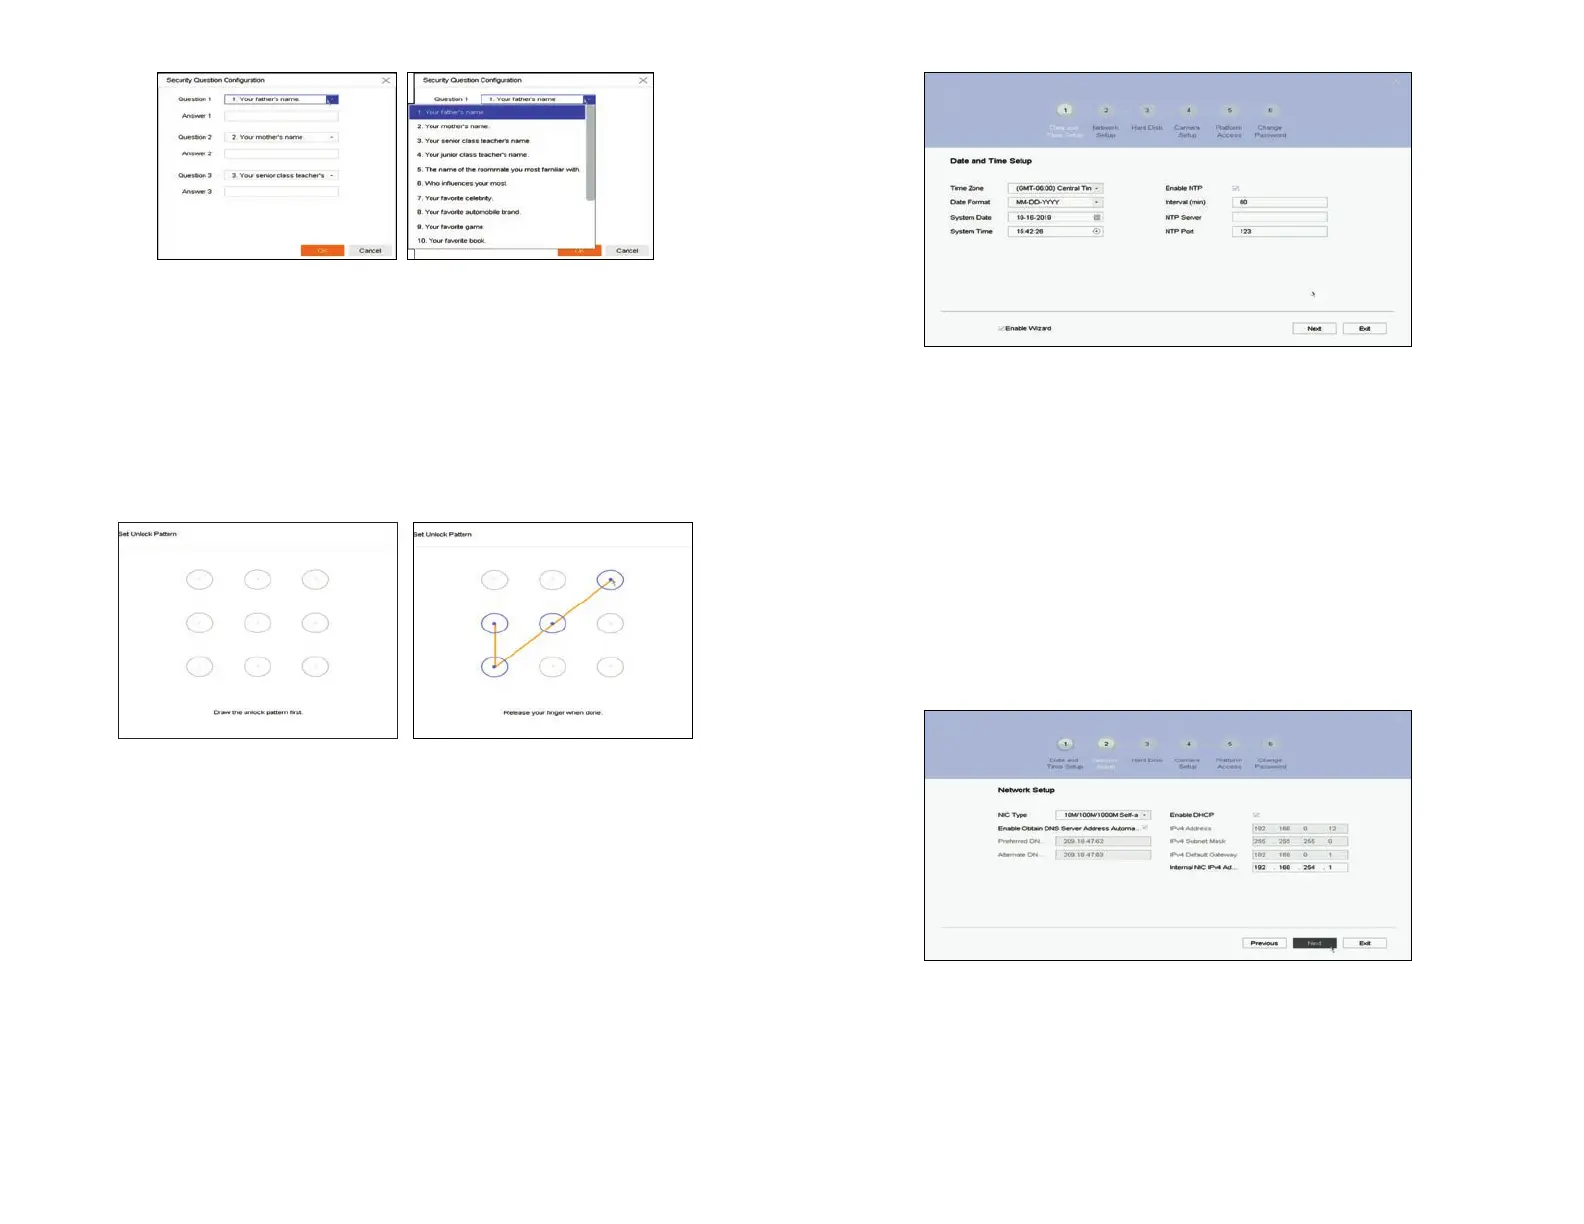
a. Select the local Time Zone and Date Format using the drop down menus.
b. Click the System Date eld, and then click on the current date.
c. Click the System Time eld, and then use the graphical interface for setting the current time. You can also check the Enable
NTP box, and then enter the appropriate parameters in the elds below it to congure the recorder retrieve the precise time
and date information from a timeserver on the Internet.
d. Click Next to save your settings and continue.
2. In the Network Setup Wizard window, click the eld value you want to change, then use the pop-up aid to enter a new value. By
default, the NVR uses DHCP (Dynamic Host Conguration Protocol) to acquire compatible (dynamic, changeable) network settings
from a network DHCP server (usually a router). You can leave the settings on this menu unchanged, but it is recommended that the
NVR have xed (unchanging) network settings, which is convenient for remote logins.
a. In the Wizard 2 Network Setup window, nothing usually has to change in the left column. You can enter your preferred DNS
server addresses (optional, ex. 8.8.8.8 and 8.8.4.4 [Google] DNSs) in the Preferred .. and Alternate DNS elds.
b. The column on the right shows that the Enable DHCP box is checked (by default) and the recorder acquired network settings
from a DHCP server. These settings are compatible with your network and the other devices that share it. To enable xed
network settings, un-check the Enable DHCP box. Then you can either use the IPV4 parameters assigned by the DHCP server,
or enter your preferred IPV4 parameters (IPv4 Address, IPv4 Subnet Mask, IPv4 Default Gateway). NOTE: If you enter IPV4
parameters in the elds above, ensure that they do not conict with other devices in the network.
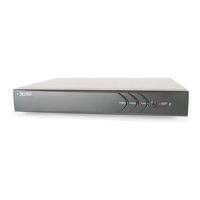
b. Enter your answer to Question 1 in the Answer 1 eld.
c. Repeat the same setup for Question 2 and Question 3.
d. Remember or write down the exact answers you entered, and then save it in a secure location.
e. Click OK to save your conguration, and then click OK again to close the Note window.
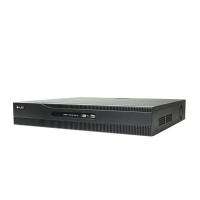
7. If you selected the Enable Unlock Pattern option, do the following:
a. Drag the mouse over four of the dots in the matrix shown below to construct an “Unlock” pattern (see right window below).
b. Repeat the same pattern again to verify your choice. Use this pattern to unlock your recorder when requested.
Step 5. Using the setup Wizard
During startup of a new NVR, the setup Wizard opens by default. Use the Wizard to select the essential conguration settings of your NVR.
You can disable the automatic startup of this feature in the Conguration menu. Refer to the rmware manual for your recorder for more
information.
1. Next, the conguration Wizard Date ad Time Setup menu will open. Since all recordings made by your surveillance system are time
stamped, It is very important that the date and time is set precisely to produce valuable evidence from your recorder.
© 2019 Observint Technologies. All rights reserved.
 Loading...