23
Oil Burner Maintenance
Z01-00095
Burner Gun Removal & Installation
1. Disconnect the fuel line from the burner gun assembly oil line tting. Loosen the other end of the
line and swing line out of the way.
2. Remove the retaining nut.
3. Loosen screw and swing transformer away from burner gun assembly.
4. Carefully remove the burner gun assembly.
1) Check and replace electrode insulators if cracked.
2) Clean burnt buss bars.
3) Clean carbon off electrodes.
4) Clean carbon off oil nozzle (use caution not to scratch face of nozzle or orice).
5) Check for a loose oil nozzle. Note: Check with dealer and/or replace nozzle with proper
nozzle.
5. Gently replace burner gun assembly in air tube. CAUTION: Do not force. Forcing will cause
electrode misalignment.
6. Reinstall the retaining nut.
7. Reinstall the oil line making sure both ends are tight.
8. Partially close transformer. Check if buss bars align and contact the transformer electrodes. If
buss bars do not contact, see Buss bar Alignment.
9. Close transformer, reposition retainer and tighten screw.
Accessories
p/n Y01-00041 Gauge-0- 200 PSI
p/n Z09-00004 Bacharach Smoke Tester
p/n Y01-00090 Allen Wrench 1/8” #8
p/n z01-00092 Fuel Nozzle Changing Wrench
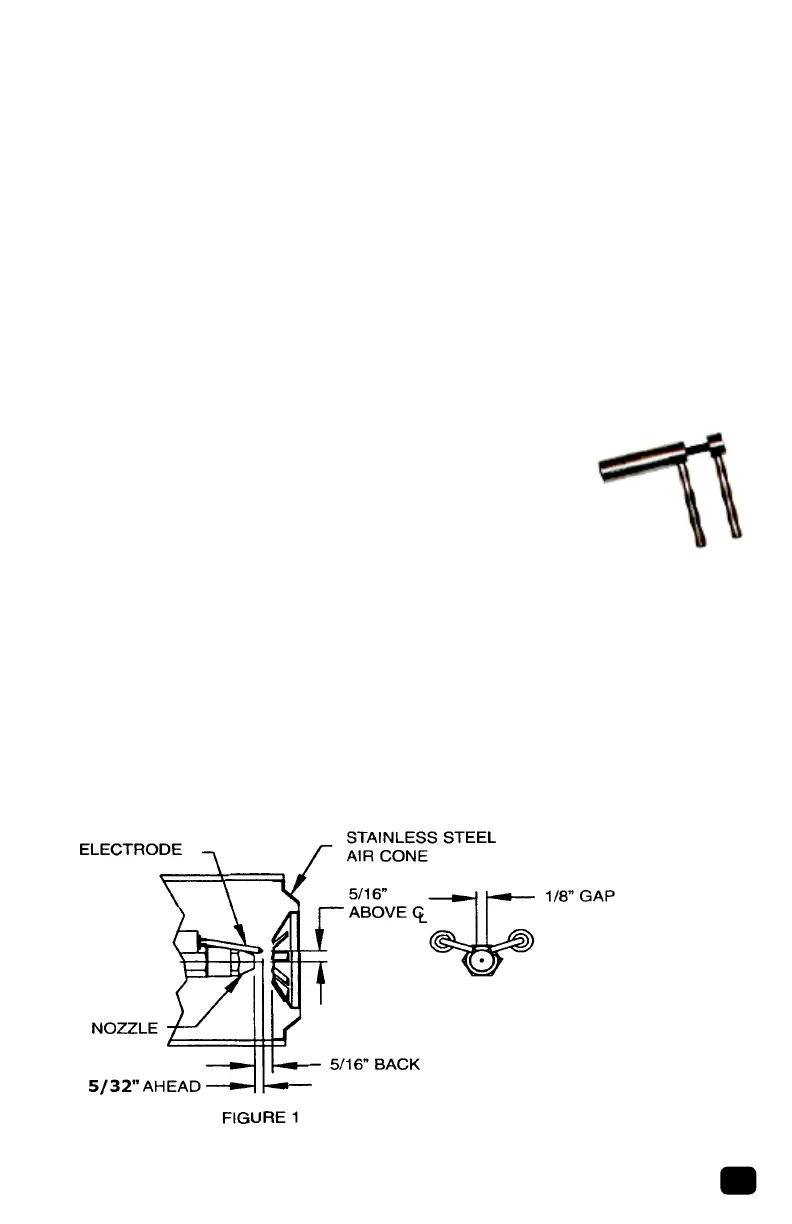
Electrode Assembly Adjustment
1. Loosen screws holding electrode assemblies.
2. Raise electrode tips 5/32” above surface plane or end of oil nozzle.
3. Place each electrode tip 5/16” from center of spray nozzle hole, maintaining previous
measurement.
4. Spread electrode tips to 1/8” gap maintaining previous measurements.
5. When the proper measurements are obtained, gently tighten screws that hold electrode assembly
in place. CAUTION: Do not over tighten, as this will cause the electrode insulator to fail.