PACKING EXTRACTION KIT ................. P/N Z09-00028
COMPLETE TOOL KIT ........................ P/N Z09-00021
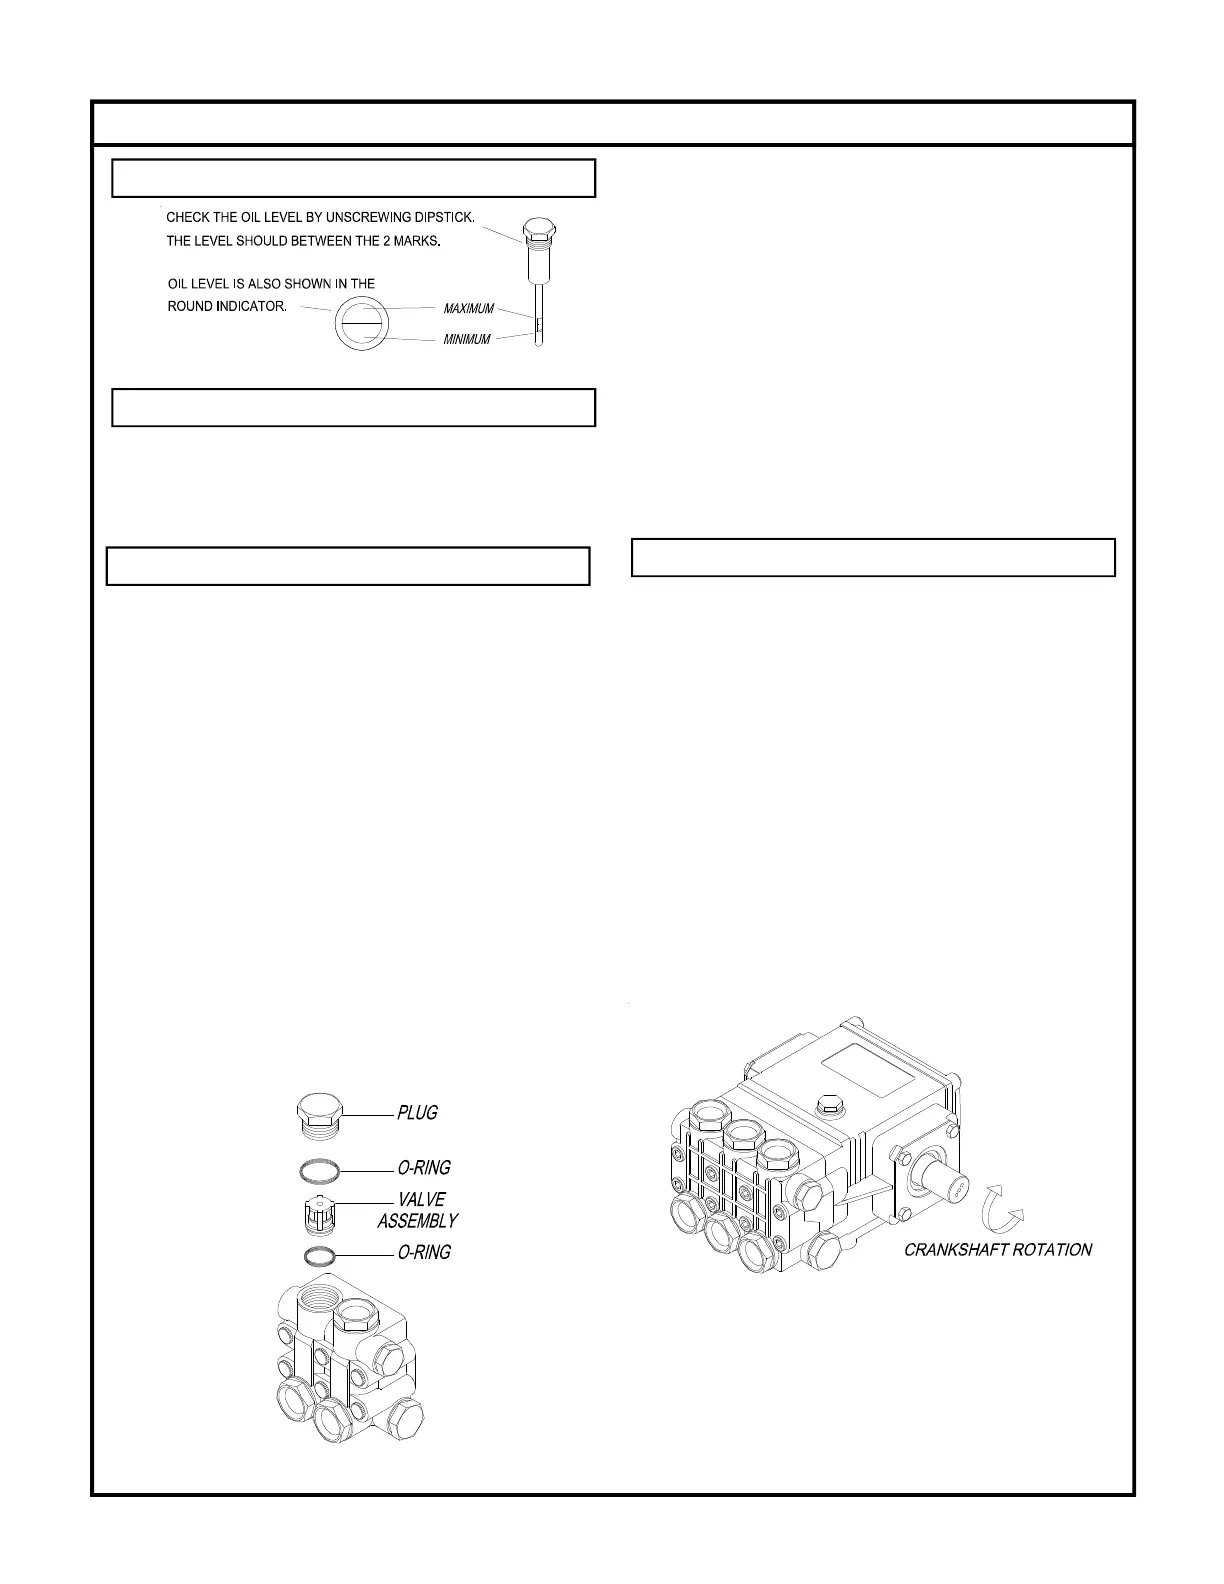
1. Remove the plugs holding the valve assemblies.
2. Remove and discard o-rings from the plugs. Clean plugs
with solvent or soap and water. Allow to dry.
3. Using a needle nose pliers, fingers, or hook shaped
tool, remove the valve assemblies from the head. Re-
move and discard the o-rings from the valve assemblies
and/or head. Examine each valve assembly and dis-
card damaged parts. Refer to the ”PUMP BREAK-
DOWN” for part numbers of any replacement items.
4. Clean any accumulated debris from the valve cavities
and flush with water.
5. Wash the valve assemblies in clean water and rinse.
While still wet, test each valve assembly by sucking on
the valve seat. A properly sealing valve will allow a good
vacuum to be developed and maintained, while a mal-
functioning valve will not. Good valve assemblies should
be set aside for installation in step 7.
6. Malfunctioning valve assemblies must be replaced.
7. Lubricate a new o-ring with the pump crankcase oil and
install into valve cavity in the head. Install a good valve
assembly into the cavity as illustrated.
8. Lubricate a new o-ring with pump crankcase oil and
place on a plug cleaned in step 2 above.
9. Install a plug into the pump head. Tighten plug by hand.
10. Torque the plug to the value indicated in the “TORQUE”
section of the pump specifications.
11. Repeat steps 7 through 11 for remaining valve
assemblies.
1.Remove the cap screws holding the pump head to the
crankcase. A metric tool is required for this step. Be
careful not to lose the washer on each cap screw.
2.Remove the head by rotating the crankshaft and tapping
the head away from the crankcase with a soft mallet.
Keep rear surface of the head parallel to the front sur-
face of the crankcase to prevent binding on the plung-
ers.
3.Once the head is removed, protect the plungers from
damage.
GENERAL PUMP MAINTENANCE
07-23-03 Z08-00063
ECN-02981 Supersedes 11-14-02 Z08-00063
OIL LEVEL
6
7
2
6
3
1
TOOL KITS
VALVE SERVICE
HEAD REMOVAL
P1