9
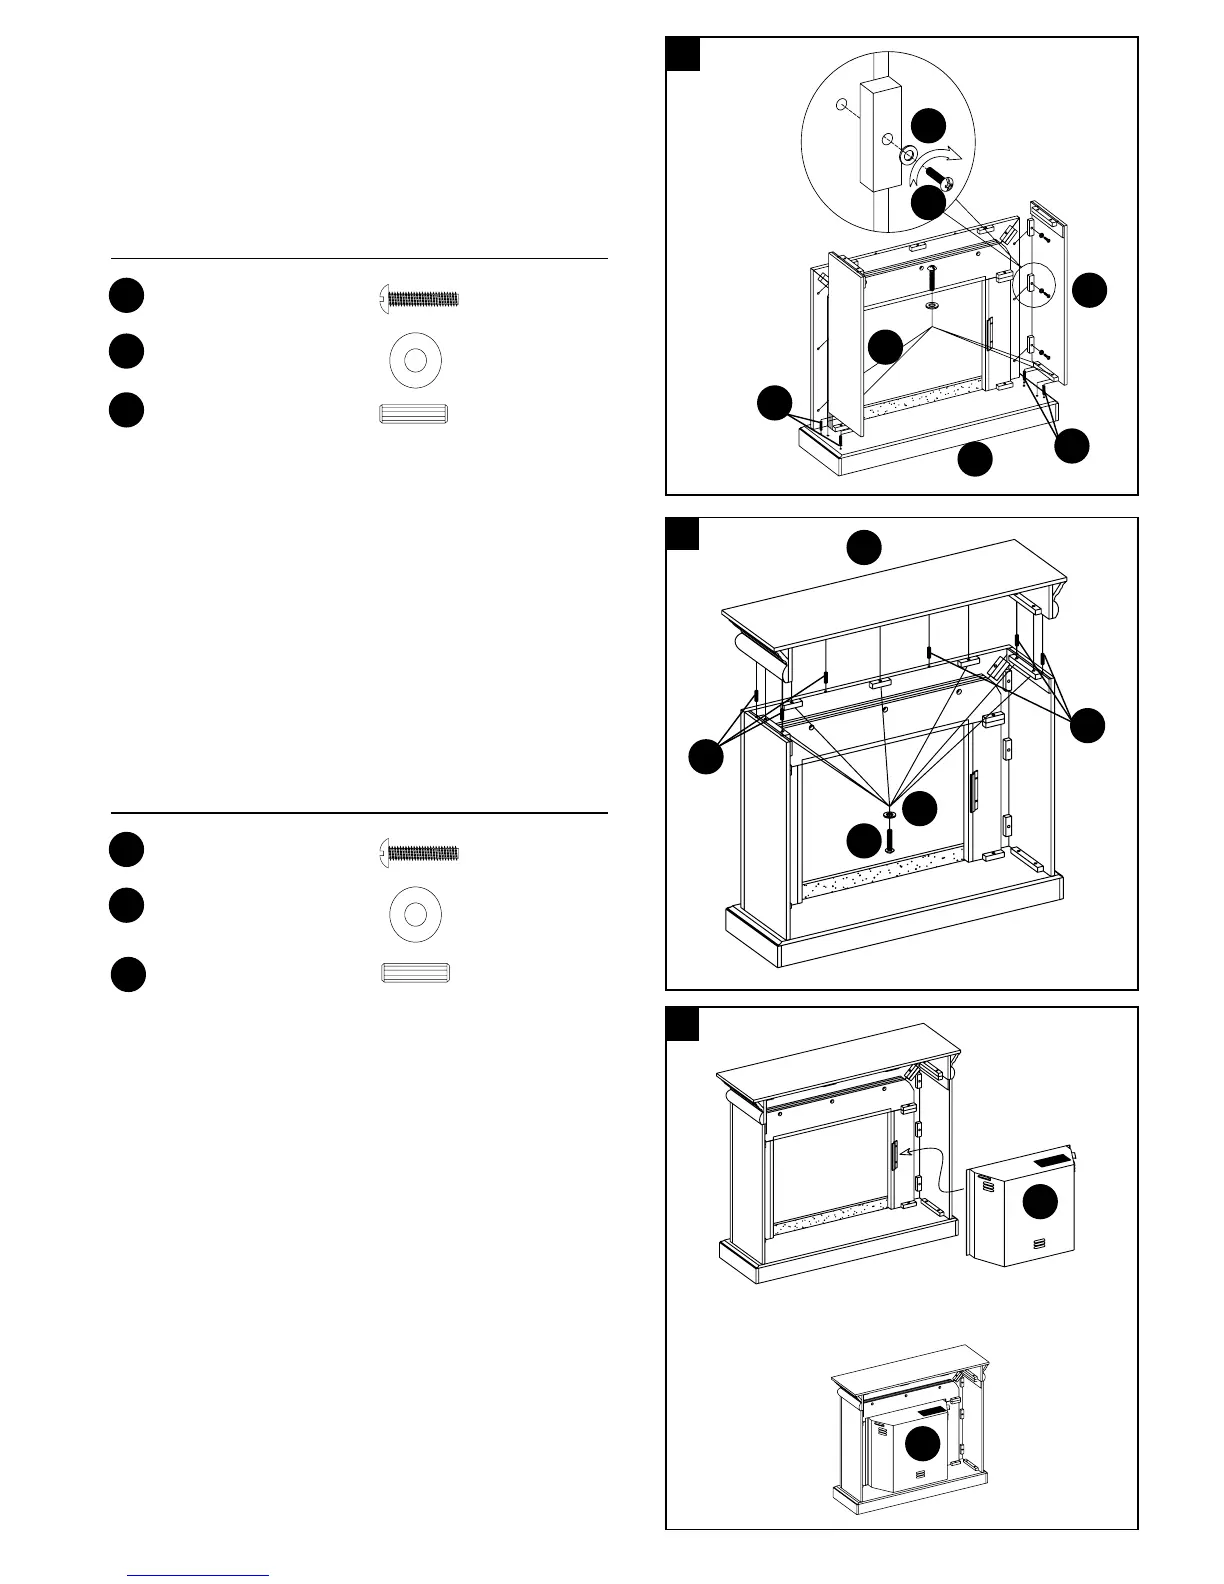
4. Insert one wood dowel (CC) into each of the
pre-drilled holes on hearth/base (A). Attach left
side panel (F) and right side panel (G) to the
hearth-base (A). Insert the bolts (AA) and
washers (BB) through the pre-drilled holes in the
mounting blocks to secure the assembly.
HAND TIGHTEN ONLY.
F
G
A
H
Hardware Used
Hardware Used
CC
CC
CC
AA
AA
AA
AA
BB
BB
BB
BB
CC
CC
Wood Dowel
Bolt
Bolt
Washer
Washer
x 4
x 10
x 7
x 10
x 7
4
5
5. Insert one wood dowel (CC) into each of the pre-
drilled holes on the top edges of the assembly from
step 4. Set mantel/top (H) nished-side up on top
of the completed assembly. From the inside, secure
mantel/top (G) using bolts (AA) and washers (BB)
through the pre-drilled holes in the mounting blocks.
HAND TIGHTEN ONLY.
Using Phillips screwdriver (not included), tighten all
bolts (AA). Alternate top and bottom and left and
right.
CC
Wood Dowel
x 6
6. Remove the two mounting brackets attached to
the back of the left front panel (B) and right front
panel (C) by removing the two screws on each
mounting bracket. Set aside.
PLEASE READ ALL “ELECTRIC FIREPLACE
INSERT” INSTRUCTIONS PRIOR TO INSTALLING
THE INSERT (I) INTO THE COMPLETED
FIREPLACE MANTEL. INSTALL THE INSERT (I)
INTO THE FIREPLACE CLOSE TO ITS FINAL
POSITION.
7. Lift insert (I) carefully into the back of the unit and
center in the opening. Do not drag insert (I) as it
may scratch your unit. Re-install the mounting
brackets to hold insert (I) ush against the inside
of the mantel front panel.
NOTE: Move your completed unit only short distances.
Move completed unit with great care. It takes two
people to move completed unit into its nal position.
Completed
Unit
6
I
I





 To Next Page