507404-02 Page 15 of 80Issue 1448
Joint Cementing Procedure
All cementing of joints should be done according to the
specications outlined in ASTM D 2855.
1. Measure and cut vent pipe to desired length.
2. Debur and chamfer end of pipe, removing any ridges
or rough edges. If end is not chamfered, edge of pipe
may remove cement from tting socket and result in a
leaking joint.
3. Clean and dry surfaces to be joined.
4. Test t joint and mark depth of tting on outside of pipe.
5. Uniformly apply a liberal coat of PVC primer for PVC
or use a clean dry cloth for ABS to clean inside socket
surface of tting and male end of pipe to depth of tting
socket.
NOTE: Time is critical at this stage. Do not allow primer
to dry before applying cement.
DANGER OF EXPLOSION!
Fumes from PVC glue may ignite during system check.
Allow fumes to dissipate for at least 5 minutes before
placing unit into operation.
DANGER
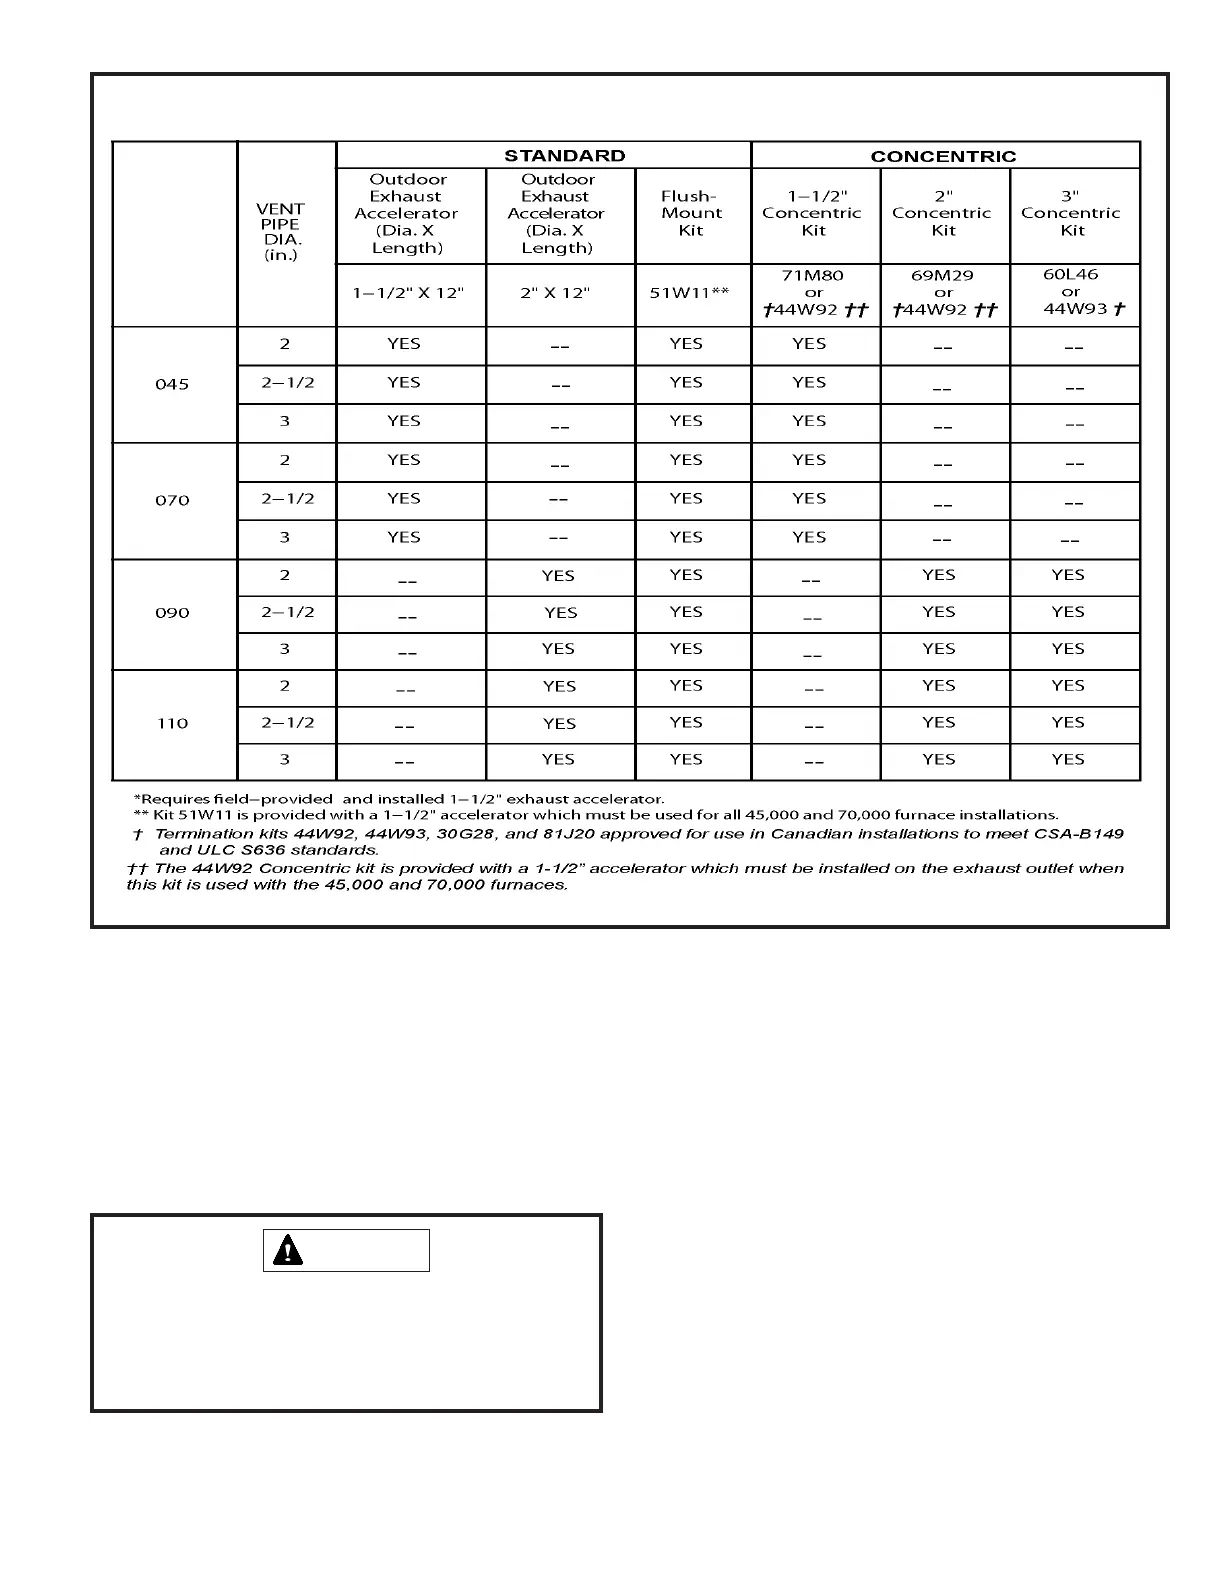
Outdoor Termination Kits Usage
A96DF2V