18
Series AE1L, AE.E, AE.N, AE.H, AE.V, AED1E, AED2N
Design ID, ZD
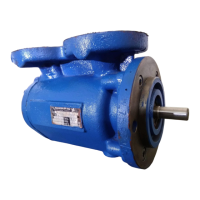
Figure 10: Pressing in the joint collar
! Slide the joint clamps (306), the joint collar (308)
and the joint collar (304) onto the shaft of the joint
shaft (307).
! Slide the joint shaft (307) into the head of the rotor
(401).
! Slide the joint bolt (301) into the joint bush (302)
and completely drive in the sleeves for the joint
bolts (303).
! Emerize the joint collar (304) until smooth at the
outer diameter if required and pull onto the head
of the rotor (401).
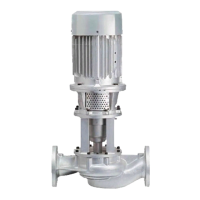
! After pulling on the joint collar (304), secure this
against axial shifting on the head of the rotor
(401).
To do so, drive the end of the
joint collar (304) with a puncher
blow into the grove at the head of the rotor (401)
(see figure 11).
Figure 11: Securing the joint collar
! Pull on the joint collar (308) with a screwdriver, lift
on top with a screwdriver, guide the spray pipe of
the oil bottle underneath the collar and fill the joint
cavity with ALLWEILER special joint oil type B or
oil ET 1510 ISO 460 by Tribol Lubricants GmbH,
Mönchengladbach. For application in the food in-
dustry with ALLWEILER special joint oil type BL or
oil 1810/460 by Tribol Lubricants GmbH,
Mönchengladbach. For the filling quantity, see the
table in Chapter 7.1.2.6.
! Check, whether the bent loop of the joint clamp
(306) is attached to the joint clamp lock. If not,
press down with a common pair of flat-nosed pli-
ers (see figure 12).
Figure 12: Press down joint clamp loop onto joint
clamp lock
! Insert the joint clamps (306) into the circumferen-
tial grooves of the joint collar (308) and tighten.
Note: Use the following clamping tools for this
purpose:
For pump sizes smaller/equal
AE1L 751, AE1N 200, AE2N 200, AE4N 200,
AED2N 300, AE1E 380, AE2E 380, AED1E 560
AE.H 100, AE.V 50 the clamping tool with the
name PoK-It II.
For pump sizes larger/equal
AE1L 1001, AE1N 380, AE2N 380, AE4N 380,
AED2N 560, AE1E 750, AE2E 750, AED1E 1200,
AE.H 200, AE.V 100 the clamping tool with the
name Band-It together with the adapter J050.
You can purchase the above named tools from
us.
When clamping the joint clamps, proceed as fol-
lows:
• Clamping with clamping tool Band-It and
adapter J050.
! Insert the band end of the joint clamp (306) into
the clamping tool with adapter up to the joint
clamp lock.
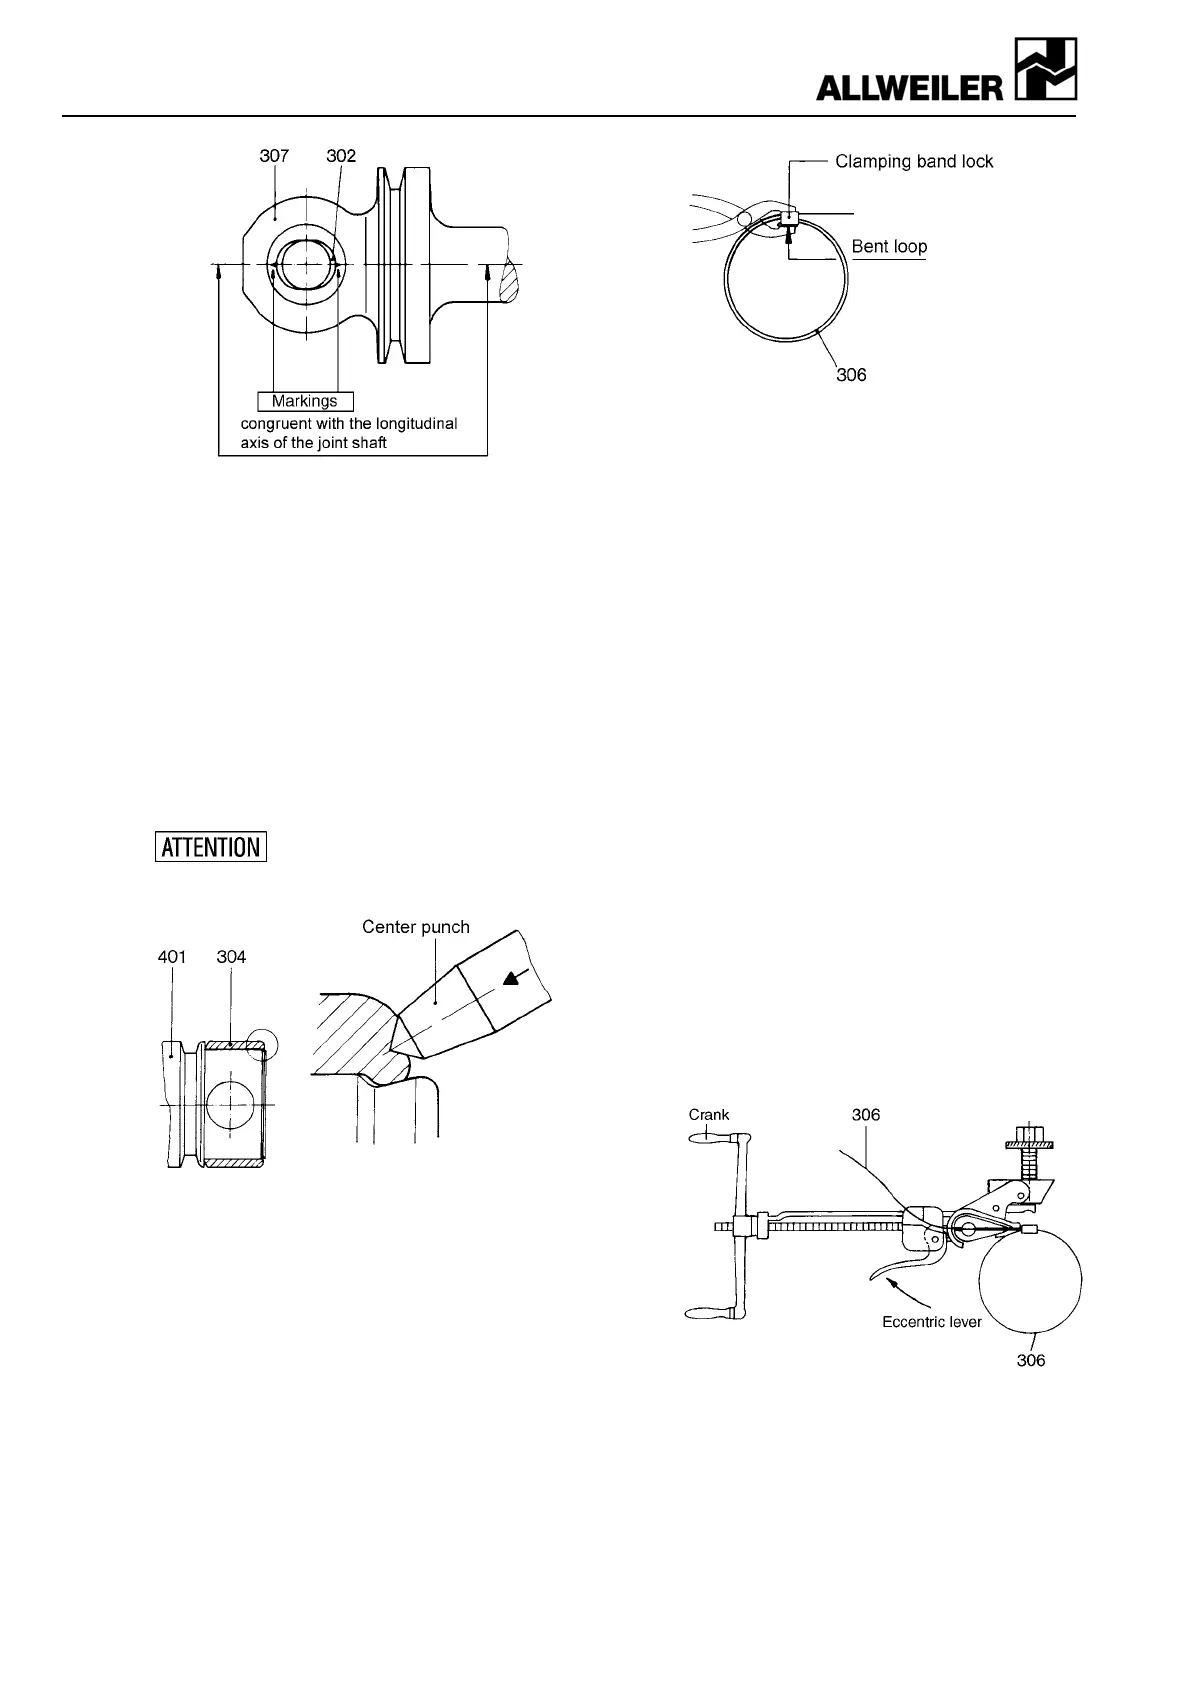
! Hold down the clamp end with the eccentric lever
of the clamping tool and tighten the joint clamp
(306) by turning the crank (figure 13).
Figure 13: Tighten the joint clamp with the clamping
tool Band-It and adapter J050
Note: The right tightening of the joint clamps (306) is
portrayed in figure 14.
 Loading...