Pro, Solo
INSTRUCTION MANUAL Page 12
SHAW-ALMEX INDUSTRIES LIMITED 49908-042 March 2012
• On small presses, lift the platen and carefully remove platen adapter from the grommet. Remove the platen and
wires.
• On larger presses there is a label showing how the platen must be rotated before it can be removed. To remove
the platen in this case, the platen cover must be removed and the adapter bolts removed from the platen.
3. Remove the screws from the platen mounting plate and disassemble the platen.
4. Remove the element.
5. Using the old element as a pattern, punch the holes through the new element and carefully trim the edges to fit
the platen.
6. Replace the new element, feeding the wires through the adapter.
7. Assemble the platen. Do not distort the platen mounting plate when tightening the assembly screws.
8. Install platen to frame by carefully routing wires through the grommet and into the frame.
9. Fit the rubber sleeve on the grommet onto the adapter.
10. Connect the element wires to the temperature control panel or to the electrical connector insert and install the
insert to the hood.
6.4. Replacing the Temperature Sensor (RTD Sensor)
1. Remove the temperature control panel from the frame or the electrical connector insert from the housing and
disconnect the heating element and temperature sensor wires.
2. Remove the platen cover.
3. Remove the adapter bolts from the platen and separate the adapter from the platen enough to expose the wires
and pull the wires through. Carefully remove the adapter from the grommet.
4. Remove the RTD sensor from the platen. If the sensor does not come easily, make a ¼” (6mm) hook on the end
of heavy wire and slide it down the channel to the bottom of the sensor (approximately 8” or 200 mm) and pull.
5. Insert the new sensor in the platen approximately 8” (200 mm). Trim the wires on the new sensor to
approximately the same length as the element wires and strip the insulation back ¼” (6 mm).
6. Route element and sensor wires through the adapter and fasten the adapter to the platen.
7. Install platen to frame by carefully routing wires into frame and fitting the grommet to the frame.
8. Fit the rubber sleeve on the grommet onto the adapter.
9. Connect the element wires to the temperature control panel or to the electrical connector insert and install the
insert to the hood.
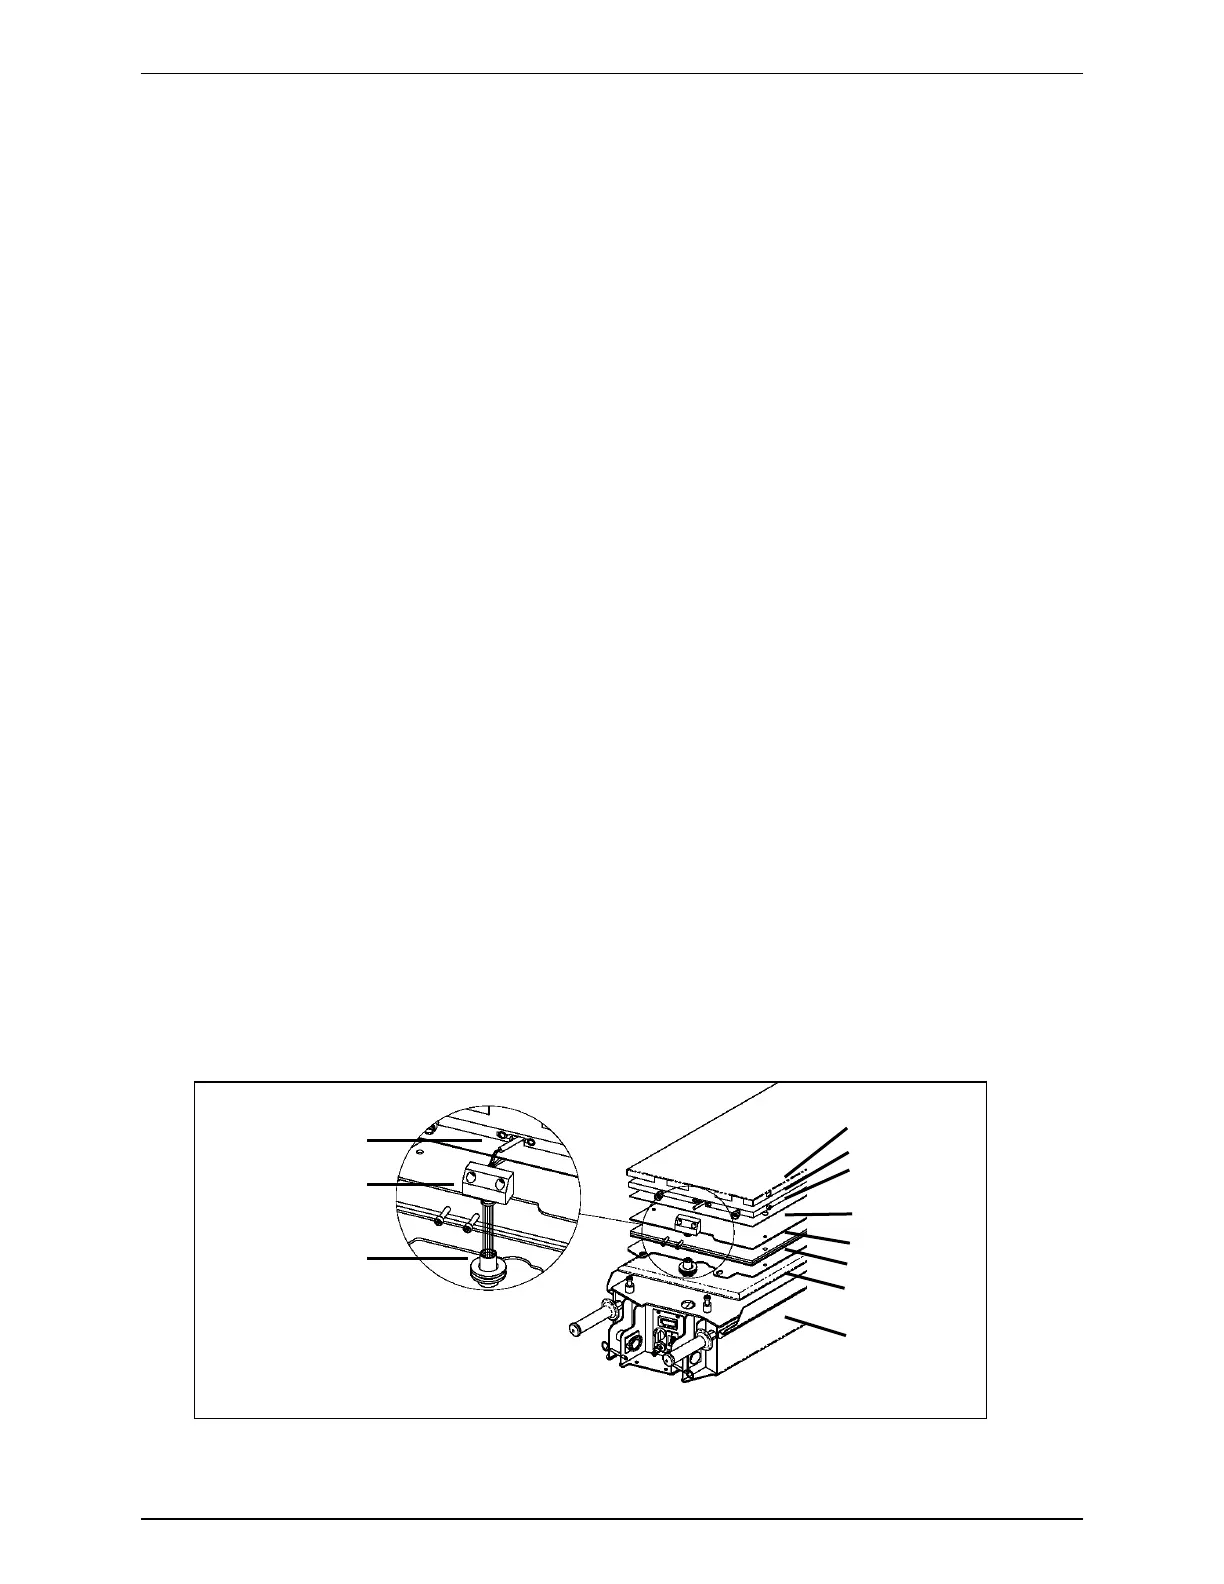
Platen cover
Platen
Element
Element cover
Insulation
Mounting plate
Pressure bag
Frame
Sensor
Adapter
Grommet
Figure 8