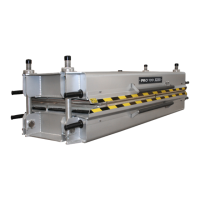
Pro, Solo
INSTRUCTION MANUAL Page 13
SHAW-ALMEX INDUSTRIES LIMITED 49908-042 March 2012
7. TROUBLESHOOTING
7.1. Vulcanizer Not Heating
Refer to Temperature Control trouble shooting instruction first. If the fault is not found, use the following:
FAULT CORRECTION
1. Loose cable connection. 1. Ensure that cable connections are clamped together
properly.
2. Loose connection in cable or
platen connector.
2. Disconnect power supply, remove electrical connector
insert from housing and check all connections.
3. Faulty RTD temperature
sensor.
3. Measure the resistance between pins 4-5 and 4-6 on the
platen electrical receptacle or between the colored wire
and the other wires on the sensor. Depending on the platen
temperature, the resistance should be between 100-170
Ohms. See figure 6.
4. Faulty heating element. 4. Measure the resistance between platen electrical
receptacle pins 1-3 on single phase and 1, 2, 3 on three
phase. Compare the reading with the value in your Record
of Purchase, Element Resistance, Coils Connected. If the
values are not close and the connections are good, the
element must be replaced.
7.2. Vulcanizer Over Heating
Refer to Temperature Control trouble shooting instruction first. If the fault is not found, use the following:
FAULT CORRECTION
1. Faulty RTD temperature
sensor.
1. Measure the resistance between pins 4-5 and 4-6 on the
platen electrical receptacle (Figure 6). The resistance should
be between 100-170 Ohms.
7.3. No Pressure or Loss of Pressure
FAULT CORRECTION
1. Blocked air passage.
1. On Pro models, remove air control assembly from frame
and pull hose all the way out to make sure there are no kinks.
On Pro and Solo models, remove bag hose from air control
assembly. Using no more than 5 psi (0.35 kg/cm
2
), blow air
directly into the air control assembly and into the air bag to
find the blockage. Clean or replace parts to remove blockage.
2. Broken air line or leaking
valves or fittings.
2. Remove air control assembly from frame and check for
leaks by applying air pressure (maximum 5 psi, 0.35 kg/cm
2
)
and covering the valves and fittings with soapy water.
Bubbling will indicate leaks. Tighten fittings, clean or replace
leaking valves. Note: do not disassemble the safety relief
valve. If it is leaking it must be replaced.
3. Leaking pressure bag. 3. Remove the pressure bag and inspect for leaks. If no leak
is evident, inflate the bag (maximum 5 p.s.i./ 0.35 kg/ cm
2
) and
spray soapy water over the bag. Bubbling will indicate
escaping air and the bag should be replaced.