the ends for making a good connection to the insert. Tighten the wires in the electrical connector insert.
Install the insert in the housing. See 6.2 Removing and Replacing the Platen Receptacle Insert.
6. Put heat sink compound on the new probe and install in the platen (approximately 8” or 200 mm).
7. The temperature controller will have to be calibrated after replacing the temperature sensor. Refer to the
Temperature Control Panel manual.
6.4. Replacing the Insulation
1. Turn the platen so the sheet metal insulation cover is facing up.
2. Remove the screws from the platen insulation cover (including the
ground strap screw on platens manufactured after 15Jun2017) and
lift the cover and insulation from the platen. The aluminum
element cover is now exposed.
3. Replace the insulation. Use the old insulation to mark the holes for
the new insulation.
4. Place the new insulation and cover on the element cover and
replace the assembly and ground strap screws using some dry
lubricant on the threads. Replace any damaged screws with screws
of the same length.
6.5. Removing and Replacing the Heating Element
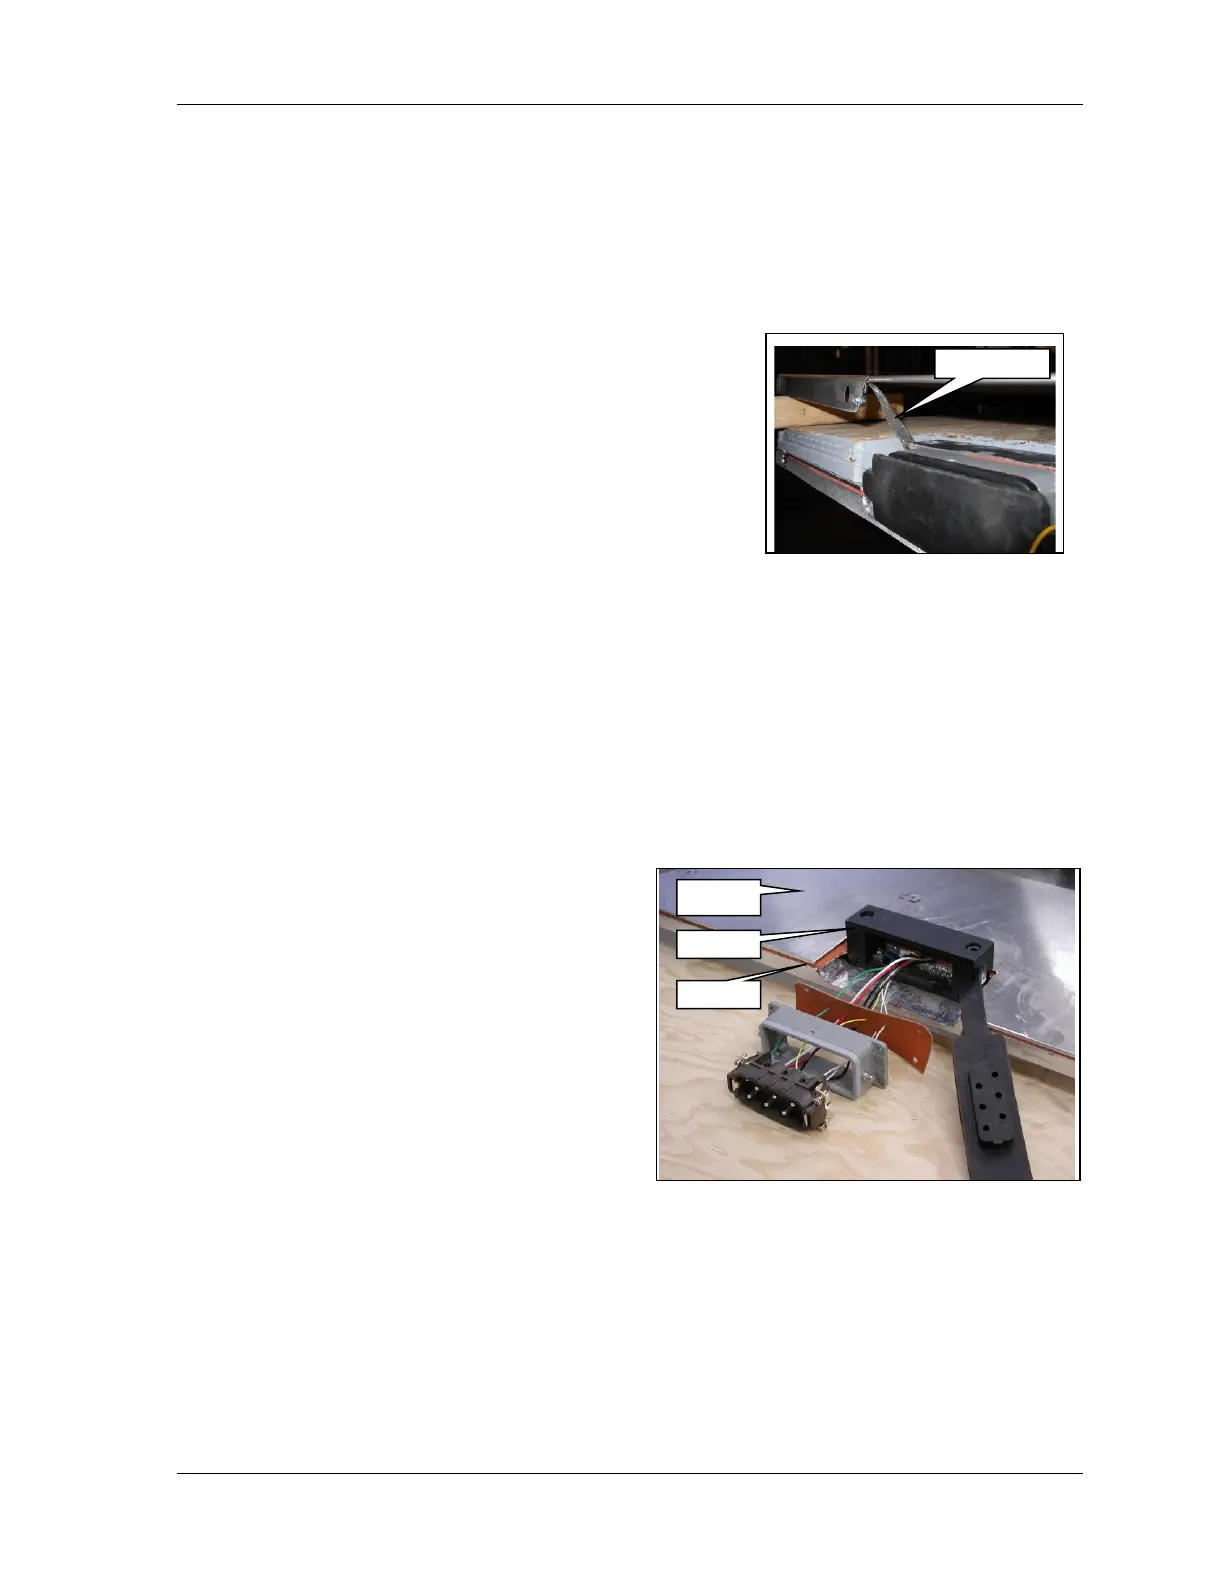
1. Turn the platen so the sheet metal insulation cover is facing up.
2. Remove the screws from the platen insulation cover and lift the cover and insulation from the platen. The
aluminum element cover is now exposed. See Figure 17 Heating Element.
3. Remove the screws from the element cover.
4. Carefully separate the element cover from the element and the element from the platen. If the element
rubber is adhering to the aluminum, use a putty knife to separate the two materials.
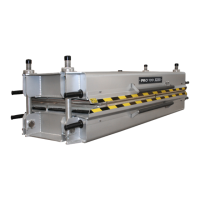
5. Remove the electrical connector insert from the
housing and, noting the connection sequence,
disconnect the element wires from the insert. See 6.2
Removing and Replacing the Platen Receptacle
Insert.
6. Remove the old element. If the element rubber is
adhering to the aluminum, use a putty knife to
separate the two materials.
7. Fit the new element to the platen and mark the holes
for the platen assembly screws. If trimming is
required, remove an equal amount of material from
each side of the element to center it correctly.
8. Punch the holes in the element with a leather punch
or similar tool.
9. Lay the new element on the platen and lead the
wires through the adapter.
10. Lay the aluminum element cover on the element and replace screws using some dry lubricant on the threads.
Replace any damaged screws with screws of the same length.
Important: Great care must be taken to keep the element, platen and element cover clean. Sharp edges on the
aluminum or metal chips will damage the heating element.
11. Cut the element wires approximately 8 inches (200 mm) long. Remove ¼ inch (6 mm) insulation from the
wires.
12. Insert the element wires through the appropriate holes in the gasket so they align with terminals 1, 2 and 3
in the insert. Lead the wires through the housing and tighten the wires in the electrical connector insert in