15
Alpha Pro Tec - General Boiler Information
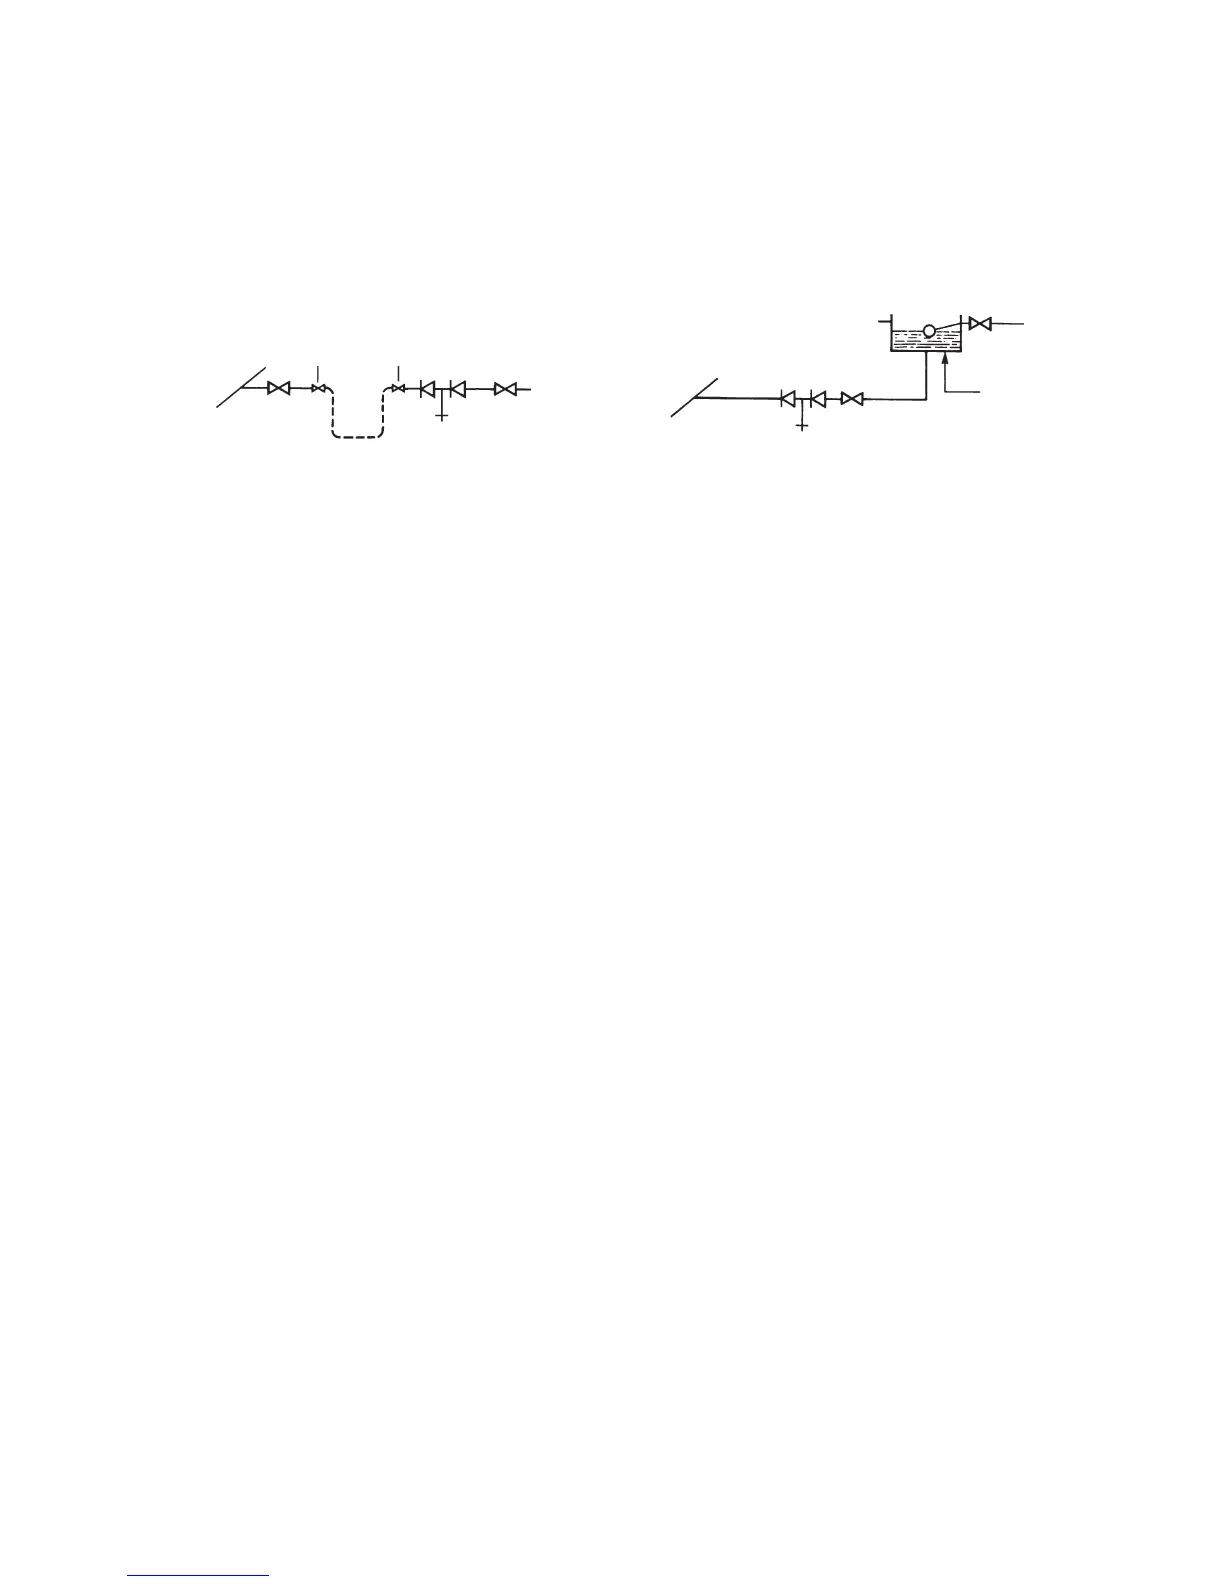
Filling of the system must be carried out in a manner approved by the local Water Undertaking. Where allowed, the system
may be lled via a temporary connection as shown in Fig. 3.4. After lling, always disconnect the exible hose of the lling loop.
All ttings used in the system must be able to withstand pressures up to 4 bar.
Drain taps (to BS 2879) must be used to allow the system to be completely drained.
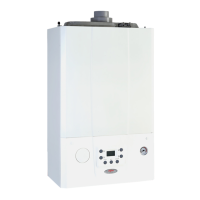
A pressurisation unit may also be used to maintain the system level. Refer to the instructions supplied with the unit for
correct installation.
Fig. 3.4 Fig. 3.5
Filling loop
temporarily connected
Heating circuit
return
Mains
water
supply
Stop
valve
Hose
unions
Stop
valve
Double check
valve assembly
Test cock
Feed cistern to be
located above highest
point in the system
Mains
water
supply
Stop
valve
Test cock
Double check
valve assembly
Overflow
Heating circuit
return
3.10 FLUSHING THE HEATING SYSTEM
It is essential that the central heating system is thoroughly cleaned and ushed when tting an Alpha Pro Tec boiler. Failure
to do so will invalidate the warranty. If this is difcult because the system is old/dirty refer to Section 3.8, Fig. 3.3 gives
consideration to using a barrier heat exchanger.
The primary condensing heat exchanger is constructed in stainless steel and therefore is compatible with most materials
used in a heating system.
A cleaning agent and inhibitor should be used, they must be applied in accordance with their manufacturers instructions.
Only products from Fernox and Sentinel are acceptable for use with the Alpha Pro Tec boilers. Further information can be
obtained from Fernox (Tel: 0179 9521133) or Sentinel (Tel: 0151 4209563).
The system should be ushed in accordance with BS 7593 and BS 5449. The following procedures are recommended:
1. Installing onto a new system:-
a. Fill the system, vent at high points, at pump and radiators.
b. Check for leaks.
c. Rapidly drain the system.
d. If required, chemically clean the system as instructed by the recommended cleaner manufacturer.
Note: Ensure that the system is ushed to remove any remains of the cleaner.
e. If chemical cleaner is not used to clean the system:-
i) Rell the system.
ii) Switch on the boiler and allow the system to heat up to the normal operating temperature.
iii) Rapidly drain the system while the water is still hot.
iv) Rell the system.
f. As required, add the recommended inhibitor to the system as instructed by the inhibitor manufacturer.
g. Recheck for leaks.
2. Installing onto an existing system, clean the system before tting the new boiler:-
a. If the old boiler is still working:-
i) Switch on the boiler and allow the system to heat up to the normal operating temperature.
ii) Rapidly drain the system while the water is still hot.
iii) Rell and chemically clean the system as instructed by the recommended cleaner manufacturer.
iv) Ensure the system is ushed to remove any remains of the cleaner.
v) Fit the new boiler.
b. If the old boiler is not working:-
i) Rapidly drain the system.
ii) Remove the old boiler.
iii) Flush the system through.
iv) Fit the new boiler.
v) Rell and chemically clean the system as instructed by the recommended cleaner manufacturer.
vi) Ensure the system is ushed to remove any remains of the cleaner.
c. As required, add the recommended inhibitor to the system as instructed by the inhibitor manufacturer.
d. Check for leaks.