For Hot Tub litres, subtract dry weight from lled weight.
55cm
72cm 57cm
70cm
66cm
53cm
220cm
286cm
58cm
28cm
40cm
8
Steps
The steps should sit on the same level surface as the Hot Tub for safe access. Consider extra
foundation to suit.
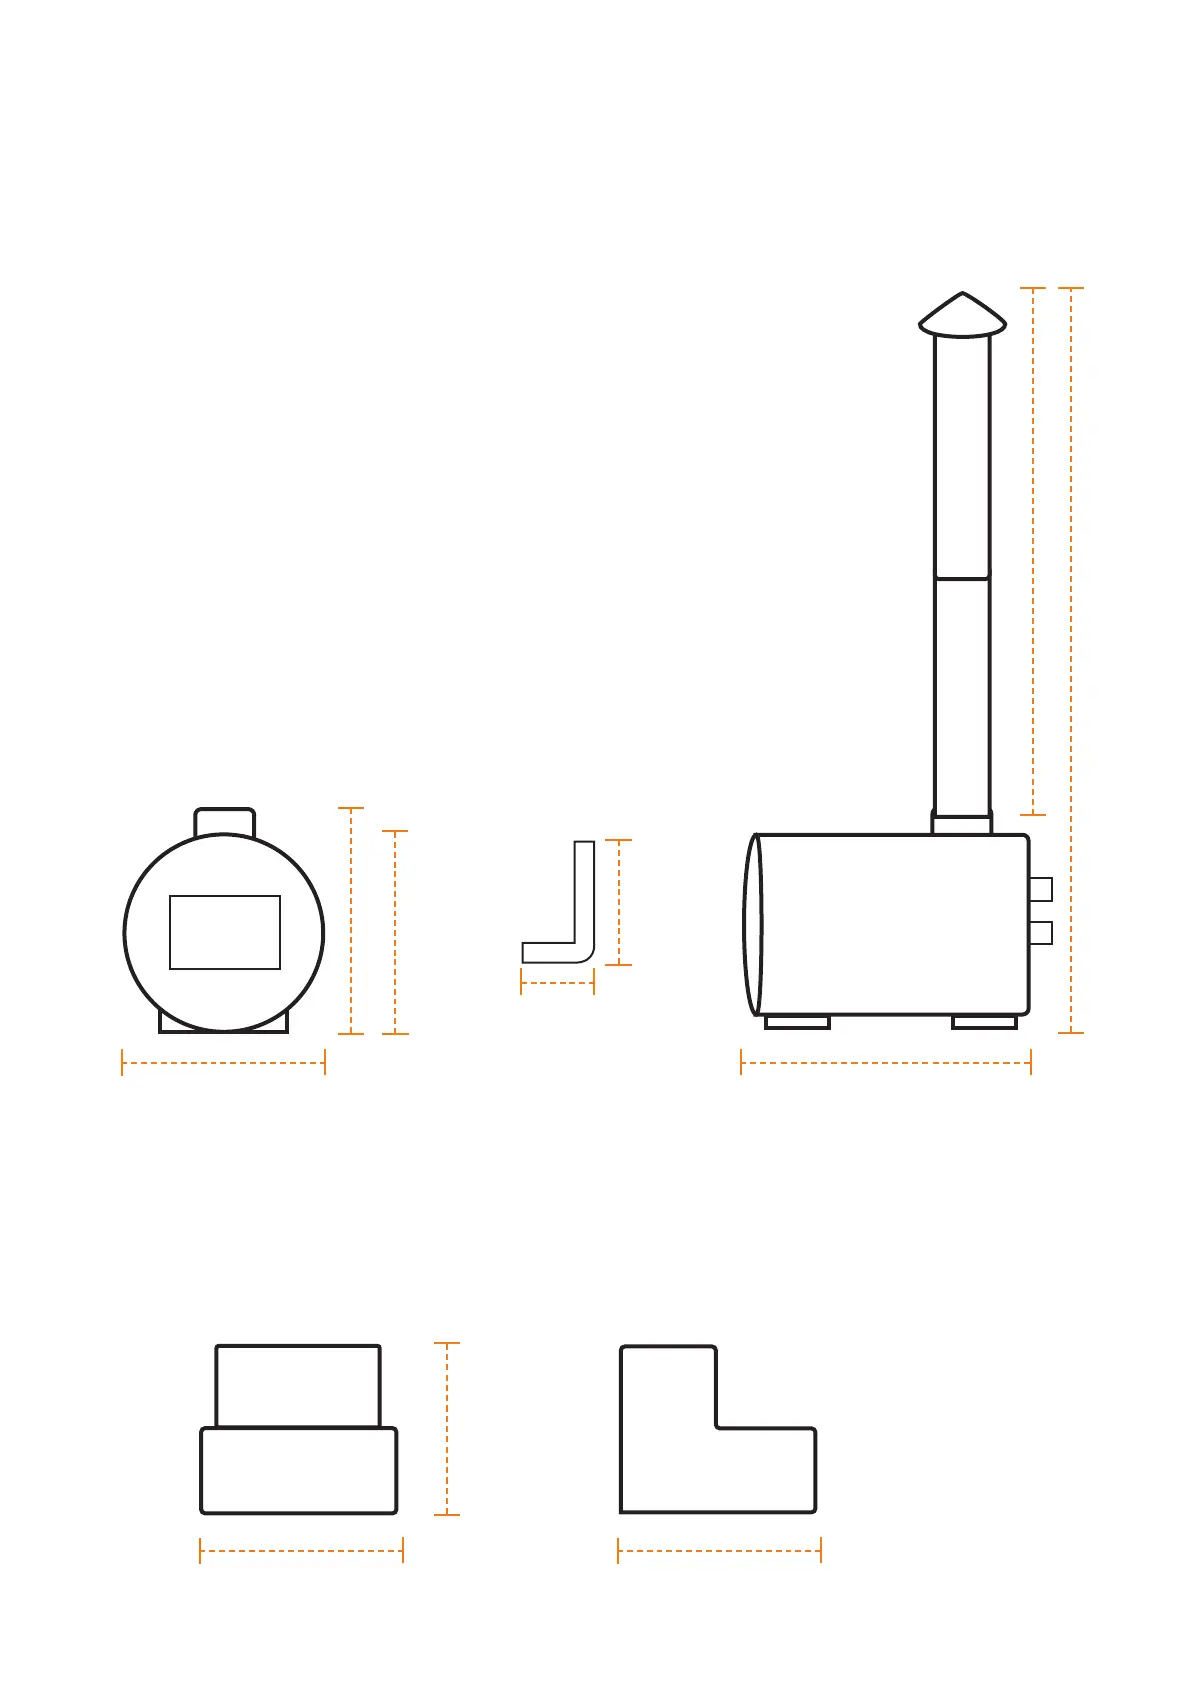
Burner & Flue
The burner should sit on the same level surface as the Hot Tub for optimal
ow and heat transfer. You will need to access the front of the burner to
load rewood, and the back of the burner to drain the tub.
Two rubber inlet/outlet connection pipes are provided and dictate where
the burner is positioned in relation to the Hot Tub. Your own 50mm rubber
piping could be sourced to alter the way the burner connects, allowing you
to change the orientation of the burner or position it further away. Keep in
mind that the longer the piping, the less ecient and slower the water will
be heated.
The ue kit consists of two pieces of chimney (bottom section with
additional protective grate) that slot together and a chimney cap which sits
at the top.
Burner
Front View
Burner
Side View
Flue
Connection Pipe
(Two piece)
Steps
Side View
Steps
Front View