9
1
2
1
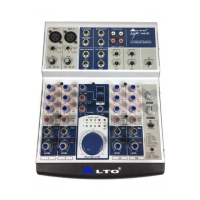
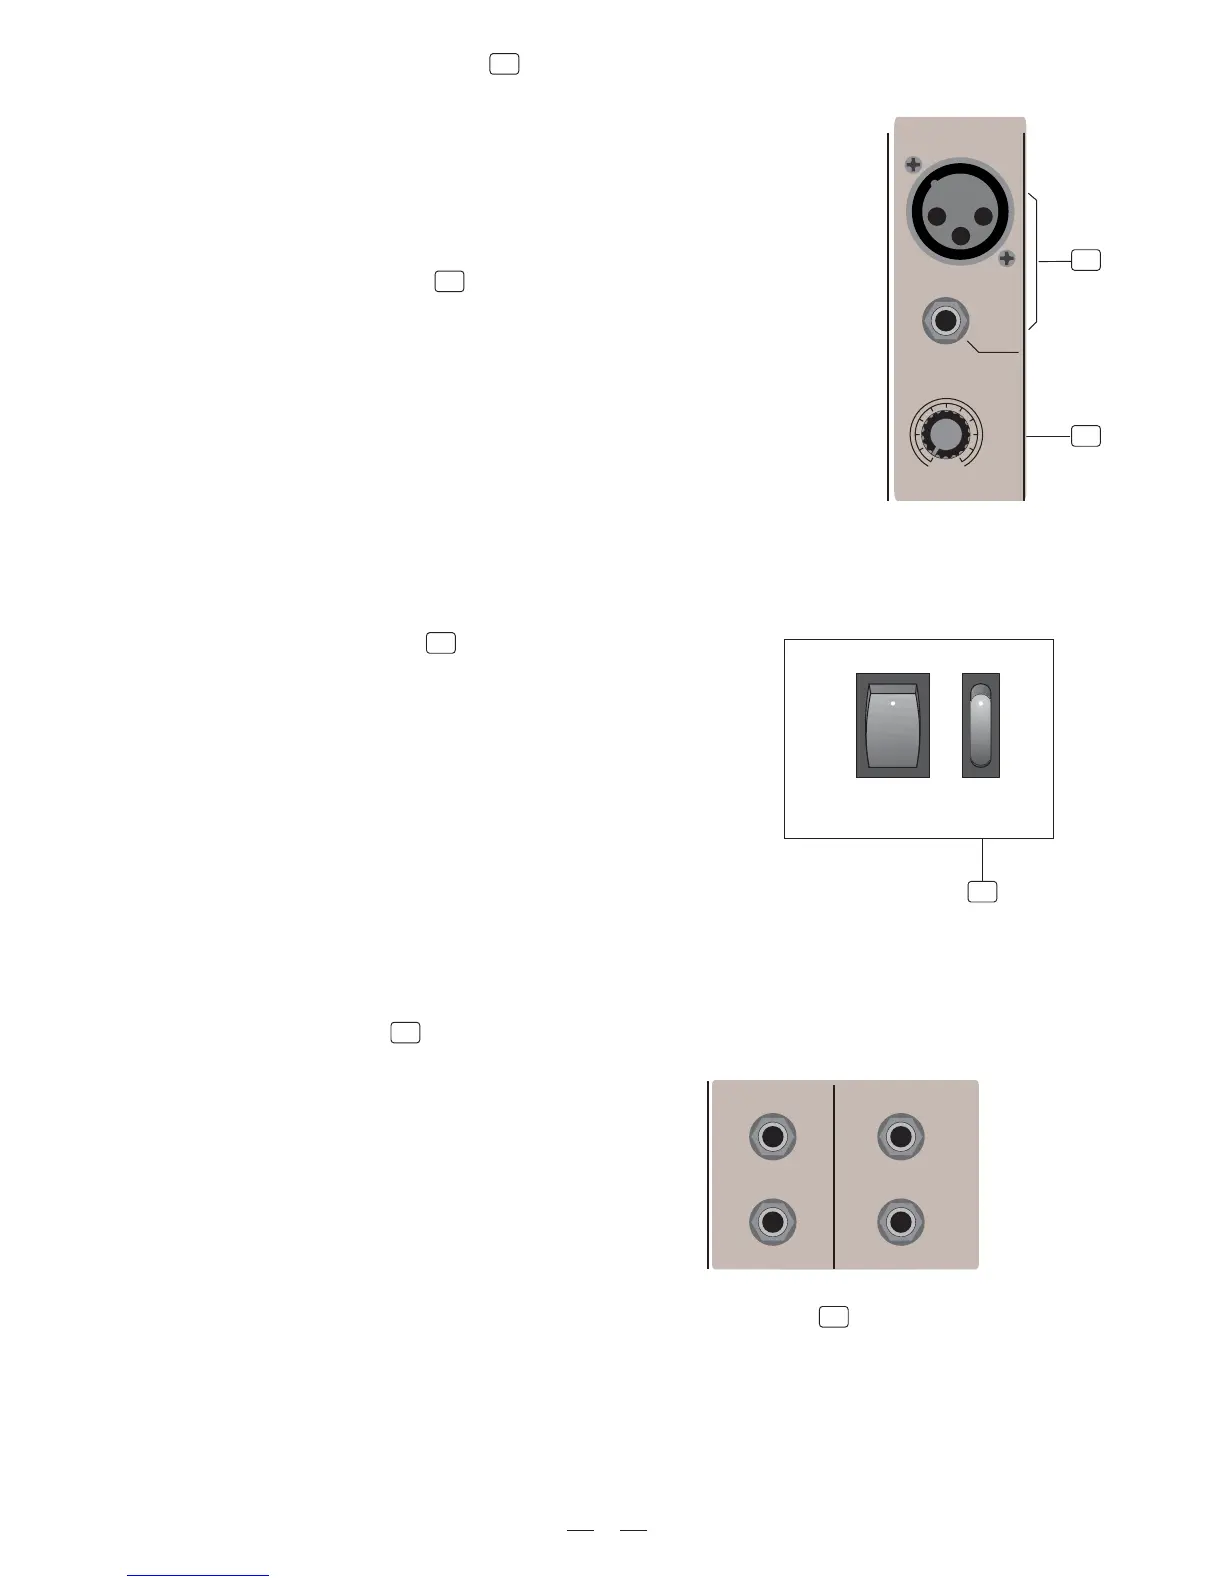
4.1 MONO MIC/LINE Channels
2
These are channel 1 through channel 2. You can connect balanced, low impe-
dance microphones to the XLR socket. On the 1/4" phone jack you can connect
either a microphone or a line level instrument. You shall never connect an un-
balanced microphone to the XLR socket if you do not want to damage both the
microphone and the mixer.
48 Volt phantom power
It is available only to the XLR Mic sockets. Never plug in a microphone when
phantom power is already on. Before turning phantom power on, make sure
that all faders are all the way down. In this way you will protect your stage
monitors and main loudspeakers.
3
4.2 INPUT LEVEL Setting
avoid distortion on the input channel.
This control is provided with 2 different indication rings: One is
for the microphone and the other for the line levels. When you
use a microphone you shall read the OUTSIDE ring (0~44 dB),
when you use a line level instrument you shall read the INSIDE
ring (+15~-30 dB). For optimum operation you shall set this control
in a way that the peak LED will blink also occasionally in order to
POWER
ON
OFF
PHANTOM
3
4
+15dB -30dB LINE
0dB 44dB MIC
TRIM
MIC 1
LINE IN 1
BAL OR
UNBAL
BAL OR
UNBAL
12
3
J.T.
J.T.
RIGHT
LINE IN 3/4
LEFT (MONO)
RIGHT
LINE IN 5/6
LEFT (MONO)
4.3 STEREO Inputs
These are Channel 3 through 6. They are organised
in stereo pair and provided with 1/4" TRS sockets.
If you connect only the left jack, the input will operate
in mono mode.
4
 Loading...