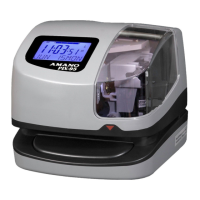
The Amano PIX-95 is an Atomic Time Clock designed for accurate timekeeping and record-keeping in commercial environments. It automatically synchronizes with the National Institute of Standards and Technology (NIST) radio station WWVB, located in Fort Collins, Colorado, ensuring precise time.
Function Description
The PIX-95 functions as a time recorder, capable of printing the date and time on various documents or time cards. It features an internal printing mechanism that automatically imprints information when a paper or time card is inserted. The device is designed for ease of use with a clear LCD display and intuitive buttons for programming.
Important Technical Specifications
Power Requirements:
- For Clock Input: 15 VDC, 1.2A (Max.)
- For AC Adapter: 100-240 VAC, 50/60Hz
- Battery: Lithium Battery for Memory Backup in case of power failure (factory installed). Shelf life of 3 years.
Environmental Conditions:
- Ambient Temperature: -10°C to 45°C (14°F to 113°F)
- Ambient Humidity: 10% to 90% (non-condensing)
- Environment: Indoor use only; dust-free environment. Keep out of direct sunlight.
Physical Dimensions:
- Height: 155mm (6.10 in)
- Depth: 175mm (6.9 in)
- Weight: Approximately 1.77kg (3.9 lbs.)
Standards Compliance:
- CUL US LISTED TIME RECORDER 289J
- ROHS compliant
- FCC Class A digital device compliant (Part 15 of FCC Rules)
Atomic Time Synchronization:
The PIX-95 receives long wave radio time signals (60 kHz) from NIST radio station WWVB. Only minutes and seconds are updated by the atomic clock; the hour must be set according to the local time zone. The device includes an Atomic Time Synchronization Indicator on the LCD display to show the signal status (searching for signal or signal found). If the atomic time signal is unavailable, the clock maintains accurate time using its internal quartz mechanism (±3 seconds per week).
Usage Features
External View Components:
- LCD Display: Shows time, date, day of the week, AM/PM indicator, Atomic Time Synchronization Indicator, Ribbon Cartridge Ink Capacity, and programming information.
- Key: Used to unlock and remove the cover for maintenance or programming.
- Back Plate: Rear panel for wall mounting.
- AC Power Adapter: Connects to the power source.
- Print Button: Initiates a test print.
- Print Window: Area where the time card or paper is inserted for printing.
Internal View Components:
- LCD Display: Same as external view.
- Program Button: Used to enter and exit the Program Mode.
- Change Button: Used to change information on the display during programming.
- Enter Button: Used to accept and save displayed information in memory.
- Hour Button: Advances the hour in the display by increments of 1.
- Minute Button: Advances the minutes in the display by increments of 1.
- Ribbon Cartridge: Contains the ink for printing.
- Print Button: Same as external view.
LCD Display Indicators:
- Ribbon Cartridge Ink Capacity: A gauge with four bar segments (E for Empty to F for Full) indicates the remaining ink. Bars disappear as ink capacity decreases.
- Time/Programming: Displays current time or programming parameters.
- Atomic Time Synchronization Indicator: Shows signal status for atomic time.
- AM/PM Indicator: Indicates morning or afternoon.
- Day of the Week: Displays the current day.
- Month/Date: Displays the current month and date.
Initial Setup and Test Print:
- Plug in the clock.
- Unlock and remove the cover using the provided key.
- Remove cardboard spacers from above the ribbon cartridge and between the ribbon cartridge and printer carriage.
- Insert a piece of paper or time card; the clock will automatically print YEAR, MONTH, DATE, and TIME with AM or PM.
Setting Time, Year, Month, and Date:
- Time: With the cover removed, use the HOUR and MINUTE buttons to adjust the displayed time.
- Year, Month, Date:
- Press and hold PROGRAM until "P1 (TIME)" appears, then press CHANGE to select "P2 (DATE)". Press ENTER.
- Press CHANGE to select the correct YEAR, then ENTER.
- Press CHANGE to select the correct MONTH, then ENTER.
- Press CHANGE to select the correct DATE, then ENTER twice.
- Press PROGRAM to exit.
Changing Print Style:
- Press and hold PROGRAM until "P1 (TIME)" appears.
- Press CHANGE until "P4 (PRT STYLE)" appears, then ENTER.
- Press CHANGE to cycle through various print style codes (e.g., 2-digit year, month, date, 12hr, 60th/hr; 4-digit year, month, date, 24hr, 100th/hr; with or without seconds, 6-digit counter).
- Once the desired style flashes, press ENTER, then PROGRAM to exit.
Changing Print Direction:
- Press and hold PROGRAM until "P1 (TIME)" appears.
- Press CHANGE until "P5 (OTHER)" appears, then ENTER.
- Press CHANGE until "P-52" flashes (PRINT DIR), then ENTER.
- Press CHANGE to select RIGHT (Right Side) or LEFT (Left Side) print direction.
- Press ENTER, then PROGRAM to exit.
Daylight Saving Time (DST) Management:
- Enabling/Disabling DST:
- Press and hold PROGRAM until "P1 (TIME)" appears.
- Press CHANGE until "P3 (DST)" appears, then ENTER.
- Press CHANGE to toggle between ON (ENABLED) and OFF (DISABLED).
- Press ENTER, then PROGRAM to exit.
- Changing DST Begin/End Dates:
- Press and hold PROGRAM until "P1 (TIME)" appears.
- Press CHANGE until "P5 (OTHER)" appears, then ENTER.
- Press CHANGE until "P-56 (DST BEGIN)" flashes, then ENTER.
- Use CHANGE to set the correct year, month, and date for DST begin, pressing ENTER after each.
- Press CHANGE until "P-57 (DST END)" flashes, then ENTER.
- Use CHANGE to set the correct year, month, and date for DST end, pressing ENTER after each.
- Press PROGRAM to exit.
Enabling/Disabling Auto Print:
- Press and hold PROGRAM until "P1 (TIME)" appears.
- Press CHANGE until "P5 (OTHER)" appears, then ENTER.
- Press CHANGE until "P-53 (PAPER DET)" flashes, then ENTER.
- The word "(AUTO)" will flash. Press CHANGE to switch to "(MANUAL)".
- Press ENTER, then PROGRAM to exit.
Wall Mounting:
- Unlock and remove the cover.
- Remove the Back Plate by pressing the tab on the bottom of the clock.
- Use the Back Plate as a template to mark the lower mounting hole on the wall.
- Mount the plate with a #10 wood screw (or equivalent) in the center hole.
- Level the plate, mark the two upper mounting holes, and secure with #10 wood screws.
- Feed the AC Power Adapter cable through a hole in the Back Plate.
- Align the clock with the two upper tabs on the back plate, tilt it upwards to fully insert the tabs, then tilt it back down and push to snap into place.
- Replace the key and snap the cover back on.
Maintenance Features
Ribbon Cartridge Replacement:
- Remove the cover.
- Pull the two ribbon release tabs upward.
- While holding the tabs up, pull the ribbon cassette out.
- If the print mechanism is down, unplug and replug the clock to raise the carriage for easier installation.
- Insert a new ribbon underneath the printer head.
- Turn the knob on the cassette clockwise one turn to take up any slack.
- Check print quality.
- Reset the INK capacity gauge by pressing the CHANGE and ENTER buttons simultaneously.
- Replace the cover.
- Caution: Print head may be hot.
Error Messages:
- E 1 (Home sensor, motor carriage stuck): Unplug, check for jams, plug back in.
- E 2 (Timing sensor, carriage stuck): Unplug, check for jams, plug back in.
- E 3 (Home sensor): Unplug, check for jams, plug back in.
- E 4 (Carriage stuck): Unplug, check for jams, plug back in.
- E 5 (General print error): Unplug, check for jams, plug back in.
- E 6 (Daylight Saving Time Program): An attempt was made to enter Program mode during the one-hour lockout period of a DST changeover. Wait one hour.
- For E1-E5, ensure ribbon cables are in good condition. If issues persist, contact customer support.
Cleaning:
- Do not use chemical solvents or oils, as they will damage the clock.
- Clean the inside of the clock by blowing it out with air.
Resetting Clock After Extended Loss of Power:
If the internal lithium battery drains due to a prolonged power interruption, the date, clock setting, and Daylight Saving Time setting will need to be reset.